Simple W88 sign

The objective is a “shingle” sign for the sign post outside the W88 space.

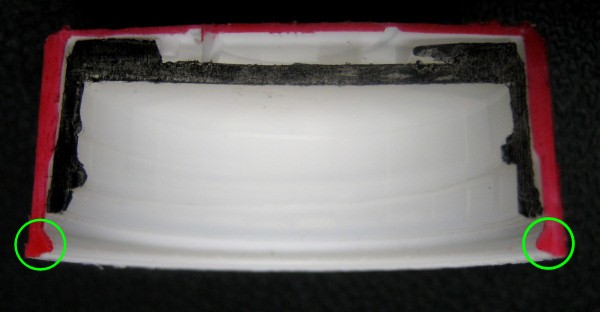
The plan is to print the words and logo on 4 sheets of 8.5″x11″ waterproof paper (portrait orientation), glue those to a piece of white 4mm corrugated plastic, spray the surface with waterproof UV-resistant spray, and arrange to hang it.  Breaks between the sheets are shown in green.

Materials
I have 2 kinds of “waterproof” paper:  HP LaserJet Tough Paper (laser only);  National Geographic Adventure Paper (inkjet or laser).

I also have 2 kinds of spray adhesive: 3M Super77 Multipurpose Spray Adhesive; Elmers Multi-Purpose Spray Adhesive.  I’ve used the 3M stuff for several lamination projects and had good results, though not exposed to the elements.  The Elmer’s is new.  Neither really says it’s waterproof.

If nothing else, I’m expecting (I guess “hoping”) the waterproof paper will protect the adhesive from rain etc.  I’m also hoping the clear spray overcoat will seal the edges and further protect from rain.  Ideally, the whole sign would be covered by a piece of clear polycarbonate or something, but that’s kind of expensive, and this is sort of an experiment on minimalist signage.

Overcoating
The Krylon UV-resistant spray is an attempt to minimize fading of the laser or inkjet ink.  Unfortunately it only says “moisture resistant”.  That’s not what I really need.  Another possibility is another coat of a more waterproof sealer over the UV coat.

Another very good way to protect the top edges of the paper panels (since I’m guessing those are the most vulnerable) would be to run the panels to the very top of the plastic, and then have some sort of upside down U-shaped channel fitted neatly over the whole top edge, thus also covering the top edges of the paper panels.  But then it would look like the top part of a frame, and I really should run it around all 4 sides, adding cost and complexity.

I also have an old pleasantly thick soft clear vinyl shower curtain.  If I could figure out how to wrap that over the whole sign it would provide very good protection.  Hanging the sign without penetrating that cover would be an issue.  And I don’t have any idea whether it would yellow in outdoor UV.

Panels on Front and Back
The 11″ tall panels will be cut on the long edges as needed to keep the letter spacing correct.  I can’t print to the very edge anyway, so some trimming is unavoidable.  I’ll use a steel straight edge and a Fiskars rolling paper cutter on a cutting mat.  I’ve had very good results with that in the past.

To increase the amount of experimental info gathered, I’m planning to use one kind of paper and one adhesive on one side, the others on the other side.  (The corrugated plastic is double sided smooth white.)  Yeah, yeah, I’m changing 2 variables at the same time, and the environment front vs back is different in terms of sun, wind, etc., but it’s better than nothing.  I’ll also probably be cute and print the back side mirrored.

The hard part will be spraying adhesive uniformly on the plastic backing and the paper panels, then while still tacky laying the panels on the plastic in perfect alignment during my one and only chance.  I really should devise something to help with that alignment.  I suppose I could first stick the 4 panels good-side down on a large very lightly adhesive sheet so I could get the relative alignment right, then spray the back side, lay the whole thing down on the plastic at once, then peel the light adhesive sheet off, hoping it didn’t lift any of the ink.  Suggestions are welcome…

Size
The real limiting factor for size of the sign is the largest logo I can get one one piece of paper.  Yeah, I’m guessing I can seam the paper panels almost invisibly, but I’ll leave that for some next experiment.  The aspect ratio of the logo makes the limiting factor a logo as wide as will fit in 8″ (allowing 0.25″ unprintable margin on each edge).  It won’t be nearly 11″ tall (more like 9 something as I recall).  The hanging support eyes are just 24″ apart, so I wanted the sign to be somewhat more than that overall.  I think the size will be about right.

Hanging
Assuming I’m going to pierce the plastic backing for whatever connects to the hanging eyes, if that pierces the paper, it’s an opportunity for water to get in – which is bad.  If I pierce it above the tops of the paper panels, I avoid that problem.

I kind of picture large gold-colored grommets about an inch in diameter going through the plastic to thread some kind of hanger through.  Unfortunately, I expect the ones you can get are plated steel rather than brass, and will almost certainly rust after while, leaving rusty drip stains below them.  That would be ugly.

The flutes in the 24″x36″corrugated plastic I have run the long way, which will be horizontal in the sign.  An interesting possibility would be to push a thin steel rod (same diameter as the ones used to support such signs in lawns) through one of the flutes near the top, right above whatever the hanger is.  That should spread the load out and make it much harder to tear out the hanger hole.  I suppose that rod could be extended outside the outer edges and bent back over the top as the hanger.  Other thoughts on hanging are welcome!

Worries
Among the things that can go wrong with this completely untested sign making approach:

  • Since the paper is waterproof, the adhesive under it will never dry
  • Whole sign shreds in the wind
  • Hangers tear out
  • Paper panels delaminate
  • Somebody throws a rock through it
  • Ink fades quickly so it’s ugly
  • Flexing of the sign in the wind cracks the overcoating

Making it or backing it with a nice piece of 1/8″ aluminum sheet would help on several counts.  Note that I’m not endorsing relocating a street or traffic sign for this purpose.

I’ll post more as progress is made.

Posted in Workshop 88 sign | Leave a comment

First post for Lauren – embroidery!

We just got a new BabyLock Ellure Plus embroidery (as well as straight) sewing machine. It’s pretty slick. Lauren decided to make some dish towels with seasonal designs as gifts as a first project (to be delivered 2 days after we got the machine!). We learned a lot. (We’ll learn even more when we take the classes in a couple of weeks!)

We went with a water-soluble stabilizer since the backs of the towels would be exposed and visible stabilizer is pretty tacky. It’s amazing – it just disappears under running water and a little rubbing.  (A week ago I didn’t even know what stabilizer was!)

The first try was a design we’d downloaded (and converted from Pfaff .PCS to Brother/BabyLock .PES format with some free software from Pulse Microsystems). It came out sort of OK, but since the towels had some pile (they’re not terry, but not just a plain woven fabric), bit of the nap leaked out between stitches.  We didn’t use a “topper” – stabilizer on the top of the fabric, designed to prevent just such leaks.  That was educational.  We used a topper with all the others, and never saw that problem again.  The tree design was downloaded, and the holly/ribbon design is built into the machine.  The various parts in the same color are usually done in one run – which means undesired threads between them must be manually trimmed away.  Interesting task – at least the first few times.  We soon got bolder and threaded a different color than the screen said.  It may be smart, but it’s color blind, and we got away with it!  Here are closeups of the designs as stitched on the towels, plus a shot of the final product.

Many of the designs we found on the internet cleverly just fit within the limits of a 4″x4″ hoop – an industry standard.  (Of course the Ellure Plus also supports a 5×7 hoop, in case we need bigger.)

There are huge piles of both art and science in this new hobby.  Art not only in the obvious artistic sense, but in the ever-present task of selecting the best type (or types!) of stabilizer, how many layers, what mix of materials, etc.  Whew!  And science in the stitch instructions.  Resizing a design isn’t like resizing a jpeg.  If the image gets bigger, you really need more stitches to fill an area.  I suspect there are good similarities between the software that “digitizes” (“punches” is the buzzverb) an image into stitch instructions and the software that creates the instructions for the X-Y table of a 3-D printer like a MakerBot.  Commercial software for this is quite expensive, so I have an interesting road ahead looking into open source stuff.

I’m sure there’s much more to follow!

Posted in Embroidery, First project - towels | Leave a comment

Phone backup

Our cordless phone/answering machine is great – 5.8GHz so it doesn’t mess with wi-fi, multiple handsets, white so it fits into the kitchen decor (a MUST).  But when the power goes out it forgets the time and date.  (It does remember messages, which is good.)

To avoid the occasional annoyance of having to set the dumb time/date, I thought it should have a backup battery.  OK – I need connections inside the phone and some kind of battery pack.  What should I use?

Under load, the wall wart powering the phone puts out 6.8V.  Five (1.2V) Nimh cells put out 6.0V, so that might work.  Let’s see – 6.8V/5=1.36V.  That’s just about the teminal voltage of a fully charged cell, so I can very likely just put the cells across the current power supply and it would work fine.  The power supply never puts out more than 5 fully charged cells, so they shouldn’t be overcharged.

Charge thru bottom diode, discharge thru top

If I wanted to be a little more conservative, I could put a normal silicon diode back to back with a schottky diode and put the pair in series with the battery.  The 0.7V drop across the normal diode would reduce the charging voltage to 6.1V, or ~1.22V/cell.  That could not possibly overcharge them.  It would cost the shottky’s 0.3V drop in the output – 5.7V while the cells were at their nominal 1.2V/cell.  That would probably keep things running.

Would AA cells hold up for long enough?  I measured the current draw at full 6.8V: 10-20mA – even with the radio on!  (How do they do that?)  New AA cells are good for at least 2000 mAhr – 100 hours of backup.  That’s overkill.  But I have a box of AA cells to be recycled, and found 5 that still had 500-700 mAhr capacity.  (It’s nice to have discharge test equipment!)  That’s still more than a day – and they’re free!  Sounds like a plan.

Connecting right across the coax power jack inside was easy.  There was a convenient hole I could run the wire out through, and I put an RCA female on the end.  Now all I need is a battery!

Buying holders for the rag-tag collection of cells I’d selected seems inappropriate.  A nice minimalist approach is to connect the end of the cells together directly.  Soldering directly to cell caps sorta works, but almost certainly causes damage to the cell.  (And these are on their last legs anyway.)  If I only had a battery tab welder!  I guess I better bump that project up the priority list some more.

More to follow when I’ve made the battery.

Posted in Phone backup | Leave a comment

Hacking into the charger

The fact that my attempts to fool the charger into pushing more energy into the battery resulted in no significant gain in capacity is a fair indication that the charger isn’t at fault, but I wanted to make sure.

After some ugly marks on the case, I got the charger open.  You can see the slick folding AC plug and the wire battery contacts (top left) in the first pic.  The wire contacts are in the bottom left of the back of the PCB (2nd picture) – we’ll need those!

What I need access to is the + and – terminals, and ideally some way to measure the current.  Expecting that to handle the rated 0.65A of charging current the traces would have to be quite wide, I located the high current paths on the board.  In the third pic, the terminals are circled in green (middle one is a temperature monitor we don’t care about) and the series pass power transistor is in red.  The black lines are essentially jumpers on the other side of the board.  Power comes in from the right somehow.

Of great interest are the two paralleled 0.68 Ω resistors circled in pink.  (We recall that SMD resistors use an “R” for the decimal point, so they’re not 68 Ω.)  They’re in series with the + side from the transistor.  We have our current sense resistors!  Now I just need connection to +, -, and the bottom of those resistors.

Having blown too many things up, I’ll use a polarized connector.  I need three pins – I’ll use a four pin 0.1″ female header.  There’s room for it across from the battery terminals.  I used some ribbon cable for the wires, and soldered them to the appropriate places (1st pic).  I epoxied the female header to the board, carefully marked where I needed holes, and made a connector.

I put it back together, started charging a battery, and was able to measure the terminal voltage without even using tin foil!


Next step is to make an accurate DC amplifier to use with the series resistors to monitor current.  At the rated peak of 0.65A and 0.34 Ω, the highest voltage I should see is around 0.2V.  With a gain of 20, I would have a nice 4V signal – very  compatible with the 0-5V analog input range of an Arduino.  And the terminal voltage – maxing out at a little over 4V – is also right in range.  Then I can have the Arduino monitor voltage and current as I charge a battery and verify whether the charging curves look like (I think) they should.

(My guess – to be hermetically sealed in a mayonnaise jar under the porch until all the results are in – is that:

  • The charger is fine.
  • The original few-year-old Canon battery is really down to 0.3 Ahr, a victim of normal aging.
  • All the other cheapies are junk. )

More to follow…

Posted in Li-ion camera battery | Leave a comment

Camera battery/charger? problems

I bought an extra battery for my good old Canon SD600 camera when I went to MakerFaire a couple of years ago.  The real ones were expensive, so I found a knock-off on Ebay.  Seemed to work, and I used both for some time.

Capacity seemed to be dropping, and I did discharge tests on both.  The “real” one, marked at 1100 mAhr measured at 770; the cheap one, marked at 1200, came out to only 520!  Both seemed to be going downhill, with the cheap one crapping out after maybe 8 pictures in one session, and I did new discharge tests on both a week or 2 ago.  Both were around 330 mAhr!  I found cheap 1400mAhr batteries on Ebay 2 for $6 with free shipping.  (New Canon batteries are ~$30.)  (OK, they’re actually “cells”, rather than “batteries”, since fundamental Li-ion chemistry provides nominally 3.7V per cell.  I’ll continue to abuse the term, but since I’m usually pretty careful about that, I’ll feel guilty each time I do.)

I did discharge tests on both new ones, fresh off the Canon charger.  Both came out to ~330 mAhr.  OK, I know they were cheap, but this is ridiculous!  I’d read about the very different charging regimen for Li-ion batteries (full current ’til terminal voltage of 4.2V, then a tapering charge for quite a while), and since the Canon charger’s only “done” indicator is an LED that turns from orange to green, I wondered if maybe I really needed to leave the battery in the charger for some time after it turned green.

So I left one of the new batteries on the charger  overnight.  I also took it out and put it right back in maybe twice.  This presumably resets the charger circuitry, and the LED goes back to orange, though it turns green quite quickly (a minute or two).  But if it’s charging at full current, each such cycle pushes a little more into the battery.  So if the charger isn’t fully charging it, a discharge test after such “multi-cycle” charges (and long time for the tapering “top-off” charge to do its thing) should give the battery the best chance to show its real capacity.  The discharge test after that showed almost identical results (1% more – insignificant).  Interestingly, for this battery at least, I could have set the discharge threshold to as high as 3.3V and still had clear indication of the “knee” when it’s done.

Of course if the charger is not doing a good job, that could explain things.  It would be nice to check at least the terminal voltage, but the charger design very appropriately didn’t expose any metal contacts while the battery was in place.  How can I quickly and cheaply extend the contacts so I can get to them?  Tin foil, of course!  (Yeah, yeah, it’s aluminum foil.)

The contacts are just loops of wire, but since the insertion of the battery is straight against the contacts (no sliding) I figured the foil would hold up for a quick test.  I taped thin foil strips  in place to let me make voltage measurements.

Murphy was present as always – see first picture below.  So I took the foil strips off and put them on the correct side.  And I got my voltage reading:  4.15V during active charging – quite appropriate.

But what if the charger’s profile is off somehow?  Surely all those batteries can’t be that bad!  But to tell that I’ll need to take the charger apart and make more connections.  I guess there’s more to follow…

Posted in Li-ion camera battery | Leave a comment

LED emergency lights

We lost power for a couple of hours the other day.  Every time that happens, various projects bubble up several notches on the priority list.  This time I remembered that the muffler mount is broken on the generator and needs to be fixed.  I should also put an outlet in below the transfer switch so I can run the main UPS when we’re on generator power.  And dreams were rekindled of one of those exceptionally quiet inverter-type Honda EU3000ISA generators to replace the very annoyingly loud one I have.

Another idea that was renewed was some automatic LED emergency lighting.  The intent is sets of LEDs permanently wired in at several strategic places around the house run from central 12V batteries.  Of course we have flashlights (including a nice automatic LED one that charges wirelessly when sitting in its base and comes on when power is out).  But having a little light around the house would be nice.

Three white “superbright” LEDs at 20mA shining at the ceiling produce enough light to change a completely dark room to a marginally navigable one.  Six is noticeably better.  Since white LEDs run at 3.5-4V, three LEDs in series is pretty optimal for 12V.  At 20mA, I can run several sets from a 12V gel battery of 2-5 A-hr for many hours.

Looking at my stock, I seem to have enough for maybe 8 sets of 3 LEDs.  That’s a good start, but I could use a few more.  I found 100 white super-bright LEDS for $3.99 with free shipping on Ebay, and ordered them.  Of course they’re from China, but the gears are now turning, and they’ll magically show up at my doorstep in a couple of weeks.  Then I’ll have no excuse for not moving forward with the project.

The battery would just sit in the basement with a $2.99 12V float charger from Harbor Freight and some simple circuit to power the lines to the LEDs when power failed.

More to follow when the pleasant automatic reminder of a package on my doorstep arrives.

Posted in LED emergency lights | 1 Comment

Arduino code for discharger updated

I tweaked the Arduino code a little more.  Deleted some debug leftovers, added some comments and restructured a subroutine.  I did a couple of several-minute tests with 1 and 15 cells to compute some timing fudge factors so the time between samples is much closer to the nominal 30 second value.  No support yet for saving data to eeprom.  Added a couple of sets of samples 5 seconds apart after the test is over and the relay is open to observe “bounceback” of the cells.

Main flow is like this:

  • Inits, including I/O pin directions
  • Serial startup dialog
    • get number of cells
    • compute end-of-test voltage
    • compute timing fudge
    • wait for command to start
  • Do one line of samples with relay still open
    • print sample #
    • read battery voltage
    • read current
    • loop, reading each cell
    • each value is printed as it’s read, with commas
  • Close relay to start discharge
  • loop doing lines of samples as above every 30 sec
  • if battery voltage is < end-of-test voltage, quit
  • when done, open discharge relay, announce done
  • do 3 more sample lines, 5 sec apart to see cell recovery
  • sleep forever

I’ll post the code if I can figure out how to attach a file.

Here’s actual results of a discharge test on my 14 salvaged sub-C cells.  One cell failed very early; a second failed around 43 minutes, which dropped the battery voltage enough to end the test.  At ~1.3A, 43 minutes is about 930 mA-hr.  The cells are nominally ~2000 mA-hr, and most of the cells were still well above 1 V, so the test doesn’t reflect the real capacity of most of the cells.  But the battery failed at 43 minutes.  I should remove those cells, charge it again, and see how it comes out.  (Those were the same 2 cells that were reverse charged in the first sample output a couple of posts ago.)

Anyway, code and hardware seem to be functional.  I do still need some perl to more properly digest what the Arduino spits out.

Posted in Discharge tester - Arduino and perl code | Leave a comment

Salt spreader

Here are a couple of ideas for a cheap, green, effective method of reducing the danger of ice on your sidewalks.

First, the “salt”.  A great material is good old “10-10-10” generic garden fertilizer.  You should be able to find this in 25 lb bags in garden or home supply stores.  The fertilizer salts provide some ice melting, and the other general grit provides surer footing – a double win.  It’s not nearly as effective at melting ice as calcium chloride or even rock salt, but the runoff will make your grass happy instead of sad!  However you spread it, this is a nearly ideal material for icy sidewalks.

(Some will promptly say “Noooo – use phosphate-free 10-0-10!”  This reduces phosphate run-off that encourages undesirable growth in water systems.  Sure – that will work just fine for your sidewalks too.  I first learned about it when that was all I could find at Wal-Mart!)

To spread the fertilizer you need a moderate-size, easy to carry container with something that will let you control how the stuff is spread.  A gallon windshield washer antifreeze jug is a good size and has a nice handle.  (A milk jug is flimsier, but would do in a pinch.)  Here’s how we make a flow control for it.

First, take the dumb child-proof cap apart, saving both the outside and inside caps.  There are some notes on how to do that in the previous post.  Drill 3 or 4 holes about as big as you can fit in the top of the inside cap while still leaving some webbing between the holes.  I usually need to clean up the holes after drilling in the soft plastic.  The right hand picture is a drilled top installed on a jug full of fertilizer.  Neatness doesn’t really count – c’mon, it’s just a fertilizer spreader!

Take the outside cap and remove just enough of the lip so it slips on and off easily, with just a little “click”.  Now you have a nice cover that will even keep rain out if you leave it outside.  Mine lives outside the front door all winter.

But wait – there’s more!  You’re going to have to fill the jug – and probably refill it when you find how handy it is and use up all the fertilizer.  For one filling, it’s not worth making a special filler.  But I end up refilling mine a couple of times a winter – in the cold, when I don’t want any more hassle than necessary.  Let’s make a filler funnel.

Take another empty jug and cut the top off neatly to make a funnel.  Now take TWO more caps apart.  (You have been saving all your old windshield washer antifreeze bottles and tops, haven’t you?)  We’re only interested in the inner parts this time.  Cut out most of the top of each cap, leaving maybe 3/16″ around the edge.  You want enough material left to glue the tops together, but you want the hole to be as big as possible to not impede the flow of fertilizer.  Now glue them together to make a “double female” adapter that will let you screw the funnel into the top of the main jug.

Even with roughing up what’s left of the top surfaces and using epoxy, I wasn’t comfortable that the caps would stay together for years, so I epoxied a thin piece of plastic around the whole outside of both caps.  (That outside band is stronger than the glue on what’s left of the top surfaces.  But gluing the tops together first makes it much easier to glue the outside band on.)

Remembering that it’s really a fertilizer spreader, I often use it in the spring, too, when I’m preparing flower beds.  Is that multi-purpose or what?

And for a seasonal twist, a pre-filled jug makes a great Christmas gift!  OK, not for everybody, but because it’s hand made, useful and very inexpensive it’s a thoughtful gift if you’d like to do something nice for somebody but don’t want to start a gift-exchange rat race.

I’m sure you can figure out how it works.  Happy “salting” and enjoy the greener edges of the grass next to the sidewalks next spring!

Update 2/5/14:  Here’s a nice way to manage the bag of fertilizer for refilling the jug.

Posted in Salt spreader | 1 Comment

Defeating child-proof caps

I never met a child-proof cap I didn’t despise until I made a dispenser for salting sidewalks to avoid winter falls.  But let’s start with defeating the @#$%&! child-proof caps. (Note: If you actually have kids, you probably don’t want to do this.)

There are various designs, but many current caps consist of a loose outer cap you put your hand on and an inner, captive cap that actually screws onto the bottle.


There are bumps with cleverly shaped edges (called “castellations” – think of the top of a castle tower) that interlock when you press down hard to let you unscrew the inner cap.  We’ll take advantage of those as we defeat the child-proof feature.

The inner cap is kept from coming out by a lip on the inner edge of the outside cap.  (Click the cross-section link – the thumbnail cuts off the good parts.)  I colored the edge of the inside cap black and the outside red so you could see it better.  We need to know about that to disassemble the caps.

To defeat the loosey-goosey child-proof part, we need to somehow lock the two caps together.  I’ve used several methods to do this.

For a small travel bottle, I just removed the outside cap.  That works and is compact, but doesn’t feel as nice in your hand as one with the outside part.  My first attempt to lock the caps together was to drill a 1/4″ hole in the center of the outside cap (only!) and squirt hot melt glue in.  Nice try, but this is the weakest possible place to put the glue.  Much more effective is a couple of holes around the edge, so the glue can hook into the castellations.  The one in the picture probably failed with the original center hole and had two edge holes added afterward.

By design, the caps don’t come apart easily.  But if you don’t care what it looks like, you can just make a couple of cuts through the outer cap, take it apart, squirt hot melt all over the castellations, and push the inside cap back in.

My current (“Version 3”) approach looks untouched from the outside and provides a nice-feeling solid one piece cap.  The only clue that it’s been hacked (and hot melt applied inside) is on the inside bottom edge, where the lip has been cut away.  So how do we take the caps apart to do this?

Using a hobby knife to remove enough of the lip on the outside cap to take the caps apart isn’t too hard.  Be careful – this is the kind of knife usage where you can really hurt yourself if you slip.  If you prefer noisier methods that are less likely to slice your thumb off, a cutter on a Dremel works well, too.

I’m a little slow, but at least had the pleasure of a great “Aha!” experience when I was trying to get the dumb inside cap out the first time and couldn’t find a way to grab on to it.  The bottle is a great tool.

I hope this helps reduce one of life’s little annoyances for you!

Posted in Child proof caps | 5 Comments

Discharger pictures

I found my camera 🙂 .

It hurt, but I clipped off the daughterboard (and removed the cut off pins).  There were a LOT of modifications to the board before it was done, but it seems to all work and I think it’s hardware complete.

The picture of a battery of salvaged cells under test is pretty much what it was always supposed to look like.  You can see the clear zip cord with red and black clips that carry the actual discharge current (and the off-board resistors that dissipate the energy) as well as lonely voltage sense clip #15, not used for the 14 cells under test.  I’ve removed the no longer needed slide switch since that picture.

Next steps are a few more bells and whistles for the Arduino code, putting some perl together to process the Arduino’s CSV output, putting the battery tab welder together, and actually rebuilding something!  (Oh yeah – and I guess I should do a schematic of how the circuit finally ended up.)

Posted in Discharge tester - PCB build | Leave a comment