
(T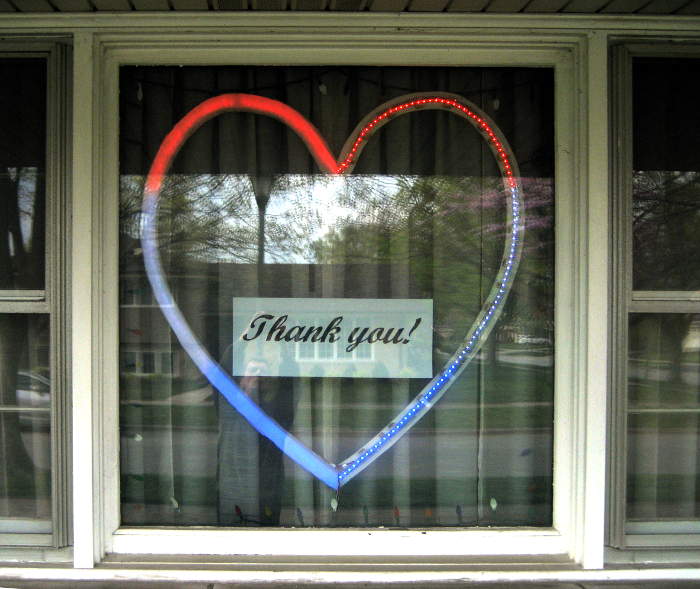 his is a quick overview. Proper build details will follow soon.)
I wanted to put something nice in the window to say “Thanks!” to all the health care and other essential service workers who are keeping people safe and helping life go on in these challenging times. Sorry it’s starting so late.
Electronics
 The heart is some 200 WS2812 individually addressable RGB LEDs mounted on a heart-shaped ring of 1/4″ foamboard. They draw around 4A from a 5V supply. An Arduino Pro Micro drives the
  LEDs thru the Adafruit Neopixel library. Thanks, Adafruit! I wrote the code telling it what to do in C/C++ using the Arduino development environment.
Appearance
There have been lots of changes in plan in the 2 weeks between starting and hanging it in the window. One of the very visible ones is naked vs diffused LEDs. What I envisioned from day one was a smooth, gentle glow. I didn’t want the techie appearance of raw LEDs. The tracing paper diffuser on the left half gives just the visual effect I wanted.
But both my wife and I responded to the brilliant LEDs on the unfinished side. The phantom-of-the-opera-mask appearance was never planned, but it’s an interesting feature. While the option of putting the diffuser on the right side remains, I’m guessing it won’t happen.
Behavior
In keeping with the ‘gentle glow’ spirit, the plan was to light the heart with just one color, changing slowly around the color wheel maybe once/day. Fancier opportunities arose, and alternating days of full saturation and pastels was the plan for a while.
Early in the software development (meaning after it would actually light up), various animations from the Adafruit example code were included. Other patterns suggested themselves, and although envisioned as static displays, I typically prototyped them as animations, often to help debug code trying to get the LEDs to behave in ways foreign to their linear addressing scheme.
But as we watched it cycle thru the animations still in the shop, I had to admit that it seemed a shame to deprive its audience – neighborhood walkers – of the entertainment of the dancing patterns.
So in a near-complete reversal of the original plan, V1.0 spends most of its time slowly but visibly changing color, with a spot of eye candy animation every 20-40 seconds.
Making it
Frame
 While I did have to order a new spool of LEDs, the rest of the parts, including the Arduino and power supply, were just on the shelf. That meant that the main frame was cobbled together from 6 bits of scrap foamboard. There were mechanical challenges piecing them together.
LEDs and reflector
The obvious thing to do was to just stick the adhesive-backed LED strip to the foamboard. Unfortunately, while the strip is quite flexible in one direction, it’s quite inflexible in the direction needed to make it conform to the curves of the heart.
But if I laid the strip on its edge instead of its back, I could easily bend it to follow the heart shape. I could just glue some little blocks to the foamboard to anchor the strip right where I wanted. Great!
Well, except then the light coming from the LEDs is going the wrong direction. If I put a mirror at 45° in front of every LED, I 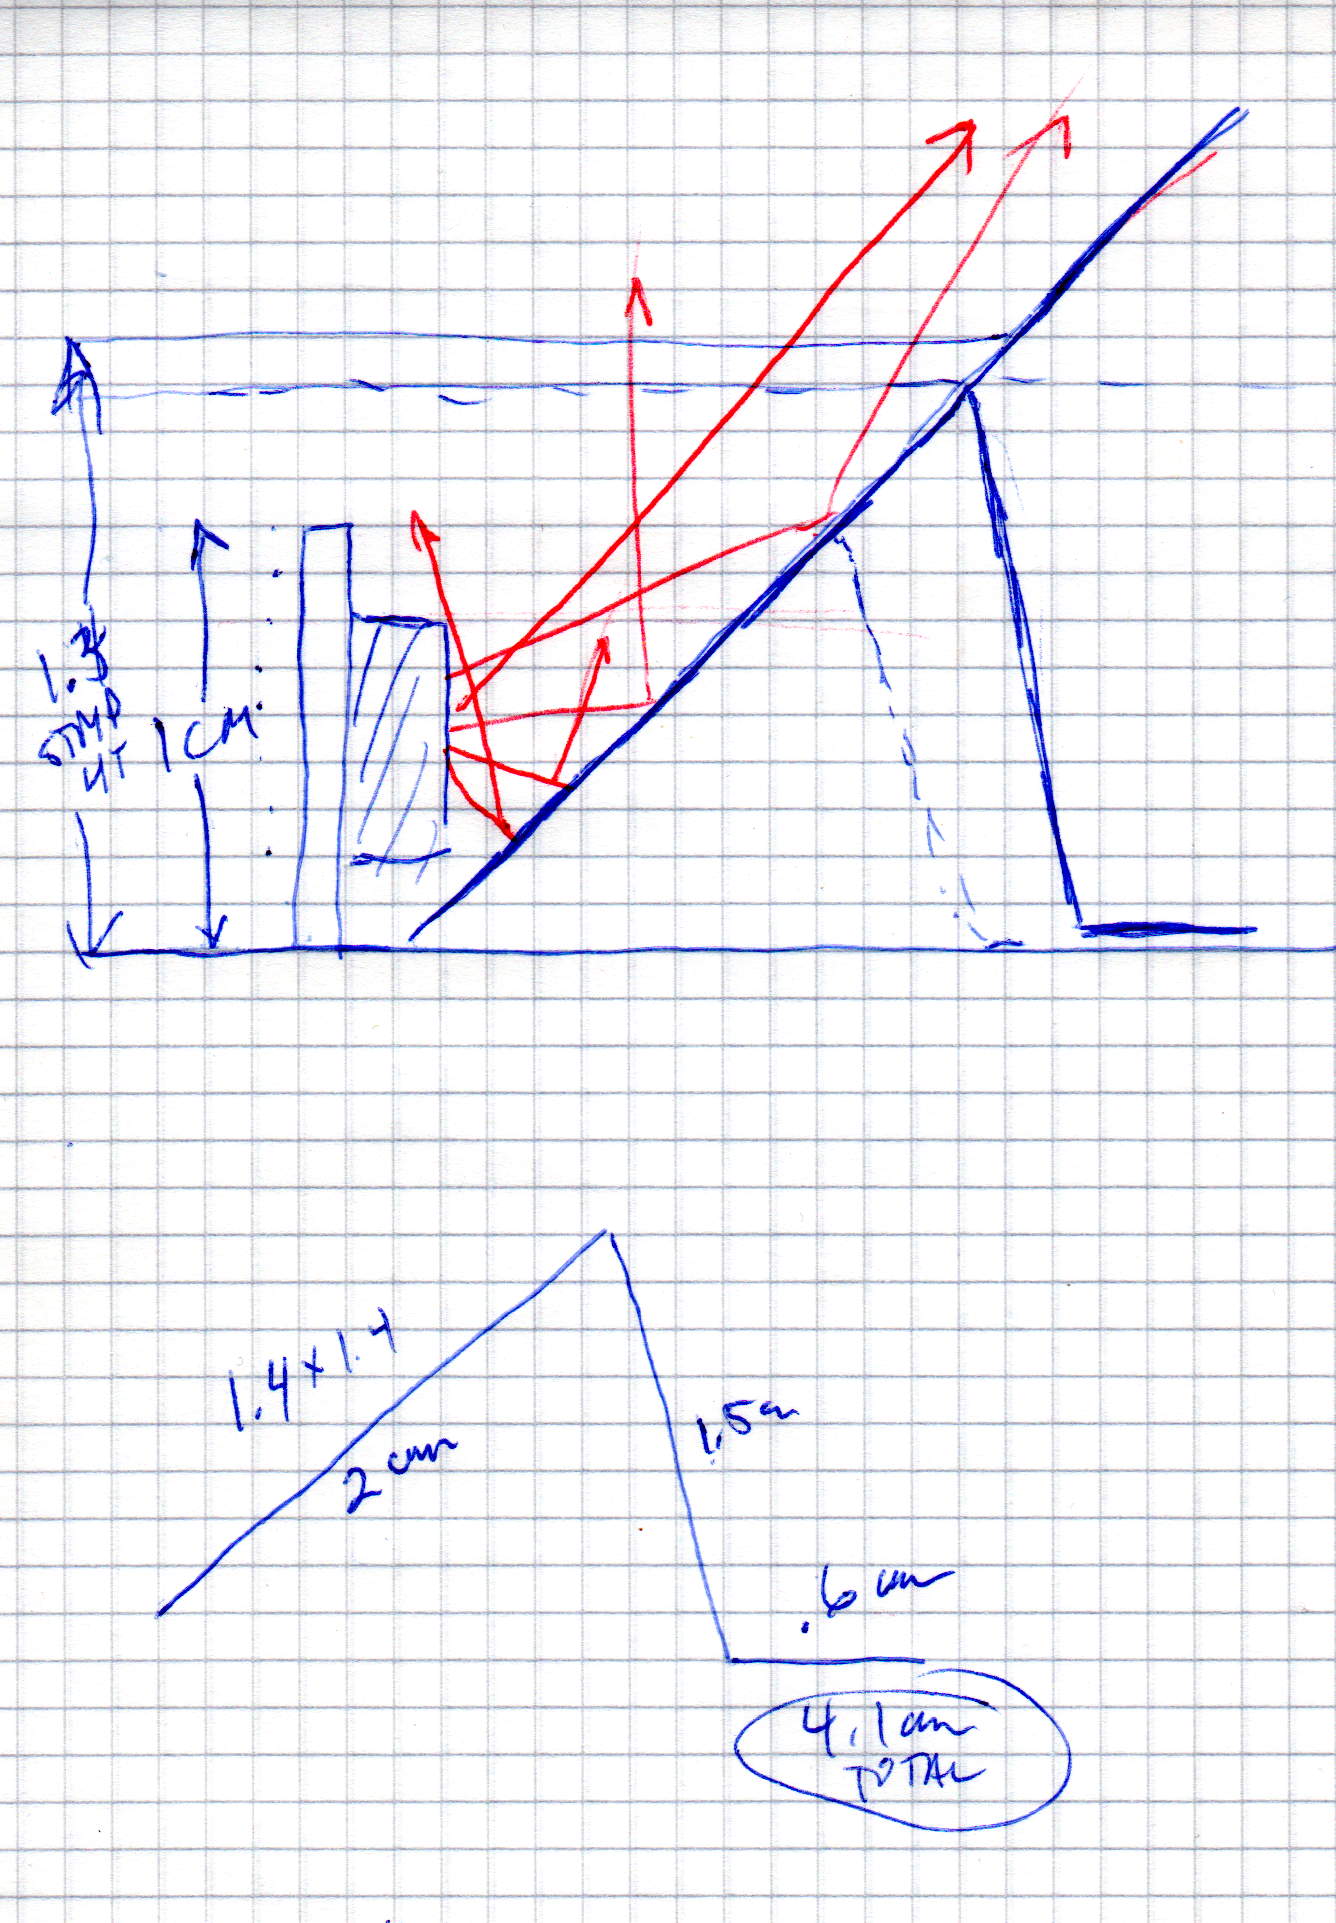 could bounce the light right back where I wanted it. Some back of the envelope calculations to determine how big the reflector should be, and a plan emerged.
 The initial attempt using aluminum foil was way too flimsy, and didn’t work well at all. Fortunately, I had a big roll of very shiny adhesive foil tape, and lots of 110 lb cardstock. Based on the dimensions that looked like they’d work,
  I made up a bunch of cardstock-and-foil-tape 45° reflector strip.
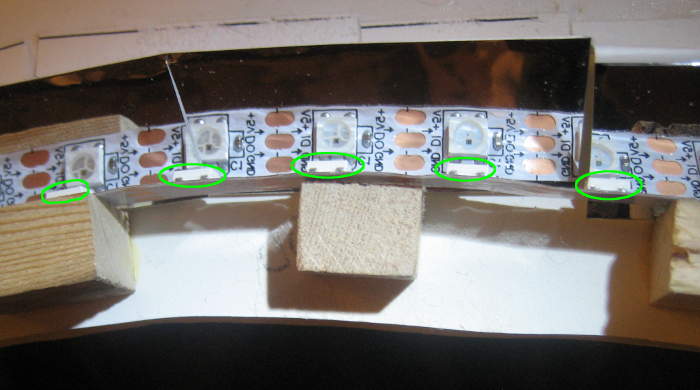 Lots of snips and tucks and glue and adjustments later, the LEDs were shining the right direction. Here looking straight down on the foamboard, you can see just the edges of the actual LEDs (circled) and their reflections in the foil. Not perfect, but most of the light is going the right way.
Diffuser
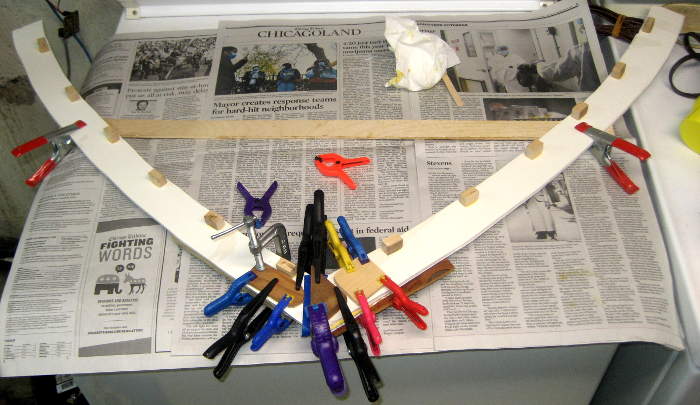
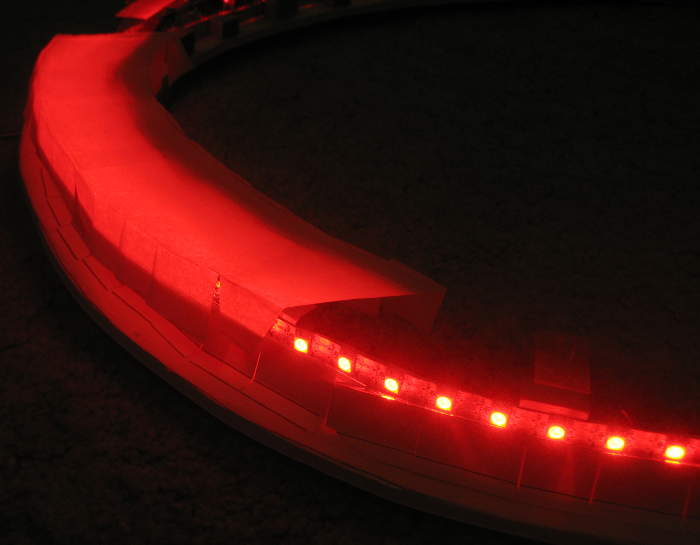 To get the “soft glow” I wanted – long before the half-and-half idea raised its interesting head – I found supporting a sheet of tracing paper over the (reflections of the) LEDs worked well. A couple of design iterations later, I had a support approach that looked like it would work.
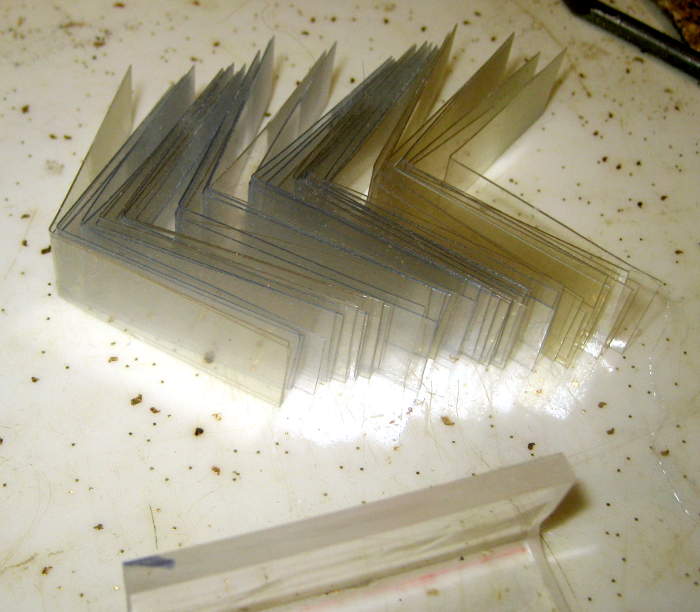 Twelve sheets of tracing paper, a bunch of supports cut from PET packaging, two kinds of glue, and a couple of hours later I had a nice gentle light from half of the heart (plus carefully cut paper for the other half – which will probably never be installed).
Next steps
While the heart is finally in the window, it’s very much still work in progress. I’m sure it will learn new animations as ideas come up from others (or me!). It still needs to learn what time it is to automatically fade up in the morning and fade out at night. Motion detection from the existing cameras may affect its behavior. Fortunately, teaching it new tricks now doesn’t involve glue or Xacto knives or clamps: “It’s just code from here.”
Comments are welcome.
Thanks to all our heros who are working to keep us safe and sound!
Development heart, animations
Update 6/20/20: More progress. To make it easier to develop more animations, I made up a duplicate functional, though ugly heart. I didn’t have quite enough LEDs, so there’s a gap at the bottom.  No reflectors – just what light bounces off the pink 1″ foam insulation board it’s built on. The foam wasn’t quite wide enough, so it has some wings to help hold the LEDs at the edges. The contact cement I tried to use for the wings barely worked, but the plan B duct tape on the back holds them nicely.
 Construction is considerably more ‘casual’ than for the real heart.
To drive it, I made up a little protoboard that connects a Pro Mini to a WEMOS D1 mini ESP8266  (and hosts some level shifters). The really cool ESP-link firmware on the 8266 provides a web server, so there’s a browser interface with both the serial
 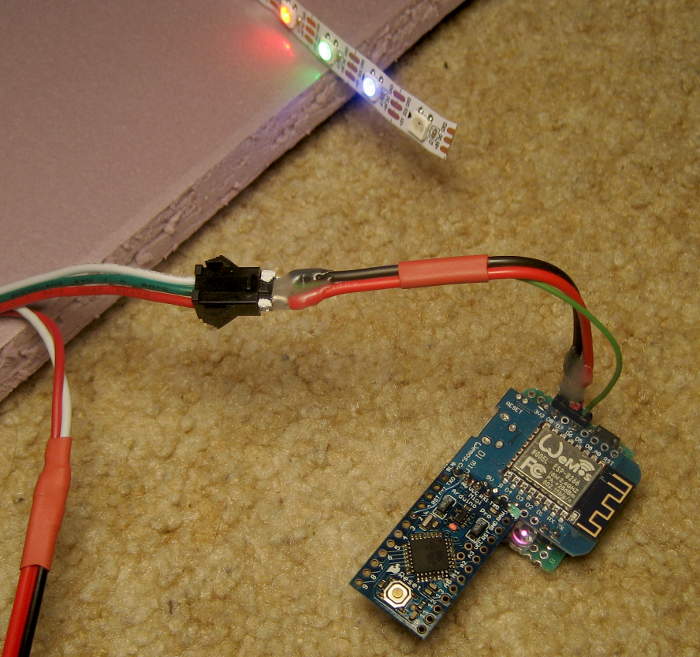 console and ability to upload code! Part of the intent of that was to use it to control the real heart so scripts on the security cam server could control the heart’s behavior. That hasn’t happened yet.
But the dev heart did allow me to write some more animations. Those are now rolled into the real heart. It now does the animations in order (rather than randomly). Still no knowledge of what time it is, so there’s just a mechanical timer to turn it on in the morning and off in the evening, instead of the nice fade-up and fade-down it should have. Maybe some day.
Surmounting some photographic and video-production challenges, I did get a little video made up of all the animations to date. It’s here.
Auto on-off!
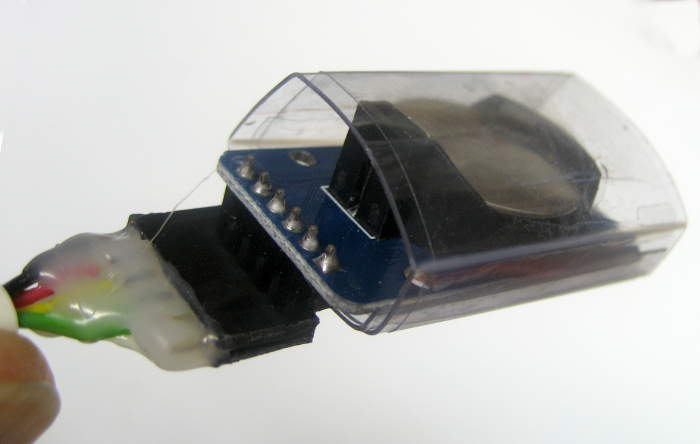 Update 8/4/20: The only robust way for it to turn on and off at appropriate times in the long term is for it to know what time it is and what time sunrise and sunset are. A DS3231 Real Time Clock module provides the first part. I put a little protective cover over one.
Adding a new I2C pigtail to an Arduino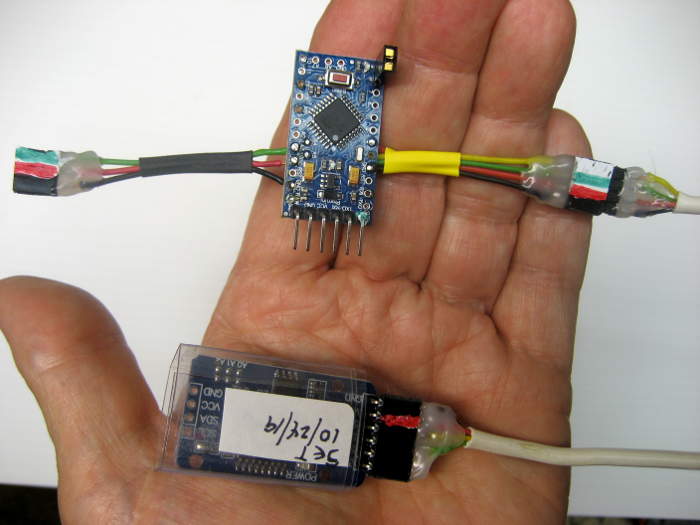 Pro Mini let it talk to the RTC as well as the heart.
For sunrise and sunset, I found dmkishi‘s very nice Dusk2Dawn library, and gave it my latitude, longitude, and time zone. Calling that with the date gives times for sunrise and set. With date and time provided by the RTC, it could now decide when to turn on and off. I told it to start 15 min after sunrise and turn off 20 min before sunset. Seems to work fine.
But what about Daylight Saving Time? I had set the RTC during summer (a year ago), so it was still on CDT. I told Dusk2Dawn that it was currently DST. Works fine. But the clock module doesn’t know about DST, and makes no automatic adjustment.
So if I take the simple path of not resetting the RTC when we go back to Standard time, and if I take the simple path and don’t change the code to tell the D2D lib it’s no longer DST, it should work seamlessly across the time change. For half the year, we’re lying to both, but it all cancels out. 🙂
Halloween update 10/31/20: It seemed appropriate to do something Halloween-themed with the heart, just as a one-day special. It can do orange. Fine. And it’s a heart, so it could ‘beat’, lub-dub. Fine.
But what can you do with a monochromatic palette? If it wanted to express ‘happy’, it could ‘sparkle’. Big blobs like the main heart routine’s ‘happy’, but just on/off sort of works.
OK, you could add purple, which helps. Actually in A-B tests, I chose random orange/purple blobs over orange/off. A little progress.
And it’s Halloween, so a little gore is OK, and it’s a heart, so blood. For a few more LEDs added off the very bottom, blood could drip out and fall into a puddle below. Blood could leak out of some starting spot, run down the side, and drip out. Maybe the heart gets a little fainter/less orange as it bleeds? Maybe its heart rate increases in desperation? Maybe it just fades to black as it dies? Kind of gross, but it is Halloween.
And purple. Maybe it starts with a purple wart on one side. The wart grows, and eventually covers the whole heart. When the evil purple has completely taken over, maybe it beats with just lub.
Maybe a little orange blob then develops, and breaks off, and falls around to the bottom. But it keeps going up the other side. Gravity is visible, speeding the blob as it falls, slowing going up. But with each cycle, it grows, and bounces up a little higher. After while it makes it all the way to the top, just makes it over, goes down the other side and starts going around. As it goes faster and faster, it grows more, and with each pass the purple fades a little more until the orange has taken back as rightful ruler. It sparkles with joy for a moment, then goes back to its lub-dub.
A couple of color wipes are possible. Maybe it fills from the top down, with orange on one side, purple on the other. And when it’s full at the bottom the color wipe switches sides, orange replacing purple and purple replacing orange. It could stay that way, split vertically, beating for a little while. Next time orange and purple switch sides.
Reality
I got part way. The old dev heart was again invaluable. Glad I hadn’t gotten around to tearing it down.
Brightness is computed with 8 bit integer math. Using the global brightness function to implement the heartbeat drastically changed the color, but settled down to a color that pulsed consistently. I didn’t do the numerology to see exactly what was happening, but I expect the stable colors were zeros in the low bits.
To get a usable heartbeat, I pre-populated a five element array with good first generation brightness values that maintained hue, then cycled thru them with a 40mS delay between, repainting the whole heart with each in turn. Fortunately, the protocol is fast enough that that approach worked nicely.
I got blood running down the side, though never got as far as the added ‘dripping’ LEDs. No purple warts or orange campaign to take back over.
When I tried it at full brightness in the window and viewed from outside, the color was way yellower than I expected. I even wondered whether the red LEDs had lost brightness over time. I tweaked the #defined ORANGE value to something that appeared much more like orange. But when I got that back on the dev heart, it looked quite red-orange. And the blood was almost invisible against that color. That was part of why the bleeding never happened.
I did get a couple of color wipes running, plus the orange/purple ‘happy dance’. While the original plan was for Halloween only, I backed off and decided to allow it the day before as well. And then, when I actually had a few animations, I started it four days before, planning on adding actions. That never happened, and those few behaviors ran all the way through Halloween.
I did do a little hack to let it run past dark on Halloween, dimmed to 100/255 brightness. It went back to normal programming the next day. Interesting.
I took a video of its final patterns. I hope to edit that down to a reasonable length and post it soon.
This probably won’t apply to your LED heart but I did some experiments with conventional plastic lens headed LEDs. If you file the lens off so it’s flat, the light is much more widely distributed. And if you file the lens off at an angle, more light gets sent out sideways.
Yeah, I’ve filed ’em down to get better distribution. (Read: to defeat the nice optical engineering that went into the design of that lens.) But I hadn’t thought about asymmetrical grinding to get asym distribution. Cool – thanks!
Hope you guys are staying safe.
Jim