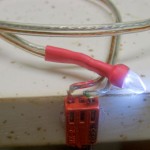
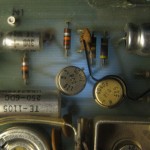
I needed to see who was connected to what in the amplifier board of the Hilton repair project, but the traces were on the bottom of the circuit board. I tried shining a flashlight between the board and the surface under it and that sort of worked, but I needed something better and more flexible. A skinny light on the end of a wire sounded about right.
 I crudely ground the case of a high-brightness white LED to defeat the very efficient lens that pushes most of the light out a narrow cone at the end of the LED. That made the light much more diffuse – just what I needed. Then I soldered it to maybe 18″ of speaker wire and protected the joints with heat shrink so they couldn’t get in trouble if they bumped into something conductive. I didn’t bother with a resistor, since an LED tester (with a resistor) lives on the front edge of my bench.
 When I slipped the LED under the circuit board, I could see the traces in any area quite clearly. Success!
[For anyone who has ever tried to photograph LEDs, you’ll know that it is nearly impossible to take the picture of the LED above. That picture is the first result of starting to play with High Dynamic Range (HDR) photographic tools. Here are some of my HDR experiments.]

Pingback: Hilton repair | Jim's Projects