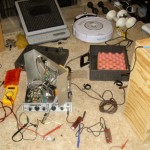
 I took in an old non-working Hilton 75 square dance caller’s turntable/amp of Ray’s to see if I could fix it. The first time I tried to work on it was before I cleaned a space on the bench, so it’s spread out on the family room floor. Thankfully, Hilton has made a schematic available. Without that I wouldn’t have even tried. It wasn’t obvious how it worked from the schematic, but some googling of the transistors it used found a DIY article from Popular Electronics Feb 1967 on building the
 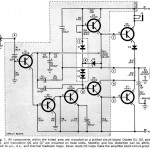 “Brute 70” hi-fi amp. (Tweak the URL to get subsequent pages.) With a couple of minor component value changes, this was exactly the amp in the (nominally 75W) Hilton! And even better – the article went into the design, how it worked, and how to do initial calibration on it. Can’t ask for much more than that!
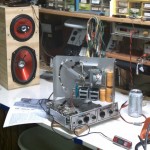 I finally shoveled off the bench enough to have a decent place to work on it. I narrowed the problem down to the power amp board. The design is pretty modular in that the only connections to that board are power supplies, audio in (from a mixer/preamp that still works) and output to speakers. Initially it was almost completely non-functional. I could hear just the highest excursions of the audio waveform as little more than pops from the speaker. It was alive, but *way*
 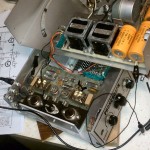 out of whack. Injecting a little DC or paralleling a pot with a cleverly chosen resistor moved the bias point so it put out recognizable, badly distorted audio – but considerably better than how it started. But with no obviously failed parts, troubleshooting was a challenge.
To make it more exciting, I now need this unit as a backup system for a square dance weekend July 8-10 (next Friday!). And to make it even more exciting, I hit something with a meter probe, heard a loud pop (from the speaker) and now it’s completely dead. The -43V supply is now at ~-21V. (The +43V supply is still at +43V.) My current dilemma is how to approach the troubleshooting/repair. A check on the transistor specs shows that they’re good for 80V, which is higher than anything I have in my junk box. (I do have replacements for the 2 output power transistors.) I have a couple of options:
a) Order all new transistors and see what happens. There are NTE cross refs to all, though Fry’s doesn’t stock them. But at least then I’d have 80V transistors. Best case is that one of the trannys was weak/bad before, and this fixes what I blew out plus what was bad and it works fine. Murphy is betting against that one…
b) Plug it into a Variac and crank it down so the power supplies are maybe +/- 20V (they’re not regulated). Then swap at least the small transistors for garden variety ones from my stock and see if I can get it basically working (obviously at lower power). If I can, and if I can get proper replacements in time, it would probably work. If I can’t get it to work, either there’s some other component bad or the rather sophisticated circuit depends on specific characteristics of the RCA transistor set it was designed around. Next step would be unclear.
c) Give up on the amp as it is. Newark has a single audio power amp IC (TDA7293) rated at 100W and power supplies up to +/- 50V (abs max is +/- 60V). There’s even a little PCB layout for it. Make a PCB – which would even let me use the existing edge connector. And of course hack it so the chip bolts to the existing heat sink. It’s sort of pushing things to replace the amp with something completely foreign, but it didn’t work in the first place, and it looks like I’m completely within spec for the new part. It should work fine…
d) Go to Fry’s and try to find some NTE parts (since that’s all they carry) that are good for 80V and see if those work. (Radio Shack still has a few transistors, but none over ~40V.) Like option b), this is based on the vague hope that the original design that used 6 different transistors in a 7-transistor circuit was just some guy at RCA trying to see how many different RCA parts he could get into a reference design, rather than that it actually depends on some weird characteristics of those parts. (It uses RCA 40406, 40407, 40408, 40409, 40410, and two 40411s.) My gut says subject to obvious stuff like polarity and working voltages/power ratings, it would pretty much work (probably even sound decent) with other general purpose transistors. But it doesn’t say it very loudly, or with very much conviction. What to do?
I’ve ordered the NTE parts and the amplifier IC, but they won’t be here ’til next week. I’m too anxious to make some kind of progress to just wait around ’til the parts arrive and hope I can get something to work in the last day or 2 before it’s needed. Do I waste an hour and a half trying to find high voltage parts at Fry’s?
Update 7/1/11: Agreeing with the recommendations of a guy at work and a guy at W88, I’m putting all my energy (for this project) into plan c) – replace the whole amp with an IC. I’ve started the PCB design. The board layout in the datasheet turns out to not be very useful, so I’ve started from scratch, including laying out fingers on 0.156″ centers to fit the existing PCB edge connector. I’ll play with the original board at my leisure after the dance weekend deadline is past.
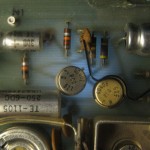 While I was still exploring the original amp, I needed to see the wiring to know which end of which component I was looking at. I made an LED-on-a-wire light snake I could slide under the PCB and see the traces. It worked out well enough that it will probably get a permanent home on the bench.
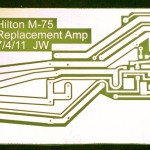 Update 7/5/11: Got the PCB laid out and etched. No major problems. I tied the “mute” line high, and am hoping there won’t be objectionable pops with it’s turned on. But just in case I brought the mute line out to where I can get to it if I have to. This is the first board I’ve done with an updated setup for etching with cupric chloride. More on that in another post.
It’s a hybrid with some SMT parts on the foil side and some thru-hole parts on the other side. I invested some time in improving my Eagle skills, including a valuable semi-automatic fill mechanism. I’m getting faster at making packages for custom parts, and am learning which layers to use for what. I guess Eagle is mostly a friend now.
There’s some cutting of this board blank to make the connector fingers fit into the Hilton edge connector. Still waiting for some parts, including the main IC. But I should be ready to put those in when they arrive – I hope Wednesday, possibly Thursday. If it’s Friday, that’s awful tight. I should be able to deal with most of the stuff like mechanical mounting before the parts come in. More to follow…
Update 7/6/11: The new amplifier is coming along. I cut the board back and slotted it so it 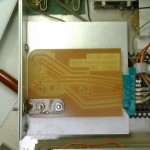 fits the
 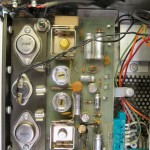 connector. I got dimensions for the IC, mocked it up, measured things, figured how to mount it and made sure everything would fit. While bolting the 15-pin IC to the heat sink would provide a sufficient mounting for the PCB, I set up an additional mounting bracket for it. Nothing is soldered in yet. Now we’re mostly waiting for parts from Newark/Element14. Old board is on left, new (smaller!) one on right. You can see the connector in the lower right on both.
One remaining open issue is whether to dig out the gold plating stuff I got for some other project and plate the edge connector for better long term reliability. Two more immediate concerns were thermal related: There’s a thermal cutout wired (soldered) in series with AC power to the unit that was riveted to a part of the heat sink on the board to be removed; and since the tab of the IC is internally connected to V-, it would have to be insulated from the main heat sink (which is electrically connected to the chassis).
You can see the cutout between the power transistors on the old board. While the IC has internal thermal shutdown, it seemed a shame to remove the existing cutout. I found a nice home for it on an aluminum bracket I made to clamp the IC to the heat sink – a fine solution, though there’s zero science comparing its temperature trigger to when the IC is “too hot”. It’s better than nothing – unless it cuts out before the IC would be in trouble and does an inappropriate shutdown while the amp is in use!
The first thing that came to mind for a thin, heat-conductive electrical insulator to put between the IC and the heat sink was mica. Does anybody still use that? I thought strongly that I had some, but couldn’t find it and couldn’t think where to look. Would I have to try to disassemble capacitors to try to find scraps of it? As I googled it, I found the clue I needed: a picture of an insulator for under a TO-3 power transistor! I looked in the old power transistor drawer, and sure enough, there was a stash of mica TO-3 insulators, along with a couple of insulators of other materials. Exactly what I remembered, and they’re plenty big enough to cover the heat-transfer tab on the IC. I have lots of thermal grease, so I’m all set. If the parts come.
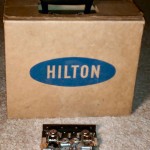 Update 7/7/11: It’s done! All problems resolved, tested, cleaned up and packaged, ready to go! Oh yeah – one part left over – the old power amplifier board.
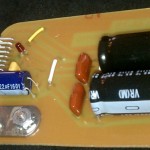 Parts came today, and board stuffing went pretty smoothly. (OK, I put one electrolytic cap in backwards and it hummed a lot. Rats. You’d think I wouldn’t make freshman mistakes like that any more.) Here’s both sides of the board and installed in the chassis:
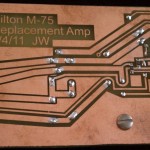
 The most interesting mechanical challenge was clamping the IC to the heat sink. I made an aluminum bracket that used 2 threaded holes that used to clamp the power transistor heat sink to the main heat sink. But it needed to clamp both the plastic body and the top of the tab. The tab is set back 1/8″ from the body, so I made a wooden spacer to fill it in. (Of course I couldn’t use metal since the tab must be electrically insulated from the heat sink, so also from the bracket.)
To insulate the back of the tab, I cut down one of the mica TO-3 insulators I found. Thermal grease on both sides and it was good. (Well at least on the third try. Apparently when I put it back together after replacing the reversed electrolytic, the insulator fell off. The back of the IC tab was all full of silicone thermal grease, so I was staying as far away from it as I could. I guess I assumed the insulator would have stayed stuck in all that goo. Wrong. More hum – but now the power supply voltages were way out of whack. Found the insulator, disassembled and reassembled again – this time with the insulator in place again. Much better. Dumb. It’s that whole assume thing…)
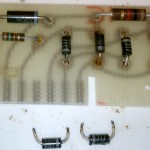 The unexpected electrical challenge was that while it worked and even sounded OK, there was still quite audible hum. The +/- power supply voltages were right on, so I finally put a scope on them. Huge ripple on the + supply! Thankfully, Hilton put the rectifiers on a nice plug-in board, so replacing the 2 diodes that were blown was easy. That quieted it down quite a bit 🙂 I suppose the reversed cap or the oops with the missing IC insulator might have had something to do with it 🙁 It’s not as hum-free as I would have liked, but acceptable.
I tested it with audio from a good MP3 player. Fortunately, the Hilton schematics made it obvious where I could plug audio in. Surprisingly, it was exactly in parallel with the phono cartridge. That meant the RIAA equalization was applied to the nice flat music I was putting in. That equalization is designed to reduce scratch/hiss, so what’s pressed into the vinyl has treble pre-emphasis, and that’s taken out in the phono preamp input in the mixer. Sure enough, I had to crank the bass down and the treble up to get the music to sound reasonable. But the Hilton’s potent music bass and treble controls let me do that.
I also ran music into the microphone input, just to make sure that worked. Wow – I had to crank the voice treble all the way down to make the music sound at all decent. But it worked, so it looks like both the voice and music channels are OK. Rats: I forgot to test the remote music volume control Hilton mics always have. I think it’s just an isolated 20K pot, so I could have done it. But it’s part of the preamp/mixer, which didn’t seem to have any problems, so it probably works. (Such an ugly word. Ugh.)
I cranked it up ’til I was afraid I’d blow out the substantial speakers I was using, and let it run for 10 or 15 minutes. The heat sink got very hot, but neither the IC’s thermal shutdown nor the Hilton’s thermal cutout (which I mounted on the aluminum clamp bracket) triggered, and there was one part of the heat sink not even mounted yet, so it seems OK. The chip has a clipping detector, and I laid out an LED on the board for it, just for testing. (It’s not visible when the unit is all together.) I did see it flicker a little when it was cranked up to the point of distorting a bit, but I was unwilling to run it that loud for more than a few seconds.
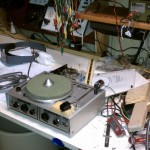 Eventually, all the too-long screws got cut down, the missing spacer found, everything tightened up for the last time and I could put it together. (It’s amazing how messed up the bench got from working on just one project!) Oh yeah, it’s a turntable – better check that out too. I found an old square dance 45 and put it on. Seemed to work fine. But when I took the record off, the back side was covered with black crud from the decomposing ancient foam turntable pad. That’s really unacceptable, so I scraped off the old pad, found some not-yet-decomposing foam rubber and cut a new one. It’s a little thicker than the old one, but should be OK. And it doesn’t leave junk on the records.
Of course I tested it some more with it in final assembled form, and everything is still good. Because I didn’t get the parts yesterday, I invoked Plan B and arranged for another system for backup for the weekend. I’ll bring this one along as a second backup, though I’m sure it won’t be needed.
But it’s not quite time to return it to Ray. I have all the replacement transistors, so I’ll probably take another crack at the original amplifier board after the smoke clears from the weekend. I wonder what challenges that will bring!

Pingback: Skinny LED flashlight | Jim's Projects
I have an AC200 Hilton turn table which is my back up. It’s not working and I was wondering if you work on them, if so where are you located? Feel free to call me 818-903-8602 or send me an e-mail.
Thanks, John
Hi John,
Sorry, I’m really not in the repair business.
Jim
HI JOHN
IF YOU STILL NEED YOUR HILTON REPAIRED, I HAVE A SHOP IN MY HOME TO REPAIR CALLER’S AND CUER’S EQUIPMENT.
I WORK ON ALL MAKES OF AMPS, SPEAKERS AND WIRELESS MIKES.
I HAVE BEEN IN THE BUSINESS FOR ABOUT 25 YEARS AND USE FACTORY PARTS WHEN I CAN.
SEND ME AN EMAIL WITH YOUR NEEDS. OR CALL ME AT 360-668-3847
YOURS IN SQUARE DANCING
GARY COON OWNER CALLER’S SERVICE AND SUPPLY
30 YEAR + DANCER AND MGST US AIR FORCE RETIRED
Hi Jim,
I have a broke Hilton Micro 75. Would you make & sell a replacement IC board like the one you made? If so, how much?
Thank you,
Pete
Hi Pete,
As I said before, I’m not really in the repair business. I fixed this one for a friend. (And because he lets me use it sometimes 🙂
About the best I can offer is that I’ll make up a duplicate of the (bare) PCB I used here and send it to you along with a schematic and parts list. It will still take someone with some electronic and mechanical skills to order the rest of the parts, assemble the board, and fit and mount it in your Hilton. I’ll make and send the bare board and docs for $10.
Sorry, that’s about all I can do.
Best of luck!
Jim
HI PETE
IF YOU STILL NEED YOUR HILTON REPAIRED, I HAVE A SHOP IN MY HOME TO REPAIR CALLER’S AND CUER’S EQUIPMENT.
I WORK ON ALL MAKES OF AMPS, SPEAKERS AND WIRELESS MIKES.
I HAVE BEEN IN THE BUSINESS FOR ABOUT 25 YEARS AND USE FACTORY PARTS WHEN I CAN.
SEND ME AN EMAIL WITH YOUR NEEDS. OR CALL ME AT 360-668-3847
YOURS IN SQUARE DANCING
GARY COON OWNER CALLER’S SERVICE AND SUPPLY
30 YEAR + DANCER AND MGST US AIR FORCE RETIRED
I have a Ac 300 with the funny speaker jacks. Now I need either the funny jack plugs on to be rewired to 1/4 phone jacks.
Any idea
Hi Alan,
Replacing the speaker jack on your Hilton is a completely reasonable task, and I’d encourage you to go that way rather than struggle with the old connectors and risk compatibility issues down the road. Anyone with some basic electronic/shop skills should be able to perform the replacement. Here’s the one I replaced:
The old connector body was larger than the 1/4″ jack mount, so I had to make up a little aluminum plate to cover the old hole and mount the jack.
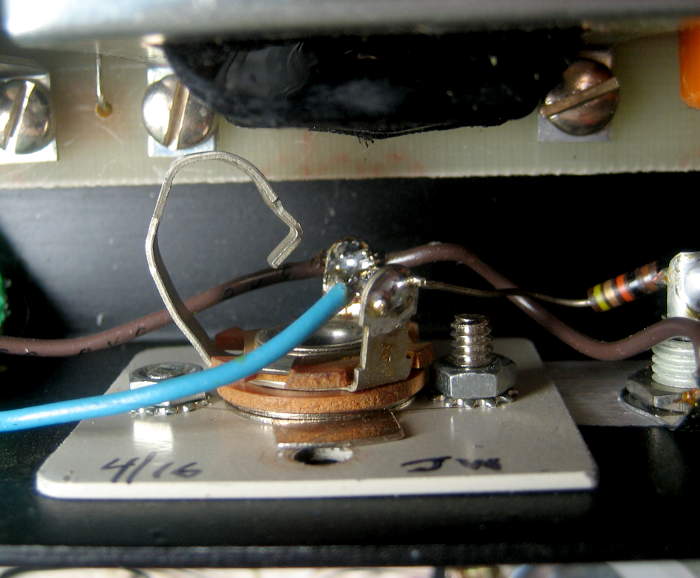
In the Micro-75 I did this on, there was a transformer very close, and I had to bend the “tip” contact. Easy, mechanically sound, works fine.
That said, if you choose to leave the jack in the Hilton and make up a short adapter with a Cinch-Jones male and a 1/4″ female, you’d need someone with about the same skills to make up that adapter. This plug on Ebay is probably what you’d need: https://www.ebay.com/itm/VINTAGE-CINCH-JONES-BEAU-MOLEX-P-302-CCT-W-POWER-CONNECTOR-PLUG-2-PIN-METAL-HOOD/402012117852?hash=item5d99ca1b5c:g:cRQAAOSw3fFeA9L4
Sorry, I can’t confirm that it’s the right one. I carried one in my bag for years, and can’t find it now, and can’t even find pics of the one I changed out above.
Good luck!
Jim
http://jimlaurwilliams.org/wordpress/wp-content/uploads/2020/01/New1-4InJack9723.jpg
http://jimlaurwilliams.org/wordpress/wp-content/uploads/2020/01/BentTipContact9729.jpg
==================
Hi Alan,
Replacing the speaker jack on your Hilton is a completely reasonable task, and I’d encourage you to go that way rather than struggle with the old connectors and risk compatibility issues down the road. Anyone with some basic electronic/shop skills should be able to perform the replacement. Here’s the one I replaced:
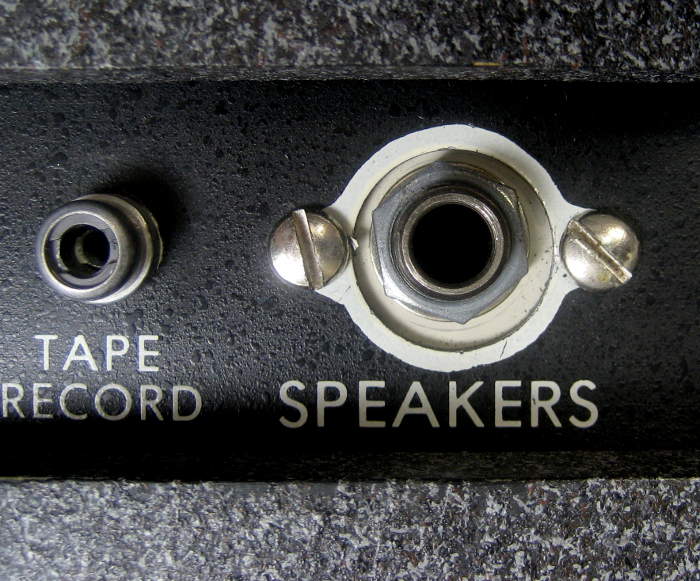
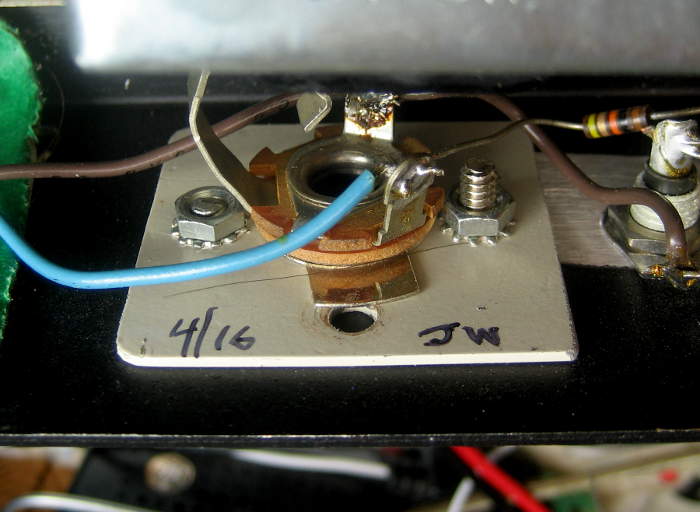
The old connector body was larger than the 1/4″ jack mount, so I had to make up a little aluminum plate to cover the old hole and mount the jack.
In the Micro-75 I did this on, there was a transformer very close, and I had to bend the “tip” contact. Easy, mechanically sound, works fine.
That said, if you choose to leave the jack in the Hilton and make up a short adapter with a Cinch-Jones male and a 1/4″ female, you’d need someone with about the same skills to make up that adapter. This plug on Ebay is probably what you’d need: https://www.ebay.com/itm/VINTAGE-CINCH-JONES-BEAU-MOLEX-P-302-CCT-W-POWER-CONNECTOR-PLUG-2-PIN-METAL-HOOD/402012117852?hash=item5d99ca1b5c:g:cRQAAOSw3fFeA9L4
Sorry, I can’t confirm that it’s the right one. I carried one in my bag for years, and can’t find it now, and can’t even find pics of the one I changed out above.
Good luck!
Jim