
I need to print PCB artwork on transparencies for my preferred PCB making approach using presensitized board material. My printer is an inexpensive Epson Stylus NX300. That printer does not support printing on transparency.
The problem is that the printer uses an optical paper sensor to which the transparency film is, well, transparent. It picks up the film fine, but then just keeps feeding, usually declaring a paper jam.
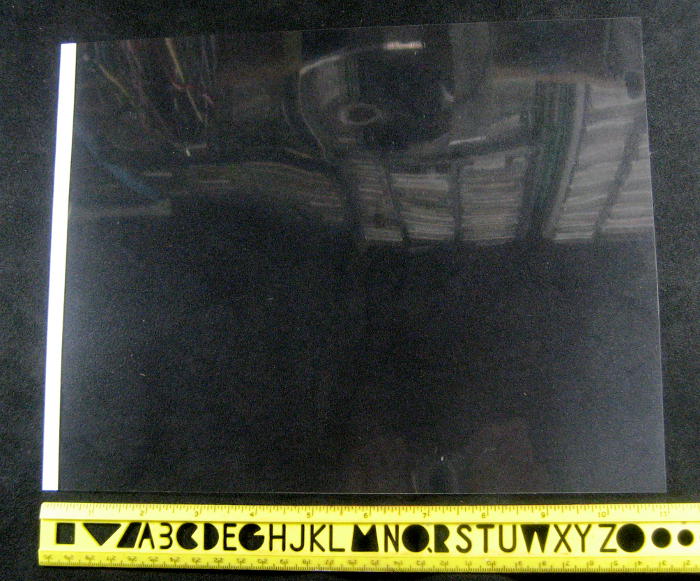
 For years, my workaround has been sticking an 11″ long piece of 1″ white PostIt correction tape exactly along one edge of the film. I put it on the non-print side of the film, allowing me to print all the way to the edge of the film if needed. Here’s a piece on which lots of small PCBs have been printed and cut out. (I can probably only get 1 or 2 more from it.) And yes, those words were written on the adhesive side of the tape.
The box of 60 sheets I had lasted me for many years. It was an Office Max house brand, and I figured I’d just get some more. Nope – they haven’t had that for years. I ended up with a box of Apollo Quick-Dry Ink Jet Printer Transparency Film VCG7033S. It was ridiculously expensive – over $1/sheet, but it said it had a “removable sensing stripe for smooth feeding”. OK – the price doesn’t hurt quite so much if it saves me having to carefully stick tape on each sheet before I use it.
 But when I opened it up – the stripe was the dumb way! OK, I suppose that works for some printers, but not mine. It would see the film, but thought it was ~1/4″ tall! OK, at least they give me some tape with each sheet. Not long enough, but it’s a start. I removed it and stuck it along the edge as I’d always done. But the printer never even saw that skinny strip. So exactly where do I have to put it?
The second printer
When I bought the printer several years ago, it was $50 new. (They make it up on the ink!) But to get a spare full set of 4 ink cartridges was maybe $38. For a couple bucks more, I could buy a whole nother printer – with ink cartridges! I could throw the printer away and keep the ink and just about break even. So I bought 2 printers. (OK, not quite as good a deal as I thought: the “starter” cartridges it comes with don’t have nearly a full dose of ink.)
I opened the second printer and stole and used the ink, just as planned. The new carcass sat around for a couple of years. But one day the print heads on the live printer clogged so badly I couldn’t get them going, despite alcohol and windex soaks and lots of other home remedies. (I now keep a humidifier inside the printer and set a calendar reminder to print a little color test pattern once/week. That’s worked so far.) So I pulled out the spare, swapped it in, and was back in business. All my printer settings (including carefully tuned ones for PCB printing) still worked perfectly. I put the bad one in the pile waiting for the next electronics recycle event.
 Fortunately I missed a couple of recycle events, and the dead printer was still here when I wanted to know exactly where that paper sensor was. It was junk anyway, so I didn’t even have to be very careful as
 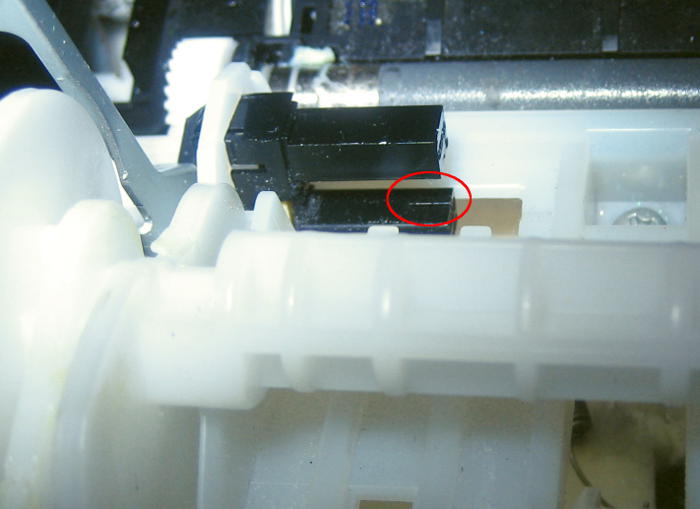 I took it apart. (The back of the printer is at the bottom of both pictures.) I had to strip it pretty far down to find the sensor. It looks like the active part is maybe 1/4″ wide, near the open end of the sensor package. Unfortunately, the paper path was substantially compromised by that time, but by sliding a card through against what I think was a paper guide, I concluded that the center of that 1/4″ wide sensitive place was just about 7/16″ from the (left) edge of the paper.
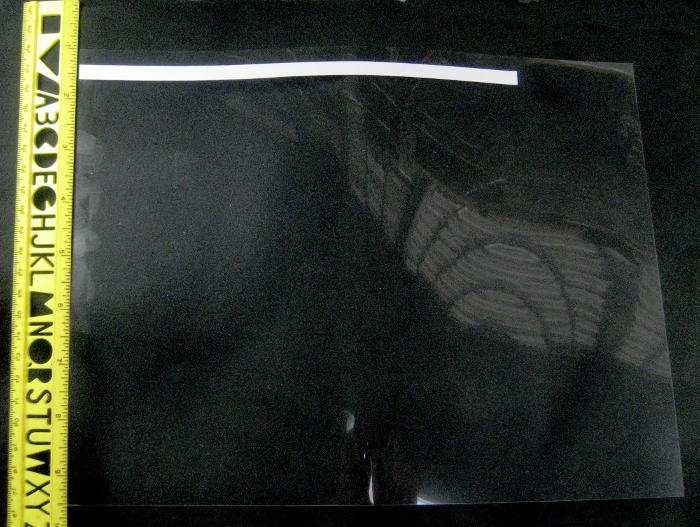
 I moved the strip so it was centered 7/16″ from the (long) edge and printed a couple of characters in the top left corner. It worked! Of course the strip was too short, so the printer stopped feeding before the film was all the way out and I had to gently pull it out the last couple of inches. In practice, when I prep a new sheet I can scavenge some tape from the previous sheet and patch it so it goes the whole 11″.
The old stuff had a nice rounded corner that helped identify which way to put it in the printer so it would print on the correct side. The new film doesn’t have that, but since the scrawny little strip is on the non-print side, as I prep a new sheet, all I have to do is lay it down non-print/strip side up, peel off and re-stick the strip (along either long edge!), add some old strip so it feeds all the way, and I’m done. (Writing “print this side” on the sticky side of the tape couldn’t hurt.) I know it goes in the printer with the strip on the non-print side, and it’s burned into my fingers that the white strip goes on the right side as I face the printer. (That’s what lets me put it on either edge.)
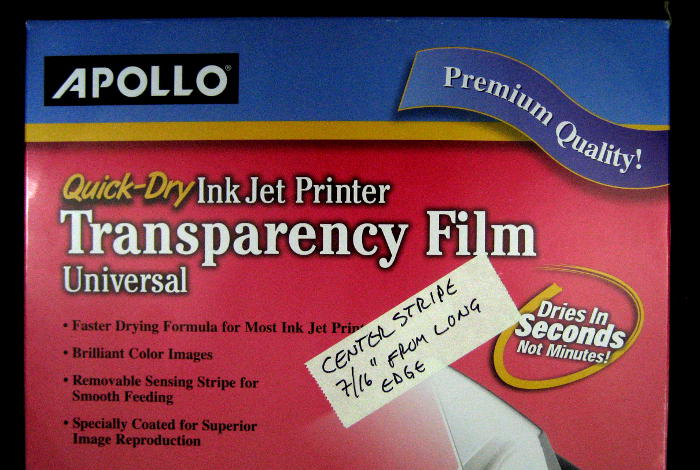 So the new stuff produces fully acceptable prints, it provides material for the strip for free, and I’ve figured out where the dumb strip has to go. And I even marked it on the package so I won’t even have to refer back to this Project Note. I have 40-several sheets, so I’m set for making PCBs for a bunch of years to come.
Update 9/16/15: Well, damn. I just tried to print on the new material, and it wouldn’t print. It was even the same piece used in the tests above: I recognized the “ABC” printed in the top corner. I remeasured the strip, and it was centered at 7/16″ from the edge. The sheet just fed through, but no printing (and no errors). WTH? I don’t have time to troubleshoot it, and I really needed the PCB, so I put a piece of the 1″ Post-It tape at the edge (covering the narrow strip) and it printed. Density isn’t what I’m used to, but I think it will work. But, damn.
Use A Laser Printer To Print onto Transparencies. I have been printing them on a Laser Printer for Years. Nice and Sharp Prints. Glad i could Help, Keith
Thanks for the suggestion, Keith. If I had a laser printer at home or even reasonable access to one – I’d give it a try!