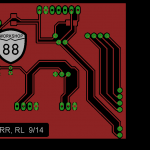
 I wanted to include a Workshop 88 logo on a board Rudy had laid out for the MAPR badges, but didn’t remember all the details from when I’d done it for the Great Global Hackerspace Challenge Educubes. This note is so I won’t have to re-invent that wheel again. It’s written for Eagle 7.1.
The basic tool is File->Run ULP->import-bmp.ulp to automagically create a series of very skinny rectangles of a raster representation of the .bmp image you provide. You can scale the new “image” and choose which layer it appears on. The script puts that image at 0,0. The first tricks are sizing it appropriately and moving it to where you want it.
How to
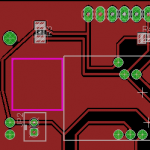 Begin by drawing an outline where you want the image to end up. Use the Wire tool with fine lines on a layer not otherwise much used. You’ll use this to size the new image and drag it into place. I chose layer 37 tTest and made it pink here.
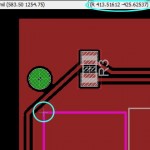
Using the Mark tool with finest grid resolution on one corner, let Eagle measure the width and height of the target area. You’ll use these to decide how to scale your image so it’s just the right size.
The image must be in .bmp format. Ideally, it’s pure B&W – just 2 colors – but you’ll get to choose which colors from the image the ULP will act on. Run the ULP and choose your image. There’s a good one for W88 in the dropbox under Logos->current_logo. Select the colors you want to appear. For the one above, it’s just black.
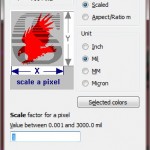 In the dialog that pops up, I chose Format->Scaled and Unit->Mil since that’s what Eagle provides. Since my area was 413 mils and the image was 642 pixels wide, I scaled one pixel to 413/642=0.64 mil. That saves a bunch of trial and error getting the size right.
While the default layer for the (first) color is 200 bmp, that’s not a good choice if you’re using flood fill as Rudy was. You need a layer that the fill will flow around. It looks like 41 tRestrict works. When you click OK you’ll get another confirmation popup to actually run the script.
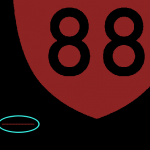
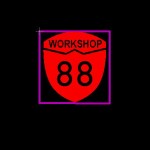 Your new image is now at the origin. Zooming way in to see the rectangles is interesting. Turn off all but 2 layers: your image layer (here 41) and the layer of your target outline (here 37). You get your image plus a nuisance freebie: tiny text with the path to your image file, below and to the left of the image. Using Delete Group, draw a box around the path and delete it. Using Move Group, draw a box around your image and ctrl-right-click drag it to be neatly centered in your target box.
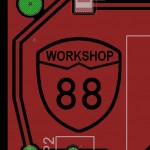 Here it is in place (with layer 37 off) and after running a Ratsnest to flood fill. I don’t know how to control the width of the isolation border around the image, despite a few attempts (found it – see update). For a funny shape like this you could insert the image once oversize, run Ratsnest to flood fill, delete that image, insert the proper size one and don’t run Ratsnest again! Ugh.
Update 10/8/14: Duh! Isolation is a property of the polygon. When you click the polygon to create the outline to flood fill, there’s an Isolate: pulldown along the top. Whatever that’s set to when the polygon is created is the isolation spacing between the flood fill and areas it’s avoiding! After the polygon is created, if you look at its Properties, under Polygon Pour there’s an Isolate field. Changing that after the polygon has been flood filled even causes the flood fill to be recalculated!
