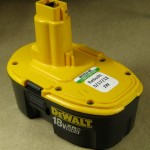
 What better birthday gift for my friend Ed than a handmade rebuilt 18V DeWalt battery made from recycled sub-C cells? OK, especially when he provided 2 of the old packs I scavenged from.
In addition to Ed’s donations, Mike D from where I used to work gave me some old DeWalt batteries suitable for recycling. I’ve had them for maybe a year, so it was time to get moving.
All 4 packs read much less than 1V as I started the project yesterday (last Saturday). I started charging up the packs for cell testing. The DeWalt chargers seem to reset when you remove the battery, and I put each one into a charger a couple of times to get as much into them as I could.
One pack came up “bad” (fast flashes of the charger’s one LED) every time I plugged it in, so I tried a more brute force approach. I put a big power supply across it with 22 ohms in series. I let it cook with about 0.25A for a couple of hours. Terminal voltage was about 3V – not good. I ran a couple amps thru it for a few minutes (with a blast of maybe 5A for a few tens of seconds). Terminal voltage came up to 8V – maybe there’s a little hope! I put it back on to charge at 200mA (still with the 22 ohms) for maybe 15 or 20 hours. As I checked in on it a few times, the current kept creeping up, so I’d turn the voltage down to get back to 200mA. The battery terminal voltage was falling (which makes sense with the current increase), so I didn’t hold out much hope. It was time to start doing cell testing, and that was the battery in the middle of the bench, so I tore that one apart.
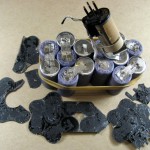 Opening the case was no problem – six T10 screws came out easily, and the case split apart nicely. Pushing on the terminals in the tower pressed the top cell out. There was a small strip of black foam tape involved. The only thing holding the cells in formation is some thin fiberboard contact cemented over both ends of the cells. A thermistor was visible and taped in a hole in the fiberboard to make good contact with a central cell. I added a rubber band to keep the cells from flopping around.
It had been off the charger for not more than an hour by the time I opened the case and got the cell ends exposed. Terminal voltage was down (from 7V) to about 2.2V. Not promising at all. I found the two cells that were not completely flat and peeled the tabs off the other cells, leaving both tabs on both cells. The tab material is about .0075x.433″, with the ends split and 2 spot welds on each split. That material is heavier than what I have, so I’ll have to salvage tab material as well as cells. I guess the good news is that this very dead battery should donate a lot of tabs.
I hooked the two not dead cells in series and started a discharge test on them. Ugh. Wasted a couple of hours trying to get a decent test of those two very marginal cells. The discharger seemed flaky – either 2.6ish or 0V. Wiggled stuff, tried a different Arduino, reseated the analog switch chip with ProGold snake oil contact enhancer, doubled lines of code like enable, analogRead(). Finally tried it with a good 12V battery – results were fine. Gave up on those 2 cells. So that first pack provided zero cells. Still a source of parts and tabs, though.
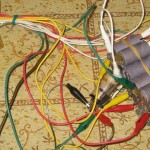 Second pack read 17V fresh off the charger, so we expect some bad cells. Construction was a little different – top was lightly glued and edges taped. Hooked it up to my good 16 channel discharge tester, but had some problems. Updated discharger code to fix a few bugs and allow deep discharge/reverse charging for cases like this where I don’t care about the bad cells. Got a good discharge run. Looks like we have one, possibly 3 useful cells. Next!
Not so good. I thought I did everything right, but it didn’t work, and the DG406 analog switch chip got VERY hot. Now it doesn’t work, so I no longer have a discharge tester for this rebuild. There’s no way I can get a new chip before Ed’s birthday on the 17th.
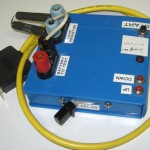 Resurrected my old single channel discharge tester. (Yeah, it’s built in a 5.25″ floppy box.) Not great, but I should be able to see cells fall off (though I won’t know which ones). And it will automatically disconnect the load when the voltage drops to a value you choose. If I run it down to say 8V or something, one measurement of each cell will show me the bad ones, and I don’t care whether a particular cell failed early or late – it failed.
But no joy. All it would report was zero V from the battery. I tried Pro Gold snake oil on the range select switch – no better. I found some project notes and the board layout and started troubleshooting. I could see which processor pin was the analog in, and when I looked at that pin I could see the voltage from the battery – though it was still reporting zero V. OK, that one’s dead too. This is not going well.
As long as I had done some moderate troubleshooting/reverse engineering, I added what I’d found to the project doc, took a couple of pictures, and included the board layout image in the doc. That way if I ever come back to it, I’ll have a clue what to do. It’s even possible that it might get reincarnated: All the binding posts, relays, range switching/scaling are there and still good. I might put a header in the PIC socket to bring out the interesting lines and put a 4313 or something in. Or maybe I could even find the PIC code again and burn a new PIC (if I have that one). Anyway, that attempt is closed for this project.
Digging deeper, I found an old Craftsman multimeter with an RS232 interface, hoping I could at least use that to log the terminal voltage while discharging with me watching to decide when to kill the test. The meter worked fine, but I couldn’t find any installed software. I did have the install zip, but that install (from 199x?) failed on my Win7 machine. I tried a terminal emulator to talk directly to the meter, but no luck. To my delight, I found the protocol doc online. 600 baud 7n2, send a ‘D’ to get a data point. Still no luck. Changed the (1999) battery – no luck. Found a 9 pin Rich serial tester – no data (or mark!) from the meter. Ran XCTU and in desperation tried playing with handshake lines. With DTR on and RTS off it worked! Ran the incompletely installed software it came with and that started working as well. I really don’t know what fixed it. Anyway, it’s now logging terminal voltage every 30 sec. I have to sit here to watch over it, but at least I’m back getting some data on which cells I might harvest.
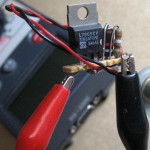 …Except I don’t trust the 9V that’s running the meter to last for hours and hours. So I made up a quickie 9V replacement with a 7805 (‘cuz I have a lot) and a 1K/390 divider for 8.4V. A 12V lead acid battery should run it plenty long enough. Took longer than I wanted, but it’s there and powering the meter. I’ll keep it in a little bag taped to the meter when this is done.
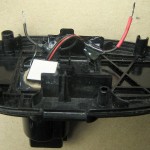 As I was frequently charging packs that were no longer in their nice plastic houses, I took advantage of the growing pile of spare parts and made up something that would plug into the charger and provide nice clip-lead-friendly wires as output.
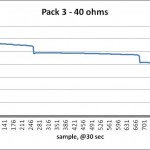 Got reasonable measurements from pack 3. Might have left it running too long and flattened 2 cells that would have been acceptable (if marginally so). Voltages logged by the Craftsman gave a classic multi-cell Ni-Cd failure graph showing when cells dropped out. And given the load resistor value and the fact that it’s in a spreadsheet, it’s easy to get approximate A-hrs delivered sample by sample.
Started tearing the packs apart further to harvest the specific cells that looked promising. I left the tabs on the good ones and started soldering them in strings for further testing. (I was careful to not solder to the part of the tab I might eventually have to weld to another cell.) Oops – miscounted and ripped the tabs off a good cell. Now how can I connect to it? Wait a minute – I have a battery tab welder. I should be able to just weld some tabs on. (Hauls out welder, tinkers…) It worked! Made one string out of the candidate cells from 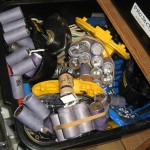
 packs 2 and 3; later another string from pack 4. Charged and test-discharged them a few times. By this time I had a substantial pile of leftovers, as well as an ugly, sticky pile of salvaged tabs.
Unfortunately, the welder wasn’t quite user friendly yet. I burned some more of the precious time before the birthday deadline updating it with a foot pedal and MOSFET charger disconnect. Details in a separate post, but bottom line is it works fine and is pleasant to use in “production”.
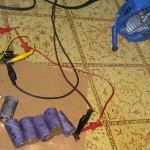 Testing of the candidate strings was tedious without my 16 channel recorder. I’d let it run a while until terminal voltage indicated a couple of cells had gone to zero V, then manually measure voltage on each cell. Since these cells were at least fair, when one died I shorted it out with a clip lead, reasoning that shorted is less damaging than reverse charging. Then wait for next cell or two to go flat. With interim string terminal voltage in a spreadsheet, formulas using load resistance and sample times gave me approximate A-hr capacity of each group of cells. A fan on the 4.7 and 6.8ohm 10W load resistors kept them cooler.
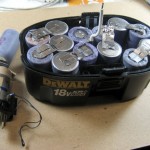 Looked at the numbers, made tough decisions, and came up with the final 15 cells. The weakest links are probably only around 1.3A-hr (instead of 1.5), but now I can start final assembly. Plopped a bunch of dead cells (I have a lot) into a case (I have several) to think about how to string ’em together so the first and last cells are in the correct position and all the polarities are right. Worked with the rag tag bunch of final cells, reusing many old tabs. By clever positioning and good luck, I ended up not having to put any new tabs
  in. I used the case to hold the cells in position as I welded first
 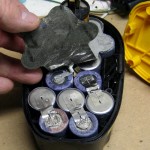 the top tabs then the bottom ones. The welding went without a hitch.
I put the adhesive backed fiber sheets on (hiding the functional, but ugly tab rewelds), soldered the last wire to the 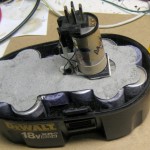 connector, and it was about ready! The case even went together smoothly.
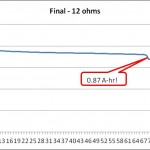 Charged a couple cycles (since some cells were fully charged when I assembled the pack and others were not) and ran a discharge test. The Craftsman-logged data tells a bad story. I really think all the cells that went in were at least good for 1.3A-hr, so the results are a big surprise. I’ll run a couple more charge cycles and then soak the whole thing at maybe 200 mA for a long time. I hope that will normalize things and we’ll get better performance in the next test. Unfortunately, it’s already Saturday morning…
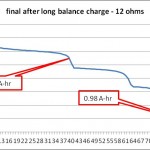 Later that morning… I did another discharge test after what I thought was a suitable balancing charge over night. The result was worse than the last one. The first cell dropped at 0.5A-hr, and four had failed by 1A-hr. Guess I better take it back apart 🙁
Later that afternoon… I decided to go with Plan B. I happened to have 15 new Tenergy sub-C cells I stocked for just such emergencies. So I built up a whole new battery with brand new cells.
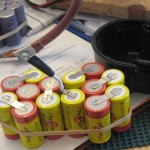 I guess I got those cells before the tab welder was working, because I seem to have sprung for tabs on all of them. Unfortunately, the tabs are lighter (.008×0.275″) than the DeWalts, but I closed my eyes and decided to save a little trouble and keep the factory Tenergy tabs. I hope that won’t turn out to be a mistake. I pulled half the tabs off (all the negative sides, with consideration for the special terminations on the end two cells) and laid out the new battery. I triple checked the layout, and didn’t end up with any mistakes.
As I started welding, it finally dawned on me why both DeWalt and Tenergy split the tabs to be welded: For a two-at-once spot weld, the current path is from electrode to tab, thru tab to battery (first weld), across to other weld site, up from battery to tab (second weld), then out the electrode. But without the split, there’s a pretty good path through the tab, without going through the weld spots and the battery plate! Yeah, the higher resistivity of the nickel tabs makes that path higher resistance, but if you split the tab and put one electrode on each side, the path through the tab is MUCH longer – down one side of the split and back up the other. Duh. So I made splits in the Tenergy tabs (which were designed with just a hole for soldering) 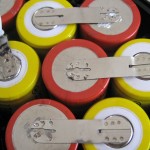 with a cutoff wheel in a Dremel. I don’t know how much it helped the welds (and how much the loss of material hurt the high currents in real use), but I felt better about them.
Here are some of the welds after I started splitting the tabs. You can tell which ends were mine 🙂
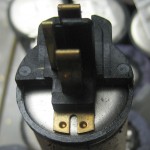 The real problems were the two end cells and how they connected to the connector. The cell with the negative end lives in the tower. The actual heavy copper strip the drill and charger touch is directly welded to the negative end of the cell. I wasn’t confident my welder could handle material that thick, but I tried. I did single welds, with the other electrode directly on the battery case so all the energy would go into one weld. I also ran the cap voltage up to 16V (others had been at 15 or a little less). After six welds, I inspected it. It
 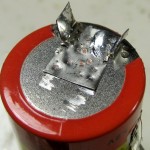 fell apart in my hand. So I was right: my welder can’t handle that!
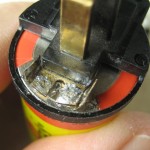 I knew I could weld regular tab material to the battery, so I made up a custom tab that would fit up around the original copper tabs. Then I fitted the external
 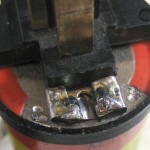 connector over it. I folded both tabs over, and having pre-tinned all surfaces, sweated them together. I’m pretty happy with the result – I think it’s as good as the original (if different).
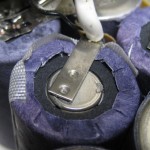
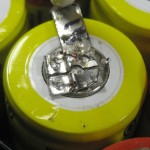 The positive end cell also has a thick metal piece (to which a piece of heavy wire is soldered), and I feared my welder couldn’t handle that one, either. But after I made about 6 single welds and tested it, it seemed OK (though I didn’t try as hard as I should have to break it.) But given the success of using some regular tab material for the negative end, I thought the least I could do was beef up the fat tab with some normal stuff. It’s ugly, but it certainly can’t hurt!
Putting it in the case went pretty smoothly. Although those cells had to have sat on my shelf for at least a year, before the first charge the terminal voltage of the pack was over 17V, and when I put it into a drill, the drill spun quite well. That’s pretty encouraging. I ran one normal charge cycle on a DeWalt charger and hooked it up for my now standard discharge test. We’ll know soon.
 A little later: Success! Looks like the cells are really well matched, and hit 15V at 1.9A-hr. Woo hoo!

This is awesome. Is there any chance you can tell me where you found the dewalt male battery connector? I need to find both the male and the female. Your advice would be much appreciated.
I scavenged the male connector from one of the discarded DeWalt packs somebody donated.
In a related battery rebuild, I needed to connect to the charger so I could put a 0.1Ω resistor in series to monitor the charging current. I didn’t have any spare batteries to scrounge from, so I made a male connector from a scrap of wood with contacts cut from an old PC slot cover plate epoxied on, and bits of wire soldered on for clip leads to grab on to. Here’s a picture.
If you don’t have an old charger you can scrounge the female from, I guess you get to be creative and fabricate one.
Good luck!