The CuCl2 etchant is working great, but I lose a very small bit with liquid that clings to the board and holder each time I take one out. Between that, wanting a little deeper bath in case I need a longer board, and wanting it to not get tired so soon if I need to do a couple of boards in a row, it’s time to increase the volume of etchant in the tank.
From the tank geometry it looks like an extra 220 ml would get to about the depth I’d like. I should be able to dump some HCl and copper into the bath, turn on the bubbles and come back and check on it in a day or two. But how much HCl and how much copper? OK, the net reaction must be
Cu + 2HCl -> CuCl2 + 2H (I don’t think H2 is released – where does the H go?)
One mole of Cu (63.5g) reacts with 2 moles of Hcl (2 x 36.5g). From the Seychell paper, I’m looking for a concentration of ~150g/l Cu+2. To make 0.22l, I need about 150 x 0.22=33g Cu. That (33/63.5=)0.52 moles of Cu will consume 1.04 moles of Hcl, or (1.04 x 36.5=)38g of HCl. Since my acid is about 10M (based on the 31.5% concentration marked on the bottle and a chart on Seychell), that 38g would be provided in (38g/(365g/l)=)104 ml of concentrated acid. But I want 220 ml of solution. Again according to Seychell, I’d like the bath to be ~3M HCl. Out of the remaining 116 ml I need to come up with enough HCl to make that 220 ml come out around 3M. So I need an additional (3 x 36.5 x 0.22 =)24 g HCl. The 10M acid gives me 365 g/l, so I need an extra 24g/(365g/l)=66 ml of concentrated acid. With the 104 ml needed to react with the Cu, that’s 170 ml total acid. Adding 50 ml H2O will give me my 220 ml total. Whew.
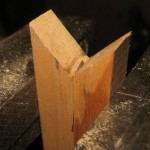 #12 copper wire is just about 9 g/foot, and stranded wire provides more surface area than solid, so I need 33/9=3.7 feet of stranded #12. I clamped a bit of broken razor blade between some angled wood blocks to make a longitudinal insulation slicer, dragged my 3.7′ of #12 THHN thru, peeled off the insulation, and the raw Cu is ready to go.
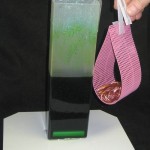 To support the wire in the bubble stream, I made a little hammock of soft plastic counted cross stitch “canvas”. It’s supported by a bit of the nice plastic Flavia coffee packets are shipped in. I hope the plastic canvas doesn’t dissolve in (and pollute!) the etchant. Guess I should try a little bit first. The plastic cable tie I used to tie the air hose to the air stone support was gone in the first few days, so not all plastic fares as well as the Flavia stuff.
Hmm – when I suspended a little of the pink plastic in the bath and turned on the air pump, I hardly got any bubbles at all. I pulled the air stone out and tilted it and played with it a little and now it seems to be bubbling OK. That’s not reassuring.
The bit of pink plastic didn’t change much in 15 minutes, so I put the 170 ml of acid and 50 ml water in, submerged the pink copper holder and turned on the bubbles at about 5 PM 1/26. We’ll see what happens.
Update 1/28/12: The bath had turned very dark brown (very reasonably from all the new Cu+1) by the time I first checked on it 2 hours after it started, and has stayed that way ever since. The color indicates > 10g/l Cu+1, so etching action is substantially slowed/stopped. I expect it’s in a sort of dynamic equilibrium with the air coming in regenerating the etchant (oxidizing the Cu+1 to Cu+2) and determining the rate of dissolving further copper. Each time I lift the copper carrier out (once or twice a day) the wire is a little scrawnier. I expect that will continue ’til it’s all gone – and then the solution will slowly (dependent on the bubble rate) turn back to its normal green to say that it’s done. The pump and air stone seem to be providing a very nice bubble stream – reassuring after the minimal bubble thing at the beginning. I guess it’s doing exactly what it should.
Update 1/29/12: After about 2.4 days the Cu is almost all gone. Color test is as brown as ever, which is what I’d expect. Should be ready to go in another day! … After 2.75 days, just a little sliver of Cu left; maybe slightly less brown.
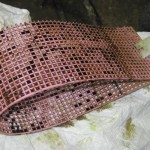
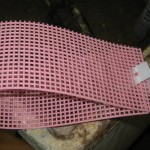 After 3.13 days, all Cu is gone. Here’s the pink plastic carrier before and after rinsing it off. It fared very well. It’s all green-up from here.
Update 1/31/12: Finally after 4.7 days the drop test is showing Cu+1 is down to ~4 g/l. I hadn’t quite lost faith, but it’s taking longer than I expected. I suppose with the same bubble rate and more solution it’s reasonable that the rate of regeneration in terms of change of concentration/hour would be a little lower. I wonder if there are larger aquarium pumps? <checks model #, google, google…> Sure enough. The cheapie I got for maybe $6 is an Aqua Culture MK1501, for 5-15 gal tanks. It functions – both for circulation during etching and aeration during regeneration – but a bigger pump would probably be better for both. And would be much better for mass copper dissolving. Now that I know the system works, I guess I should invest in a bigger one.
On reflection on the minimal bubbles at startup issue: The air stone has a small horizontal passage along its length and stone above. If it’s been sitting for a while, I’d expect the channel to fill completely with liquid (as well as filling the air tube up to liquid level), since the check valve in the pump can’t be perfect. What I observed was lots of bubbles very near where the air tube is glued into the stone and nothing along the rest of the length of the stone. One of the things I did was tilt the whole thing while it was out of the liquid (air hose end higher). Eventually bubbles seemed to be coming from the whole length of it, and I put it back. Thinking about the startup conditions, it doesn’t feel like there would be much trying to flush that air channel if the bubbles could just crowd out near the air hose. So maybe to get uniform bubbles after it’s been off for a while I’ll always need to lift it out, tilt it to drain the air channel (better with air flowing) and put it back. A small hassle, but worth it if it provides more uniform bubbling. I’ll have to try that.
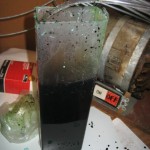
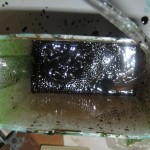 During this major regeneration, the bath and tank are really ugly/dirty. The solution is quite dark when it’s fully regenerated, but at least it’s a pretty green. This is just ugly.
Update 2/2/12: After 6.7 days, the solution is down to ~1g/l Cu+1. Yeah I did one board in there, but it was tiny, and I can’t believe it affected the overall regeneration time measurably. This is way longer than I expected. I guess a larger pump would be appropriate.
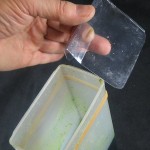
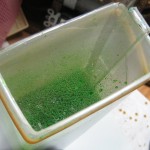 Update 2/3/12: After less than 8 days, solution is (finally!) perfect light green. I cleaned up the etch tank, and made splash guard. The bubbles routinely propel tiny droplets of liquid a couple of inches above the surface. This guard tries to contain that splash and let it drain back into the tank. This one is only good for regeneration, since it doesn’t have room for a board holder. I may just fit and glue a separate splash guard to each board holder. I have lots of clamshell packaging material 🙂
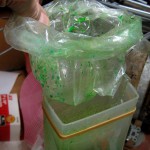 I used to put a baggie over the top to contain the splash. (It didn’t go as deep into the tank as this picture seems to show.) I’ll continue to do that, though now I expect the baggie to get considerably less wet.
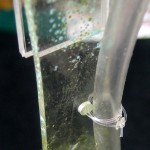 Since the zip tie I used to hold the air hose to the air stone hold-down failed within a day or two, I tried using monofilament to tie it down this time. This pic was before I realized I tied it down wrong: I’d like the hose to come up a corner, but this leads it up the wrong way. The redone monofilament ties it to the other edge. I’ll report back later how the monofilament survives.
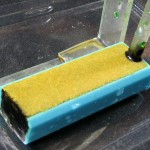 When I pulled the air stone out to tie down the air hose, I noticed that the epoxy sealing the air hose into the stone and sealing up the end of the cut stone had turned quite dark. This was of course after living in the very dark solution after adding lots of copper. It does still seam to seal OK, though.
