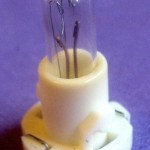
My friend Ed had a burned out bulb in the climate control panel of his Chrysler van. The rather unusual bulb is not available by itself – only by buying the complete $400 control panel. Thanks, Chrysler.
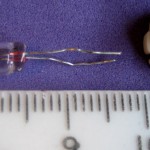 After slipping off a clear blue rubber shield and taking the assembly apart, the bulb looked sort of like a miniature Christmas tree bulb. But those are typically 1.5-3V, and wouldn’t survive very long in a 12V application like this. I did find that a 14V 8640 bulb looked like it would sort of do, though it’s a little shorter. And I even found one for $1 (plus $5 shipping!!) on Ebay. That will be plan B.
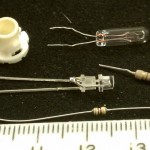 Since I had some small blue LEDs, I decided to try to make an LED replacement. I cut the LEDs down in various dimensions so one could straddle the other while staying within the original bulb outline. With 2 LEDs at ~3.5V in series, a little calculation and experiment showed a 470 ohm resistor would be about right. At 20mA it would dissipate ~0.18W – more than the cute little 0.1W job in the foreground. I didn’t know whether I could fit a larger one in, though.
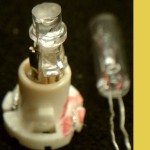 By drilling the base a little I did manage to fit the larger resistor in, and put the whole thing back together. The contacts were the original wire leads from the bulb, wrapped around a nicely formed base. I wrapped the resistor and LED leads back in the same pattern, but they were considerably larger diameter than the original leads, and I didn’t know how tight the tolerances were. So I relieved the base a little with a Dremel so the fat new leads would sit lower, but with their top edges about where the top edges of the original wires had been. Approximately. Maybe. And of course unlike the original bulb, this one is polarity sensitive, so I marked the + side.
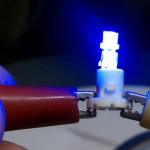
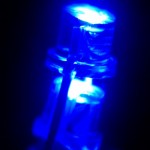 Since “the test is the test”, I’ll have to report back after his auto shop folks put it in for him how it worked out. But it does light a pretty blue on 14V. It’s really hard to take realistic pictures of lit LEDs. Switching back and forth looking at the camera screen and the real thing, the very exponential response of our eyes compared to the camera sensor was very obvious. I almost tried a double exposure with one very underexposed to capture the LED realistically plus a fill flash to get the foreground, but didn’t. Maybe next time.
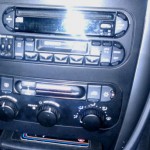
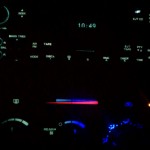 Update 7/10/11: The LED replacement bulb got installed. Here’s the console (sorry for the flash) and how it looks in the dark. The new LED bulb lights the lower right portion. It’s effective and pretty, but much bluer than the original equipment bulbs. I suppose that qualifies as a successful effort.

