
I don’t have a CNC machine at home, but several times I’ve wanted to do some kind of testing that sort of needed a machine to see what was happening. Not particularly to print or cut – just to watch the movement. I considered making a very bare bones machine – some cheapie 5V steppers and string and pulleys, or maybe CD drive hardware. But they quickly grew more complex than I wanted.
 So I built a simple CNC controller/machine emulator with LEDs to indicate gantry movement and buttons for limit switches etc. It’s an Arduino shield that expects grbl running on its host.
Pairs of LEDs (red ovals) show X, Y, Z motion by decoding the step and direction pins from grbl. Cranking the step pulse width up from 10 to 50 μsec improves the brightness. Just as with the W88 Shapeokos, there are limit switches for X, Y, and Z – implemented as small button switches at the ends of their axes. There’s also a button on the A5 line grbl0.9 uses for the G38.2 probe command, plus one for Arduino reset, since the one on the board is covered up. Two more LEDs – for Stepper Disable and Spindle complete the hardware. Since grbl0.9 supports spindle speed control via PWM – at the expense of pin compatibility with 0.8 – there’s what amounts to a DPDT switch of header pins to support either pin configuration. There are traces hard wiring it for the 0.8 assignments that would need to be cut if I ever populate the jumpers.
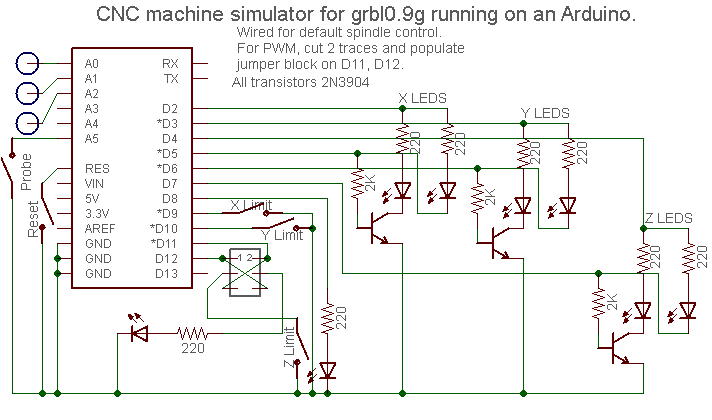 It was an interesting challenge to figure a simple way to decode step/direction for the LEDs, but I think the 3 transistors are about as simple as it gets. Yeah, if I’d used MOSFETs I could have saved 3 resistors, but I didn’t have any on hand.
The first application of the emulator was to hack grbl to add the very slick “smart clamp” Z auto-touchoff like Carvey uses. It performed admirably for that task. (The implementation was a surprise: I expected to implement it in code in grbl, maybe triggered by a private M code. But it ended up just being some gcode in the $N ‘startup blocks’ grbl supports. The hack was just to support more blocks (I needed 5 instead of grbl’s normal 2) and ensure that they were not executed after a reset.) I even put the code in the W88 github repo, thanks to gentle browbeating from a couple 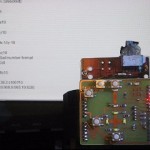 of other members.
Here’s a quick and dirty clip of it in action.
Overall, it’s a real success. But if I ever make another (unlikely), here’s what I’d add:
- 100K resistors from all 3 step lines, run to a common post for audio output.
- Easy access pins for both sides of the serial comms. I needed to sniff them a couple of times to see what was going on.
- Lay out / cut the board so the ICSP header is exposed. Since grbl overwrites the bootloader, I had to pull the shield off so I could burn a bootloader each time I wanted to load a new round of code.
Hi Jim,
Our team really likes this project and regarding this we have some inquiry. Kindly drop me a message on my business email add: smocorro.eeweb@gmail.com. I’ll be looking forward for your response.
Sardiah
Hi Sardiah,
Thanks for writing the emulator up for EEWeb. Here are the Eagle files for the board.
Jim