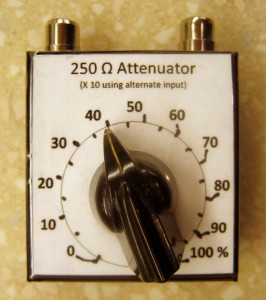
All I wanted to do was make some quantitative tests on the breadboarded AGC chip. I don’t have any calibrated audio equipment, so I thought it would be nice to have one calibrated attenuator. Nothing fancy – just a pot with a manually calibrated dial so I could apply say a fairly accurate 40mV signal. I eventually ended up with almost exactly what I wanted. But the path to it was long and full of yak fur.
So I started looking for a pot. Pretty low value so the load it was driving wouldn’t affect the accuracy much – maybe 100 Ω. Audio taper would be nice. And no trimmers – it needs a real shaft for a real knob. But the big jumbled box of pots collected over the years was a nightmare to search through. Too deep, and too many unmarked pots. So I dumped the box out and made a little circle of piles around where I was sitting (my standard sorting approach). And I had an ohmmeter and a Sharpie and measured and marked every unmarked part. There were a lot.
(OK, I like my dessert first, soI left the big mess on the floor while I selected a pot and made and calibrated the attenuator, only finally to come back to clean up.)
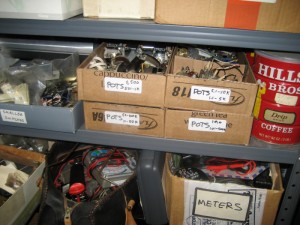
Now I had nice sorted piles of pots – 1K, 10K, 50K – what to do with them? I cut up some of the long narrow boxes I scrounge from work (from coffee packets) that fit perfectly on 12″ deep shelves, using the space very efficiently. I taped some dividers into them with packing tape, labeled them, and my pots had new homes!
By cutting the boxes in half, I have nice shallow storage that makes it easy to see what I have. I guess from a dimensionless view, the appropriate depth of a container to root around in is not more than twice the “size” of the objects it contains. That works as well for pots as for nuts and bolts.
Anyway, the shallow boxes stacked nicely in the spot the old too-deep box had been, taking up the same footprint, but with an order of magnitude better organization.
I found a little metal box for the pot, and working around the existing holes measured and drilled and made a home for the pot. I wanted it to look kind of nice, so I’d need a label for the top. Since I couldn’t find an audio taper, I wanted 10 marks around the circumference to show what percent of input the attenuator was giving. I knew for it to be fairly accurate I’d need to calibrate it by hand, but hand-written numbers were uglier than I hoped for.
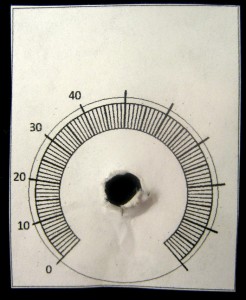
I found an old (white on black) dial plate with about the usual 230° rotation, scanned it, photoshopped it, and pasted the image into Word, where I made a bunch of text boxes for the numbers. The actual dial marks would be misleading, as they almost certainly wouldn’t line up with the manual calibration I would do. So I only used it to let me locate the text boxes in approximately the right places, then deleted or hid the image. I took too-great pains trying to get the numbers in the right place. The final calibration missed the numbers by a visible amount. But what I really cared about was accurate calibration, and the numbers were close enough to be obvious which hand-made mark they go with. In hindsight, I should have stuck a piece of paper on the box, done an initial calibration run marking the main points, then scanned that and used it to locate the text boxes with the numbers. I wonder if I’ll be clever enough to do it that way the next time. After calibrating it, I put a piece of 2″ clear packing tape over the whole thing to make it look shiny and stay cleaner.
The other tool I added to my audio test collection was an old Palm Treo phone. I’ve wanted an easy, reliable audio source on the bench for a long time. I have a cassette plus FM Walkman, but tapes are a hassle and FM reception isn’t great in the basement and the wall wart to power it is a nuisance.
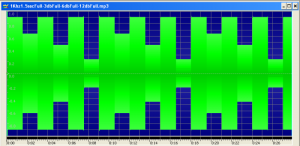
I’ve made several audio test signal MP3s, and they’re very helpful. I’m not willing to buy a dedicated MP3 player for the bench, so I scrounge old ones lying around. But it finally dawned on me that one of my old Palms would be happy to serve as a dedicated player. I considered writing a signal generator app for it (since the first couple I found were not free), but I can create MP3s with GoldWave to do about anything I want, and there’s more than enough storage for them on the Palm. So the “signal generator app” is just a playlist on the audio player app. Works for me.
I got burned the other day with some distortion I couldn’t track down. What I’m working on now is mono, and I was playing some music through it. I was using an adapter with a male 3.5mm stereo plug and one RCA jack to get audio from some MP3 player. It “combines” the two stereo channels by shorting them together. This is not a nice thing to do to the output amps in whatever is driving it, but since it was all mono (I thought) the two channels should be putting out the same signals, so it shouldn’t be too bad. Unfortunately, I was wrong, and the recording I was playing was indeed stereo, and with noticeably different program material on the two channels. That means the “fighting” output channels could indeed have introduced some distortion. Fine. Let’s make sure that doesn’t happen again.
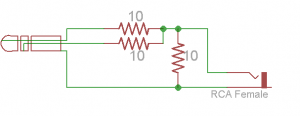
So I made up a “safe” adapter, with 10Ω in series with each lead, and 10 to ground, just to provide an earphone-like load. That’s guaranteed to not abuse headphone output sections or introduce any distortion from such abuse.
So a day and several yaks later, I have my attenuator, and maybe I can start to make progress on the recording preamp again.

