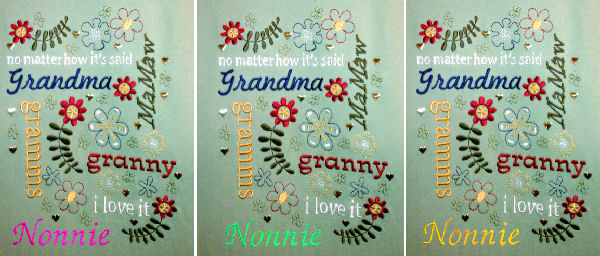
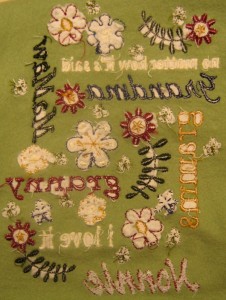
 Our second project was basically successful – and it’s done! That’s it on the right. Close friend and nutcase enthusiastic grandmother Nancy had a great sweatshirt with several variants of “grandmother” embroidered on it – but it didn’t include her preferred name: Nonnie. The layout conveniently had a suitable space for adding one more name – so we took advantage of it. I started by taking a picture of the original shirt. We sewed out a version of “Nonnie” using a font built into the machine, took a picture of that, and through the magic of digital editing created some pictures she could look at.
  She liked the font, so we brought the sewout to her for a closer look. She picked a color and we thought we were all set.
Second thoughts
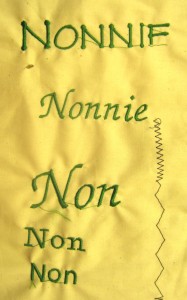
We sewed a sample on an old sweatshirt to practice with a garment like the target and a fabric like the target. We tried with and without a topper stabilizer, but didn’t like the results. The second from the bottom line still has some topper in the “o”. While it looked OK, the strokes of the font were scrawny compared to some of the really beautiful professionally stitched words on the original shirt. So we started looking for other fonts that were a little bolder. After sewing a few out on a scrap, we found one that looked promising,  downloaded it, loaded the letters into an embroidery editing program, and made a single design of the sequence of letters at the correct size. That’s what we ended up using on the shirt. We succeeded fully in having the strokes not look scrawny, and in fact overdid it. But having the most bold word on the shirt be hers isn’t a bad thing.
Gory Details: Stablizer
No embroidery discussion would be complete without a section on stabilizer 🙂 (The wrinkles on the scrap were because we didn’t bother wasting stabilizer for throwaway tests.) Since the shirt is likely to be worn next to skin, we wanted something soft, so we went with a water soluble stabilizer. It’s a pretty bold design, so any loss of precision with the weaker stabilizer wasn’t a problem. We also used a
water soluble topper to keep the stitches on top. Both washed away like magic. Better sewing through chemistry! (Well, really the solubility is a physical, rather than chemical property. So a more accurate statement would be – oh never mind.) We compared the softness of the apparently tear-away used in the original with the Nonnie, and were satisfied that we had kept the nice soft feel.
Gory Details: Hooping technique
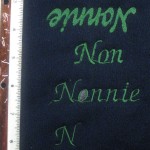
We learned a couple of critical tricks about hooping in the class from Alana at Fabrics Etc. One was to use the soft, rubbery, slightly sticky waffle texture stuff sold in rolls for drawer lining (and whatever else – like this) to keep the bottom hoop from skidding around on a hard surface table. Unfortunately, the class was after the project, so frustration with the skidding hoop had led me to hoop from the back side. That’s not a great idea from an alignment point of view. The second trick was to draw alignment lines on the fabric with a disappearing fabric marker so you could get the top hoop (and thus both hoops) square with the fabric so the pattern would be straight. I wasn’t clever enough to figure that one out on my own either – though it wouldn’t have helped as much while I was hooping from the back. The net result was that our design was slightly crooked. Not awful, but very clearly visible if you looked at it from 6″ away and put a ruler on the lower edges of the letters to get a line of reference. We’ll do better next time.
In addition to having to fight to get the really nice, thick sweatshirt material into the hoop, we had some “hoop burn” on the good side of the fabric from being crushed between the hoops. Fortunately it brushed out pretty well, but could have been a big embarrassment. We had been exposed to the idea of hooping only the stabilizer (maybe the first time we were buying stablizer) to avoid hoop burn, but everything was so new and the concept of not actually putting the material to be sewn into the hoop was so foreign that it didn’t stick. The idea was reinforced in the class when the setup screen of an Ellisimo (triple the price and features of our Ellure Plus) offered an option of a basting stitch around the pattern in case they were hooping only the stabilizer. I’ll try to keep that in mind.


