Well, that was informative. As Ziggy taught me to say back at Reuters, “The test is the test.”
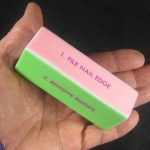 When Scott told me about keeping a nail buffer block on the bench to provide 4 grits of sandpaper in one convenient, easily replaced tool, I thought I’d try it. But after the 4-for-a-dollar Chinese cheapies arrived, they didn’t seem to do anything! Even the coarse side didn’t begin to do what even the fine side of an emery board did. I was convinced they’d just glued 4 colored pieces of paper to a nice foam block. OK, I could glue some real sandpaper to the nice block, but that’s not what I was trying to buy.
But just because my fingers couldn’t feel any grit (at all!) didn’t mean the blocks were a fraud. How could I test it? How about “sanding” a piece of polished acrylic with them? What about controls? Name-brand commercial products exist – and surely those aren’t frauds.
The test
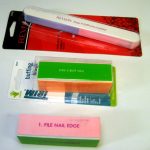 Armed with products from Revlon and Trim for comparison, I set up the test. Knowing I was going in with a strong bias, I tried to
 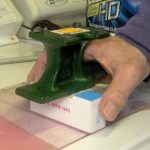 make it as objective as I could. I put a 22 oz anvil on the pad (with a bit of sticky waffle rubber between to reduce slipping), and tried hard to not apply any force normal to the plastic as I scrubbed. I
 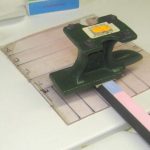 arbitrarily chose 16 strokes back and forth for each sample as a nice round number. Of course while the anvil provided constant force, it certainly didn’t provide the presumably more important constant pressure on the various
 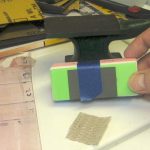 width and stiffness blocks. Oh, well. (Oops.)
I included some 1200 and some 2000 wet/dry sandpaper as well. I just taped some bits of those around a block for a comparable test.
Pictures
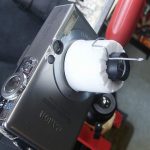 To take closeup pics of the scratches, I mounted some little short FL positive lens in a bottle cap that just lightly press fit over the lens on my usual camera. A bit of wire made a distance jig. A black background and
 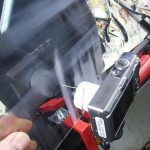 side lighting seemed to give about the best results. Unfortunately, auto-exposure can’t be turned off, so that tends to normalize the appearance of the pictures.
Being chinzy with the plastic cost a bit: Some of the Revlon scratches impinged on some of the foam block tests. Fortunately, they went a different direction, so when I took pictures I could try to exclude them.
Results
Short answer: I was completely wrong. The 4 sides of the cheapie blocks clearly scratched the plastic, and in 4 graded ways. And within the eyeball-quality results, their gradations were about the same as the 4 sides of the comparable Trim product. The Revlon board included a side (black) that actually felt like an emery board (plus another medium grit white side), so those were in a different league from the Chinese (and Trim) “polishing” blocks. In all cases, the #1 side was most coarse, #4 smoothest.
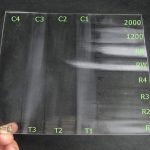 Here’s the whole piece of plastic after the tests, marked for the blocks/sides used. Overall fairly successful, though in hindsight I could have reduced the number of scrubs to 10 or 8.
Hmm – there’s a strong and repeatable artifact that grits 1 and 3 scratch more than 2 and 4, for both the Chinese and the Trim blocks. Both 1s/3s are on the narrower sides of the blocks. I’d have to guess we were seeing an effect of higher force/unit area on those smaller sides. The Revlon block is more square in cross section, and doesn’t show that effect. Interesting. Yeah, I could retest and mask the surfaces to fix that – but I got the results I was after, so I’m done.
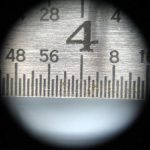
Here are the closeups, including a steel ruler for scale. Identical contrast post processing was done to each. Top to bottom, we have the cheapie, the Trim block, the 4 numbered sides of the Revlon board, and finally the white and black surfaces of the Revlon along with 1200 and 2000 actual sandpaper.


 The closeups aren’t as definitive as I’d hoped. But the result that the cheapie does in fact have 4 different (if fine!) abrasives is clear.
The test is the test.
