
When we first got the W88 laser cutter up and running, we scavenged the ancient circulation blower from the old, gutted in-wall furnace, took advantage of the 8″ flue/fresh air hole in the wall, and hacked a mounting to provide the exhaust for the laser. That (admittedly overkill) blower died around 3/14/16, about 6 months after we put it in. After an urgent discussion on Slack  about flow rates (FSE recommended 60-100 CFM), pressure drop, 8″ and 6″ duct booster fans, a marine ventilation blower, a big honker 110VAC muffin fan from American Science & Surplus, and other possibilities we decided on the sciplus fan. Daniil picked it up on the 15th, and we hacked it in that night. (Some upgrades are visible since the original picture: The vent pipe now runs thru the side of the furnace shell, the water cooling tank has moved inside the furnace, and there’s a power switch up where you can reach it!)
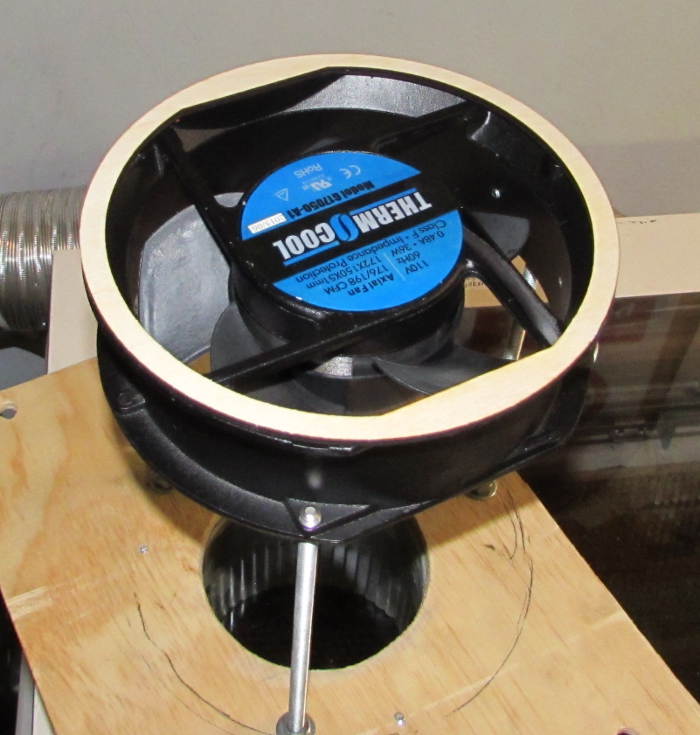
That fan (spec’d at 198 CFM, presumably in free air) (after removing a plastic mount for the electrical connection) fit inside the 8″ pipe perfectly. There’s maybe 1/8″ clearance around the edge. By installing it inside the pipe, we gained clearance for the 4″ flex pipe to bend to horizontal. In the original installation, it fed vertically into the blower. Tom M suggests that mounting the blower with its shaft vertical probably speeded its demise. It died of a bearing failure, and the bearings weren’t designed for that load. But it served us well getting the laser running – and it was free!
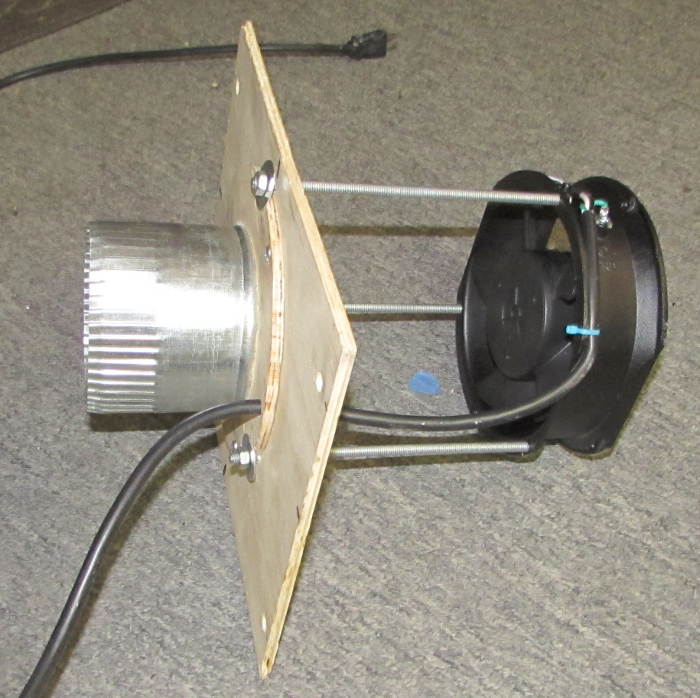 We reused the 4″ flange Daniil had hacked together as the inlet at the bottom of the old blower, screwing it to a plywood plate to mount it and to cover the hole to the 8″ pipe. We’d planned to mount the muffin fan directly to the back of that same plate, but the motor hub almost completely obscured the air flow from the 4″ inlet. We found some 1/4-20 threaded rod and tapped holes in the fan for it. (Thanks for bringing in the tap set, Daniil!) Setting the fan deep in the pipe provided what seemed like reasonable air path. A standard IEC power cord lost its C13 end and provided the power connection. The green wire is even connected to a threaded hole in the fan body!
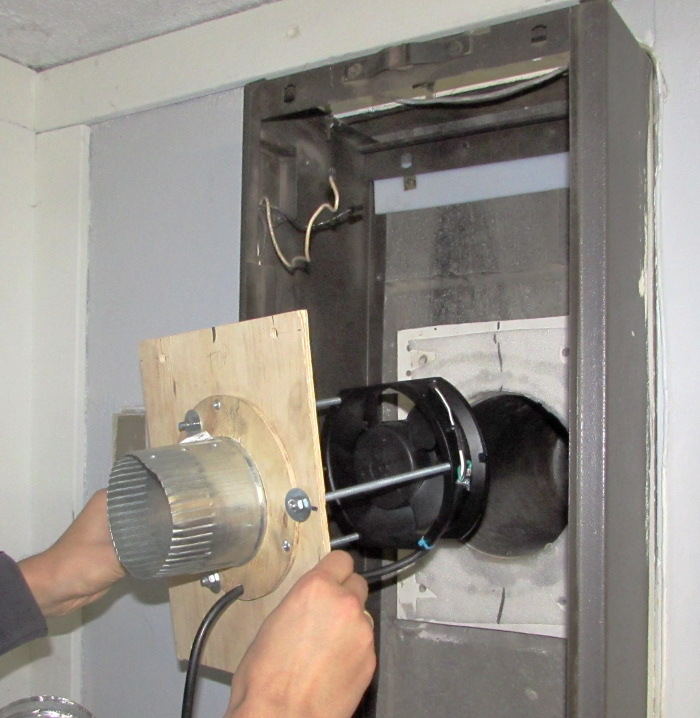 Here’s Daniil about to put it in place. We left the original wood plate that fit the 8″ pipe. The new plate mounts over it (with the foam gasket from the old blower still there) with the same long screws
 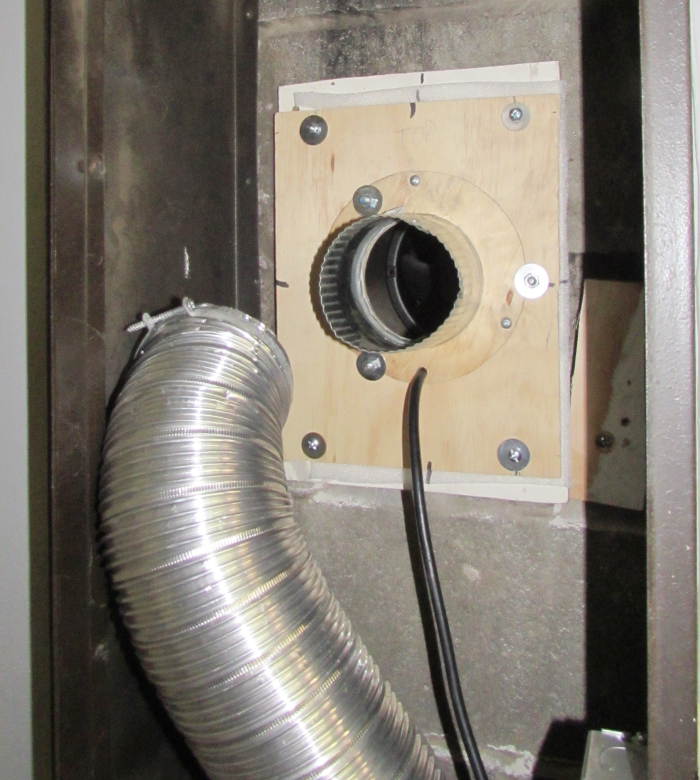 into anchors in the concrete block wall. It’s all quite solid, and we think it should serve for quite a while.
The only remaining work is to plug/cover up the holes resulting from the flats on the top and bottom of the fan. Expanding foam is a possibility, as is removing the fan, laser cutting a circular plate and screwing it to the exit surface of the fan.
 With it all buttoned up, the only clue that there’s actually a fan there is the power cord going into the plywood plate. It also runs MUCH more quietly than the old blower. While your can hear the whine of the fan spinning up if you listen, the reduced noise is an excellent reason to continue with plans to put an air vane flow sensor in the exhaust port of the laser cabinet.
All in all, it was a fun emergency repair project/hack, and very satisfying to get the laser back up within hours of deciding what parts to use!
 Update 3/18/16: Daniil and I stayed late after the meeting Thursday and made a ring to reduce the backflow/leakage around those two non-round areas of the fan. We pulled the fan, measured, did some quick artwork in inkscape, put the fan back in temporarily, and cut the ring from 3mm plywood without incident. Well – one incident: My artwork, on the laser PC, looked perfect in inkscape, but didn’t export as vector to RE. The design showed up – reversed B/W – in the raster view, but not in vector. Daniil did the same thing on his laptop and it worked fine. Troubling.
We feared that drilling the ring for screws would weaken it a lot, as half the width of the skinny ring material would be lost to the holes. He was for some mysterious and unvoiced reason uncomfortable with using zip ties to hold it on, so we decided to glue it on with some HF 5 minute epoxy. 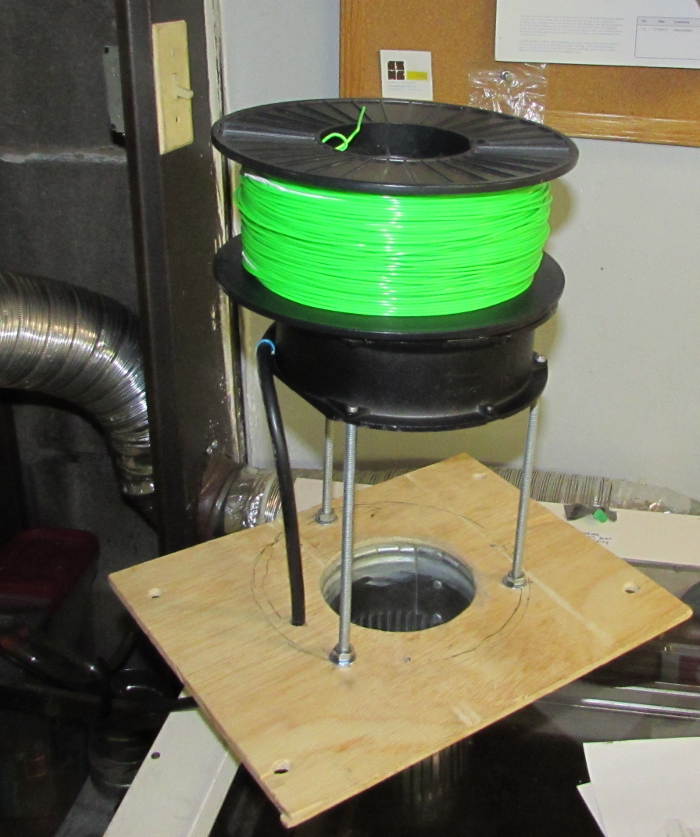 We found a very appropriately shaped weight to hold it while the epoxy cured. It’s all back in place now, looking from the outside exactly like it did before. But we know we picked up maybe 5% better airflow from the patched up leakage path.
Unrelated to the fan ring, I worked a lot that Thursday putting in 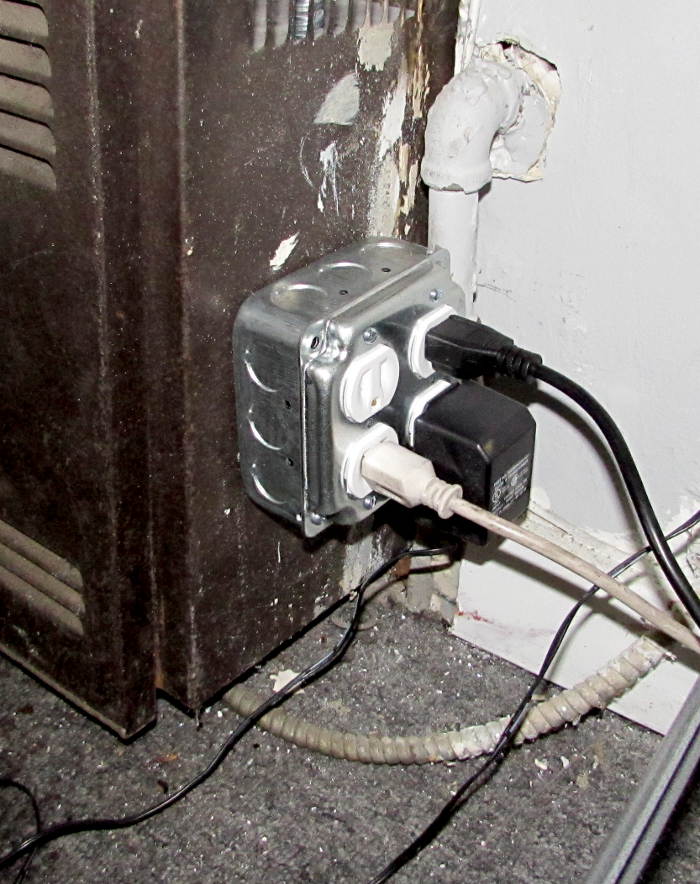 better AC power wiring for the whole laser setup. I scrounged some of the Greenfield apparently ripped out of the media room initial electrical rough in, and put 2 duplex
 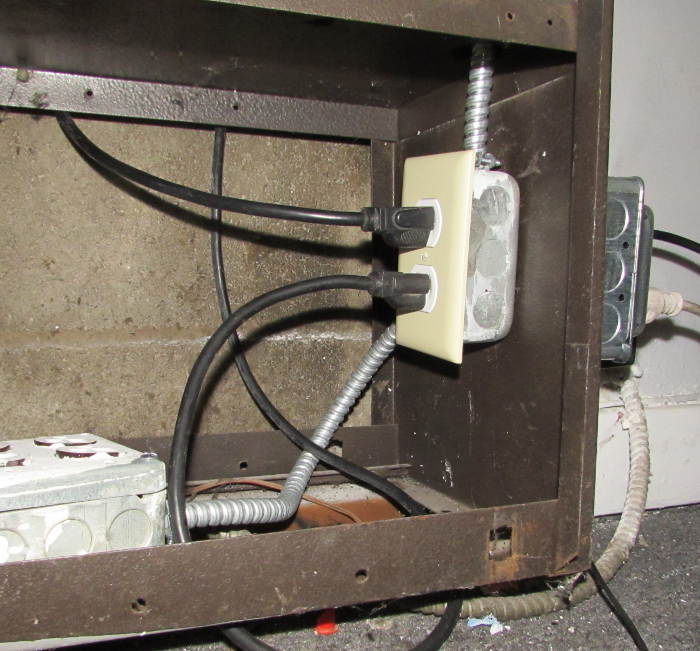 outlets outside and one inside the furnace shell, all powered from the original BX-connected box. I cut a hole in the side of the shell at a comfortable height
 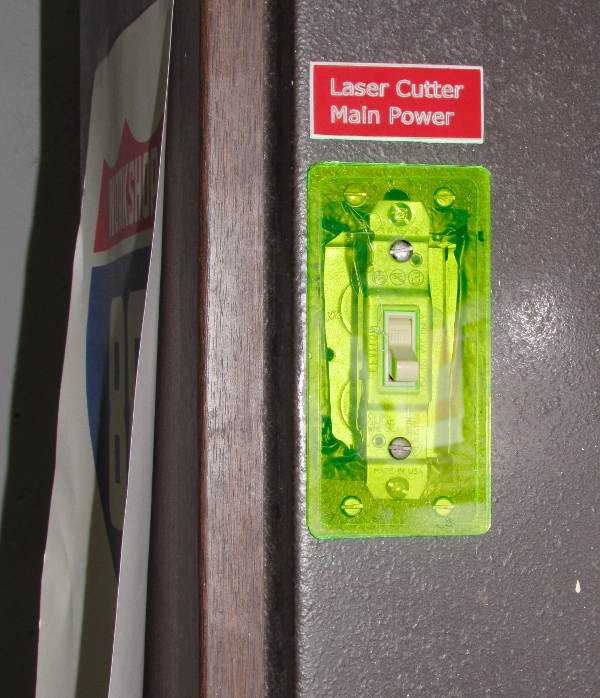 and put a in switch that controls all 6 outlets. It’s a little close to the edge for a normal switch plate, so I made a narrow one from fluorescent acrylic. The possibility of some UV LEDs has not been ruled out. The sign above it was vector engraved, as the artwork I made up in inkscape for that one imported as vector but not as raster. That remains troubling. But I’m delighted and relieved to have much more civilized power control for the laser. That was one of the last big punch list items to get the laser “production ready”. Maybe now I can go back and do some work on the Shapeoko 2!
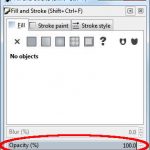 Update 4/29/16: I discovered the problem that caused my inkscape prints to Retina Engrave to work wrong: I had the “Opacity” set to less than 100%. Apparently RE doesn’t like that. It had become a default value, and all docs created since that happened were so corrupted. Changing the opacity back to 100% (and making sure it stuck as the default!) completely fixed the problem. Who knew?