One of the goals of this project has been to come up with a recipe for making the etchant from scratch without need for tuning steps like titration or specific gravity measurement. Just do these fairly painless steps and you’ll end up with a good batch that should run without touching it for a long time. I’m willing to to the experiments and the tuning measurements and corrections to make sure it works. Here’s a first attempt (corrected from an earlier version with bad data).
The approach is to use stranded copper wire, HCl and H2O2 as the initial oxidizer. The question has been how much H2O2 to use. Is it reasonable to put in enough to oxidize all the initial copper? Is it so unstable that you couldn’t put it all in at the beginning and would have to put it in in batches? Do you just put a little in to bootstrap the process and let the CuCl2 produced take over from there? Certainly near the end there will be enough CuCl2 to finish up, but would the concentration be so low at the beginning that it would take a very long time?
We also need air continuously bubbling through the mixture, both for mechanical agitation and to oxidize the CuCl to CuCl2. An aquarium pump, tubing, and air stone work well.
Our goal is to find how much of each reactant we need, with a little sanity checking on the amounts.
The basic chemistry
Unlike the reaction using CuCl2 which oxidizes the raw copper to Cu+, the basic initial copper oxidation reaction using H2O2 makes CuCl2 directly:
Cu + 2 HCl + H2O2 → CuCl2 + 2 H2O
If there isn’t enough H2O2 to completely oxidize all the copper (which is very much the case with our final recipe), whatever copper is left must be dissolved with CuCl2 – the same way boards are etched:
Cu + CuCl2 → 2 CuCl
A second reaction that will be occurring simultaneously and continuously is normal conversion of the CuCl to CuCl2 that happens during aeration:
4 CuCl + 4 HCl + O2 → 4 CuCl2 + 2 H2O
This takes a while, and will probably determine how long the whole etchant creation process takes.
OK – let’s shoot for 1 liter of finished etchant with 125-175 g/l Cu++ and ~2.5M acid content as may be inferred from the Seychell paper and the Chemcut paper. (local copies – original links dead)
Copper
From the target concentration of say 150g/l Cu++ we’ll need 150g of Cu. That’s 150/63.5=2.4 moles. With my earlier determination that #12 wire is ~9g/ft (consistent with the 28Kg/Km from a wire table), we’ll need about 16 ft of #12 wire. Stranded has more surface area, so that should dissolve faster. One down.
Acid
The Cl will come from the acid. To make one mole of CuCl2 we’ll need 2 x 35.5g = 71g Cl. For our 2.4 moles, we’ll need 2.4 x 71=170g. The pool acid I have is ~10M, or 10 x 35.5g=355g per liter. To get 170g of Cl, we’ll consume 0.5l of acid. Two down.
We also know we need to end up with a bath that’s ~2.5M. Starting with 10M acid, we need 0.25l of concentrated acid in a liter of solution to be 2.5M. If we add an additional 0.25l of acid to the initial soup that should cover it. So we’ll need a total of 0.75l of concentrated acid. Not much room left for peroxide! (We might consider adding at least some of that last 0.25l of acid at the end to reduce fuming early in the reaction.)
H2O2
Is it even feasible to put enough H2O2 into the starting solution to react with all the copper? From the original equation Cu + 2 HCl + H2O2 → CuCl2 + 2 H2O, we need 2.4 moles of H2O2 to react with our 2.4 moles of Cu.
The 3% peroxide is mostly water, so 1 l is 1000g. If 3% of that is H2O2, we have 30 g/l. With MW of 34, that’s about 0.9M. So to get our 2.4 moles, we’d need 2.6l of peroxide. No way! We only have 1 l for all the initial reactants, and we’ve already spent 0.75l on acid. We only have room for 0.25l – only 10% of what we need to react with all the copper. What to do?
If we don’t want to have to evaporate the solution down and don’t want to have to find higher concentration H2O2, about all we can do is run the reaction, burn through all the H2O2 and hope the resulting CuCl2 concentration is high enough to dissolve the rest of the copper in a reasonable amount of time. (The reaction would speed up over time as the concentration increased, but the continuous need for oxidation of CuCl to CuCl2 via aeration would probably limit the rate of the reaction.) If we put more H2O2 in, we could initially dissolve more copper, but that blows all the other calculations. We’d end up with more liquid, so our 150g Cu would give a lower concentration, and it would also put us below our target 2.5M acid concentration.
A quick check at Amazon found 4 oz of “35% food grade” H2O2 for $9 (plus shipping). That’s ~0.125l. Just to run the numbers: With a density of 1.13g/ml (looked up here), one liter of that stuff would be 1130g. If 35% of that were H2O2, that would be 395g, or with MW of 34, 11.6M. To get our 2.4moles, we’d need about 0.2l – ~two bottles. Wow – we do have room for that. I guess I’ll have to look for a local source.
So a very interesting race would be to run two batches, one with 0.25l of 3%, the other with 0.2l of 35% and see which one takes longer to finish.
So our first guess for the recipe (which might take a long time to run to completion):
16′ stripped #12 wire
750 ml 10M HCl
250 ml 3% H2O2 (250 ml of 6% should make it all go faster if you can find it)
WARNING! Don’t use the recipe below – at least not in one step! See the very unpleasant experiences in this post.
Or if we can find 35% H2O2:
16′ stripped #12 wire
750 ml 10M HCl
200 ml 35% H2O2
50 ml water
Reaction vessel
We need room for a liter of liquid, a place to put the wire, room for an air stone to make bubbles, and some headroom above the liquid. Metal containers are out. How about a 2l pop bottle with the top cut off?
It turns out splashing of etchant while bubbling is an issue. With air constantly being pumped in we obviously can’t have a sealed container, so we need a way to contain/redirect the tiny aerosol droplets.
One interesting mechanism is to put a funnel (plastic, of course, and larger diameter than the mouth of the container) loosely in the top of the container. Air can escape around the edges easily. The hole in the stem provides a fine way to run the air tube in. Droplets that hit the funnel and coalesce into larger drops will run down the outside of the funnel (and down the air hose) back into the bath – perfect!
To provide an additional level of protection, a disk of the clear plastic from clamshell packaging almost the inside diameter of the bottle supported maybe an inch above the top of the liquid should catch the great majority of droplets. Angling the disk would give the drops a preferred direction to drain off.
We still need a way to support the wire in the middle of the liquid so the air bubbles are constantly streaming past it. I had good luck previously with a little hammock or sling made out of the coarse plastic backing fabric used for counted cross stitch. It’s spent maybe 2 weeks in the acid so far making 2 batches of etchant, and seems still in fine shape.
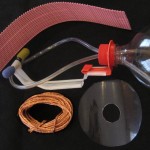 Here are the parts I came up with. I was pleased with making the “funnel” out of the top of a second bottle (so it would be big enough to not fall in). Its screw threads provide a great way to mount both a hanger for the sling that holds the copper and a hold-down for the air stones. (The yellow stone is stained from previous duty in my etch tank before being replaced with a bigger stone.)
The orange hook that holds the copper sling is cut from a heavy duty jug (HDPE ) from laundry detergent. A hole in it just fits the neck of the “funnel”, and the screw top holds it on. Heating it helped the bends stay how I want them.
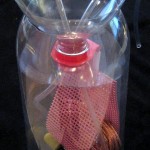 I heated and bent a piece of the coffee packet holder plastic I stocked up on from work to hold the air stones and fitted it to clamp to the orange piece. The clear circle “splash guard” (cut from the bottle that gave up its top for the funnel) also fits over the neck of the “funnel” and is also clamped in place by the screw top. Nothing magic about any of this – it was just from scrap I had on hand. Here’s the whole reaction vessel.
Air pump
So far I’ve used the cheapest air pump I could find, sized for 5-15 gal tanks. The last batch I made took a long time to aerate the CuCl to CuCl2, and I’m guessing more air would be better/faster. I hope it will make for more uniform and quicker etching, as well. So I got the next size up cheap air pump at Walmart – for 20-60 gal tanks. This Aqua Culture MK-1504 says it pumps up to 2800 cc/min.
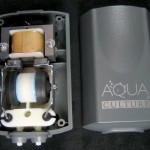 I was surprised when I opened it that it had two output nipples (mostly because I hadn’t looked at the picture on the box that showed that feature clearly). Okaaay – will I have to seal one off if I only want to use one? Putting fingers over the outputs while it was running indicated pressure on each side even if the other side was open. So it’s not just a tee on the inside. Are there really two pumps? <takes pump apart> Answer: yes. And that means if I want the full output of the pump, I’ll need to hook up both hoses. A couple of quickie tests with a stopwatch and inverted glasses in a sink full of water proved that and also showed even the small stones didn’t significantly decrease air flow. OK, I can deal with two hoses.
Using air stones makes lots of tiny bubbles to maximize the bubble surface area in hopes of efficient reaction. I’ve had trouble with the air stone not staying on the bottom where I want it. (I guess the “air” part won out over the “stone” part.) Heat from a propane torch made segments of a piece of the coffee holder plastic very floppy and easy to form into a crude hold-down for the two stones.
The question of how temperature affects the reaction is interesting. An aquarium heater (maybe with the thermostat hacked for higher temps) might be appropriate both for making the etchant and for faster etching, but I don’t have one yet. To be determined…
Show time!
The peroxide I had is more than a year old, I don’t know how fast it decomposes, I don’t have any way to test it, and I need all the strength I can get since I can only put in 1/10 as much as I’d like. I got a fresh bottle. (I have an idea for a yeast-based vaguely quantitative H2O2 test approach.)
The 16 feet of wire when stripped had a mass of 147.2g according to my cheap digital scale. Close enough to the 150g I was shooting for.
I don’t expect problems with the pop bottle, but prudence says a containment vessel just might save me from an unpleasant experience with a liter of acid on the floor. A cut down gallon HDPE jug should be fine.
A final test fitting of all the parts and I was ready to go. Peroxide in. Acid in. Smell those fumes! Lower the guts into the bottle. The slightly yellowish clear liquid started to turn green within seconds.
I took it down where the etching tank normally lives in the basement and connected and fired up the pump. In a minute or two the fumes were so strong it was clear this wasn’t a good plan. I took it outside (no bubbles) while I invented plan B.
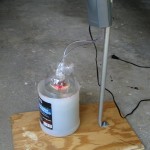 There’s no good place for it outside, so the garage is the next best place. I needed a way to hang the pump, and it would be convenient to have it all one piece so it could be moved easily. A scrap of 1/2″ EMT with the end squashed and a scrap of plywood quickly became the platform. Crude, but effective.
With the garage door open it should be fine. At night when both cars are inside, I’ll probably leave it just outside, at least for the first few days. The fumes should decrease as the chlorine gets locked up to the copper, and then I hope to leave it in with the cars and the door closed over night.
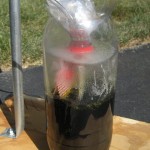 In the half hour or whatever it took to bolt the conduit to the plywood, the solution had turned very dark green (even without bubble agitation). Here it is boldly posing naked of its containment vessel. The baggie in the top is protection from fumes for a chunk of metal weighting the top down.
The bubbles are not at all the tiny ones I expected, and look much more like what would come out of raw tubing ends. I gingerly pulled the innards (all conveniently attached to the funnel top) out just enough to see the stones. They were both still there, and seemed to behave normally. Maybe there’s just so much air in the small space around the small stones that it coalesces into bigger bubbles before it gets to the surface. Too bad – that may slow down the CuCl -> CuCl2 processing.
Anyway, it’s off and running as of ~4PM 6/27. I’ll keep an eye on it and report from time to time.
Update 2:30P 6/28: The liquid is very dirty brown – it’s clearly in the “lots of cuprous” stage waiting for /throttled by aeration oxidation of Cu+ to Cu++ . Curious how much of the copper was gone, I gingerly lifted the guts – top funnel, splash disk, copper hanger, and air stones out of the outer bottle. When I put a drop of the liquid on a piece of white plastic, it looked like the 20g/l picture from Seychell’s white card test pictures.
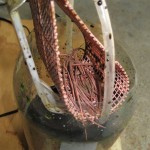 Ignoring the little incident of the wet splash disk (which is obviously smaller than the hole in the top of the bottle) snapping out at the very end and spraying fine droplets of acid in my face and eyes (mostly only the right eye), it was clear that quite a bit of the copper was gone. It’s hard to be very quantitative (especially with tears streaming out of one eye), but it looks like it’s more than half gone.
I watched as I lowered the stones back in, and there were clearly lots of bubbles from all over both of them. Maybe a pair of larger stones would spread the small bubbles out better. But overall the reaction is going well – maybe more quickly than I feared. Helping speed things along is that it’s hot out – 90F yesterday and near 100F today. That should be speedier than the ~70F in the basement for the previous batch, but I don’t know how much.
(Yes, I did go in and wash my face and flush my eye – even before I got the camera out.)
Update 7:30A 6/29: I was going to take a picture of the copper – but (as of about 40 hours into the reaction) it’s all gone! The white card test shows the bath is still 10-20 g/l Cu+ , but with the bigger pump, that should clear up fairly quickly. I’ll start checking it more frequently now.
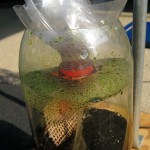 I think the splash disk is very effective at keeping the aerosol in check. Some still gets above the disk, as evidenced by droplets on the inside of the top of the bottle, but I’m sure a lot more would get up there without the disk. (I suspect the droplets are green despite coming from murky brown liquid below because their large surface area allows them to have their Cu+ oxidized quickly to Cu++ by exposure to air.)
Unfortunately, the disk is a significant pain to deal with. Since it’s considerably larger than the hole in the top of the bottle, it must be bent to get it in and to get it out. When it’s clean (like loading the stuff in the first time) that’s not a problem – the disk is pretty flexible, and squishing the bottle a little makes its opening oval to more easily accept the disk. But when you try to pull the innards out – whether to try to take a picture for documenting how much copper is left or at the end of the run when you’re taking it all apart, having a good-sized piece of springy plastic wet with dirty acid makes the job messy, if not dangerous.
I’m considering skipping the disk for the next batch. As an additional layer of protection against the aerosol, I think something like a cylindrical skirt of kleenex or paper towel say hanging down from the top of the funnel, long enough to touch the body of the bottle would help a lot. Another implementation would be a band wrapped around the waist at the top of the bottle, possibly cinched lightly with a string or barely stretched rubber band and touching both top of funnel and outside of bottle. Attaching it 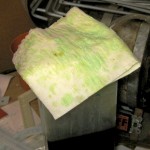 to the funnel would make it more convenient when taking the innards out for mid-reaction observation.
That idea comes from a kleenex I’ve been plopping loosely over the top of my etch tank for some time. While I have a splash guard in the top of the tank, the kleenex catches anything that gets past the guard. The green stains indicate that it must be catching stuff. Really simple, but I think it helps quite a bit.
Update 11:30A 6/29: Still dirty brown (10-20g/l Cu+ ). But in looking at it, if I slosh the liquid over the white plastic air stone hold-down, I can see the color pretty well without extracting a drop to put on a card. 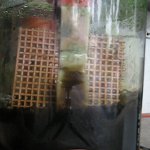 Here’s a little clip. This suggests that including a piece of white plastic near the outside of a clear etch bath container could provide a very simple way to observe the color of the solution for visually estimating the cuprous concentration (based on the white card photos).
Update 10:30A 6/30: It’s done! I think it’s a little lighter green than my current working batch, but I haven’t done specific gravity and acid concentration tests yet to verify that it’s all in range. 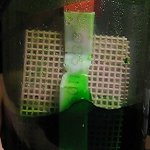 Again, here’s a little clip of the “slosh it over white plastic” test. I’m really pretty excited about the simple inclusion of a bit of white plastic providing a very serviceable way of telling when aeration is complete.
As a separate question, I wonder if bubbling all that air through the solution evaporates some of it. It seems plausible that the bubbles would end up pretty well saturated with whatever vapor the liquid gave off, and would carry that vapor away in the stream of air created by the burst bubbles.
If that is the case, there are two important implications:
a) A significant part of the decrease in volume of my etch bath I notice over time might be due to water loss from aeration. If that’s that case, I should be adding water to make up that part of the loss. (Certainly some of the loss is liquid droplets wetting the boards and board holders that is forever lost as I rinse those things off.)
b) Evaporating some the liquid in a new batch being made might be practical. Since I’m very short on volume to put enough (weak 3%) peroxide in, any evaporation I could get, either as a byproduct of the aeration needed to make the bath or in additional aeration after the solution turns clear green would give me room for more peroxide, speeding up the first phase of the reaction. (Hmm – I suppose if I have to add a step to the recipe to aerate for several additional days to reduce the volume of liquid down to the target, the benefit of “getting to green” quicker by means of the extra peroxide doesn’t help much.)
In any event, I should run a test – probably just with water – to see what the rate of loss is due to aeration. I’d guess it will be pump and ambient humidity dependent.
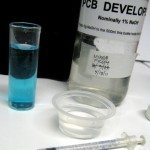
Update 7/21/12: Finally got around to testing that batch. I made up some 1.0 M NaOH,
saving 20 ml or so for this and future use and diluting the rest to 1% for PCB developer. I refound the nice 1 ml syringe I’d used before and used it to put one ml of the new etchant in ~25 ml hot water. Then I used it to slowly add the 1 M NaOH – stirring constantly – until it just started to be cloudy. It took 2.9 ml of NaOH, so the acid in the etchant was about 2.9 M. That’s a little higher than I expected, but completely acceptable.
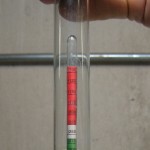 Using an automotive battery hydrometer and extrapolating past the calibrated scale, it looks like the specific gravity is ~1.31. That’s right around the optimum density according to Seychell’s observations.
Just for fun, after I pulled out the air stones etc I marked the level of etchant in the pop bottle reaction vessel. After I’d stored the etchant in another container, I filled the pop bottle to that mark. It took about 1.055 l. I wouldn’t have guessed I blew the initial liquid measurements by that much, though I suppose adding all that copper might have increased the volume a little. But it’s quite close.
Given all that, I’d have to say the recipe I used was a complete success!

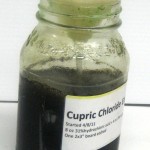
I’ll share my recipe – almost totally off the cuff. 1/3 3% peroxide, 2/3 31% Muratic both from Ace Hardware. Made a little more than a half liter in a square plastic tank which I keep in a polyethelene bucket in case it spills. There’s a photo on my wordpress page. First board etch with the fresh H2O2 went very fast < 3 minutes. Then I put in 2 feet of #6 stranded which seems to come within your Cu concentration guideline. Much of that dissolved in a few days, but needed air to finish. I bought the biggest aquarium pump at Meijers, I think it was <$15. Not so much for capacity but because it has dual air outlets. Made an X shaped arrangement with two T fittings and four air stones that are held in bottom of the tank with a plastic bracket. bubbled for maybe 8 hours and all the copper wire is gone and solution is deep green. Have done two more boards in there 3-4 minutes each. Need better air stone arrangement so bubbles are even across the target board. At your suggestion, bought a long air stone, sawed it in half and gluedin fittings. Have not tried that yet.
Thanks very much for that! Sounds like you have a good working setup.
I don’t think I’ve ever seen part of my 1 oz boards finish etching in less than 10 minutes, and usually another 10 (turning the board, etc) before it’s all done. I’m running mine at ambient basement temperature – maybe 70 deg. What temp are you running yours at?
We received the reply below from Patrick Mills, chem prof at Joliet Jr College. (Thanks for the connection, Andrew!)
—————————————————–
Most of this comes down to a comparison of reduction potentials (or a
league table of ‘who oxidizes who’), with the biggest potential
difference representing the most preferential reaction.
H2O2 + 2 H+ → 2 H2O: +1.78 V (most oxidizing)
O2 + 4 H+ → 2H2O: +1.23 V (bubbler reaction)
Cu+ → Cu: +0.52 V
Cu2+ → Cu: +0.34 V
Cu2+ → Cu+: +0.16 V (least oxidizing)
The experimental part may need some tweaking, but the following basic
science should apply:
Adding acidified H2O2 to copper metal should preferentially produce
Cu2+ (CuCl2) due to the largest difference in potentials:
H2O2 + 2 H+ + Cu → 2 H2O + Cu2+ (unbalanced)
Equimolar amounts of peroxide and Cu should get this done, but a light
excess of H2O2 / acid would ensure complete dissolution of the metal –
this is not what the author has for his first equation, but the end
result (combine the author’s first and second equations) essentially
gets to the same place…
Here’s the interesting part – the ‘bubbling reaction’ is simply a way
of ensuring all the Cu has been fully oxidized to Cu2+ – it’s
basically a cheaper way to finish the reaction (than using the more
expensive peroxide):
O2 + 4 H+ + Cu → 2H2O + Cu2+ (unbalanced)
What’s worth noting is that both processes require H+, so acid should
be used in great excess. Thus, I have the following cost effective
‘molar recipe’ (convert to masses and volumes as per the math in the
article):
1 mole Cu
0.5 mole H2O2
4+ mole HCl (this should be the excess reagent, peroxide limiting)
Bubble O2 until reaction is complete.
Note: Since peroxide is notoriously ‘weak’ when purchased, plus the
fact is easily ‘goes off’ when exposed to light ( 2 H2O2 →+ 2 H2O +
O2), I would recommend using less H2O2 and bubbling O2 through for
longer. This has the disadvantage of not producing a high Cu2+ conc.
quickly (i.e. etching slowly), but would be much more cost effective.
As usual, it seems to be a tradeoff between speed and cost…
Hope this helps,
Patrick
********************************
Dr. Patrick Mills
Department of Natural Sciences
Joliet Junior College
Professor of Chemistry
& JJC Anglers Club Advisor
Pingback: Making cupric chloride etchant – with 35% hydrogen peroxide! | Jim's Projects