
 I scored some 35% “food grade” H2O2! I tried a few local health food stores with no success, but finally found a link to places that sell it. I called Life Spring Health Food in Chicago and they had it – for $14.95/16 oz. Not cheap, but not terrible. (At 200 ml to make a liter of etchant, this is more than enough for two liters.) The drive into the city to get it was less than pleasant, but I came home with a nice cold bottle of it. (It should be stored in the refrigerator.) (See comment at end for 12%.)
I just tested the first recipe batch of etchant and freed up the “reaction vessel”, so I’m close to trying a batch with this oxidizer.
 I also ran across a wonderfully simple insulation slicing bulk wire stripper on YouTube. (Judging from the number of wire stripper clips, there must be quite a few people selling bare copper wire for the scrap value.)
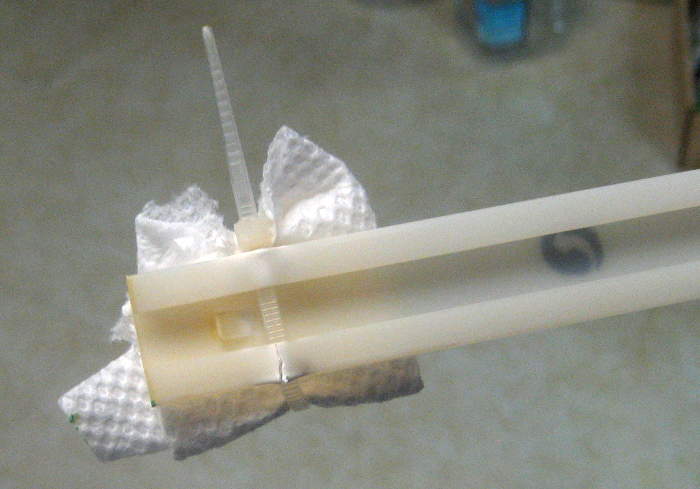
 OK – it took a couple of tries to get the alignment right, but it’s much better than my previous stripper because it’s trivial to adjust, and because the hole provides a much better guide for the wire than the V-groove in my old one. The sharp point on a drywall screw works quite well to slice the insulation. I haven’t stripped the 16′ of wire for this new batch yet, but I bet it will go very quickly.
Judging from how fast the first batch got green with just a little H2O2, I’ll be really interested in how fast this goes. Updates to follow!
Update 8/7/12:
DON’T DO THIS!
Updates to follow after I neutralize the acid and clean up.
Later: The recipe to make CuCl2 with drugstore 3% H2O2 is to put everything in a container, turn on the bubbles and check back every few days. That REALLY doesn’t work with 35% H2O2!
I used the reaction pop bottle, top funnel, copper holder and air stones from the last run (with 3% peroxide), but skipped the splash disk. To help contain the aerosol, I made a skirt of paper towel, folded to about 3″ wide, 3 layers thick, wrapped around the top edge of the funnel, secured to itself with a piece of duct tape. It just touched the shoulder of the bottle with the funnel in place. That’s the white looking top in the clip below.
I put 250 ml of (cold) 35% H2O2 into the bottle, and carefully added 750 ml of 10M HCl. Kind of yellowish, but it didn’t seem to do anything bad. I went to get the “containment vessel” – a cut down gallon HDPE jug – to take it outside, and in the minute or so I was gone the acid/peroxide had started bubbling very actively. Not boiling – just (I expect) H2O2 decomposing and giving off O2 .
 I hurried outside with it to get the copper in before I lost any more H2O2. Fortunately, I had set up a camera to record how quickly the solution became green. Unfortunately, I’d cheaped out and set it for pretty low res. Here’s what happened next:
 The boiling acid didn’t attack the PETE
  pop bottle, but it did soften it enough to deform under the (small!) weight of the top funnel/copper holder. The previously clean galvanized EMT that supported the air pump got substantially redecorated. (You can see it happen in the clip about 50 seconds in.)
The interesting good fortune was that Steve Finkelman of the Evanston Mini Maker Faire (and PS:1) had asked/required that I prepare a “safety kit” for my PCB etching demo there yesterday. I did my homework, and had prepared two bottles, each with about 3 moles of dry NaOH (lye from the hardware store) – just enough to neutralize the ~3 M acid in one liter of etchant. (I had two liters with me.) The bottles were still sitting around.
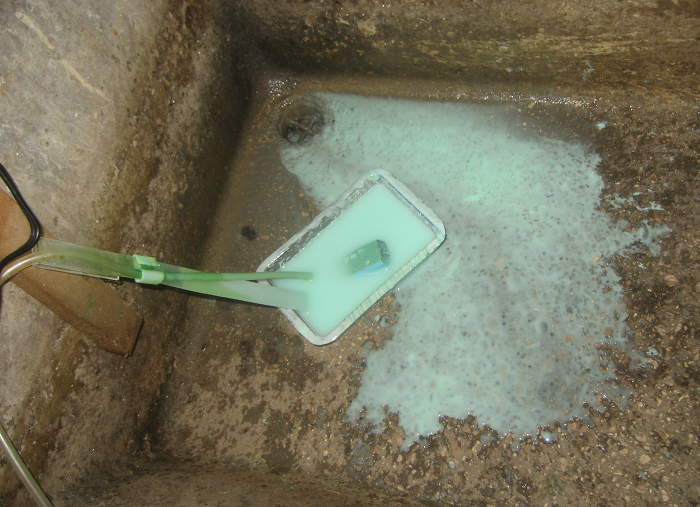
Doing a little quick math as the acid boiled, I figured the 750 ml of 10M acid was about 7.5 moles (actually a little less, since there was still some in the reaction container), and I had about 6 moles of NaOH in the two bottles. Close enough. I dumped the two bottles into a 5 gallon bucket and turned on the hose. The total amount of water didn’t really matter – the neutralization would happen mole for mole, whatever the concentration. I scooped and sloshed the NaOH solution all over (last half of the clip) and then hosed it all down some more.

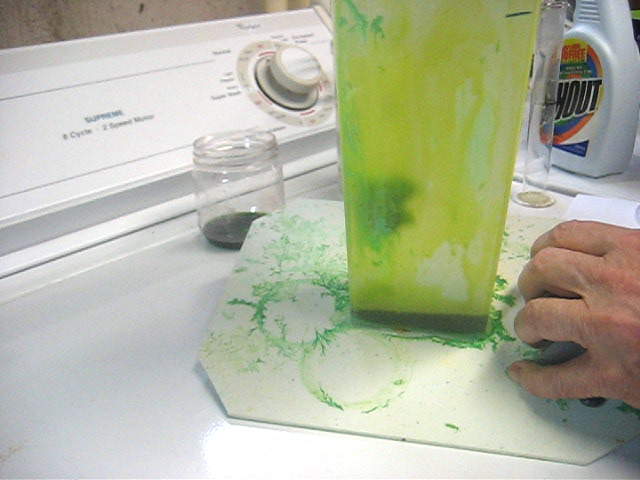
 The prettiest part was some almost fractal-looking patterns in whatever toxic sludge was pooling at the edge of the blacktop driveway. Other places it was blobby rather than spikey. Now stop taking pictures and hose this crap down to the street. And hose the sidewalk off well enough that somebody doesn’t come asking embarrassing questions about what happened.
 OK – so how much copper salt did I really end up dumping into the water table? I knew I started with almost exactly 150 g of copper (‘cuz that’s what the recipe called for). During the couple of minutes the copper was in the bath, about 70 g had dissolved. That’s all split between what soaked into my grass and what got washed down the sewer. I think I’d figured a typical PCB would have about 0.5 g copper etched off, so that’s around 140 boards’ worth of copper salts added to the water table. That’s probably approaching the number of boards I’ll etch in my life.
I guess that means I could have not ever bothered with the cupric chloride, used any other etchant, and just dumped the all the toxic remains down the drain with no net difference on the environmental damage I caused. Sobering. I wonder what the legal requirements are for reporting chemical spills. <googles…> Looks like the Reportable Quantity of even some of the nastiest substances is 1 pound (and up to 5000 lb for others). So at least they probably won’t be knocking on the door in the middle of the night. Good.
As for the recipe to make this wonderful etchant using high concentration peroxide, there clearly need to be steps to control the reaction rate – and the heat produced. Maybe running it in an ice bath and adding the peroxide just a little at a time? I was hoping the strong peroxide would get us past the user-unfriendly several days it takes the reaction to run with the drugstore stuff. Requiring an ice bath and the maker to come to add some more stuff to it once an hour for a couple of days isn’t much of an improvement!
When all was cleaned up, I had maybe 30 ml of ugly brown liquid in the bottom of the reaction bottle. It was probably acid and copper salts and couldn’t be dumped down the drain, and I didn’t want to deal with it, so I just put it in a bottle and set it aside.
While I still haven’t found any 6% peroxide, maybe I should dilute some of the 35% and try a run with 6% to compare overall time with the batch I made using 3%.
Guess I’ll have to think about it for a while. I have another 250 ml of 35% H2O2 (and lots of acid and wire), but after cleaning up today I’m not very anxious to try it again just yet.
 Update 9/17/12: One bit of fallout from the acid fountain is the grass immediately next to where most of the acid hit the ground. While it stayed green for days or maybe a couple of weeks, it eventually succumbed to the abuse. I’m not sure whether it was the PH change or the copper salts, but it’s in pretty sad shape.
Update 8/10/12: OK – second verse, same as the first – but with more math 🙂
Let’s try to get a handle on how much heat is given off in the reaction we’re trying to run, with the goal being designing a way we can run it fairly quickly while keeping things boring.
If we take the heat of formation (the heat absorbed (or if negative, given off) per mole to make a compound from its elements) of all the products of a reaction and subtract the heat of formation of all the initial reactants, we get how much heat is absorbed or given off. Here are the values of the compounds of interest:
HCl (aqueous): -167 kJ/mol
H2O (liquid): -286 kJ/mol
H2O2 : -188 kJ/mol
CuCl2 (aqueous): -172 kJ/mol
Cu: 0 kJ/mol – by definition
The reaction with peroxide as the oxidizer (with heats of formation) is
4 HCl + 2 Cu + 2 H2O2 -> 2 CuCl2 + 4 H2O
4*(-167) 2*0 2*(-188) 2*(-172) 4*(-286)
We end with -1488 kJ and start with -1044 kJ, so we have 444 kJ given off per 2 moles of Cu dissolved. For our 1 liter bath, we used 2.4 moles of Cu, so with our quantities, we get 533 kJ given off.
It takes about 4.2 kJ to heat 1 kg of water by 1 deg C. (That’s one “large” calorie.) Concentrated HCl (30% by this table) takes only about 2.6 kJ. Our 533 kJ would heat the acid about by 205 deg C. Since it started at ~25 deg C, that’s way more than would be needed to heat it to its boiling point of around 90 deg C. All of that essentially says that yes, we should have expected boiling acid (if we’d done the math).
Our 150 g Cu, with specific heat of .39 J/g, would take about 0.6 kJ to heat it one degree. Adding that to the acid’s 2.6 kJ/kg along with the fact that we only have ~0.75kg, we have a specific heat for all our initial reactants of ~2.6 kJ/deg C. As the 250 ml of H2O2 is added and reacted to water, it will add ~4.2*0.25= 1.05 kJ/deg C for a final specific heat of ~3.7 kJ/deg C.
We need to get rid of that 533 kJ and keep the reaction from going crazy. I’m thinking of a two-part approach:
– don’t allow so much heat to build up in the first place, by adding the H2O2 just a little at a time;
– take the excess heat away with an ice bath.
Now the heat of fusion of ice (energy needed to melt from ice at 0 deg C to water at 0 deg C) is 334 J/g, or 334 kJ/kg. So our 533 kJ would melt 533/334= 1.6 kg of ice. That’s a manageable amount. So I suggest that by adding the H2O2 a little at a time, keeping the reactant bottle in an ice bath, monitoring the temperature and allowing it to cool before adding more H2O2 , we could control the reaction fairly well.
What’s “a little at a time”? Let’s say we didn’t want the temperature to rise to more than arbitrarily 75 deg C, and let’s use our reactants’ effective specific heat of 2.6 kJ/deg C for the acid plus copper. Starting at say 25 deg C, we can let it heat up by 50 deg C. To heat our reactants by 50 deg C takes 50*2.6=130 kJ. (More as the H2O2 is added.) If our whole 250 ml H2O2 produces 533 kJ, adding it in 4 doses would keep us down to ~133 kJ per dose. Close enough.
Specifically: Put the copper along with a thermometer into 750 ml of concentrated acid in a 2 l pop bottle, and put the pop bottle in an ice bath with at least 1.6 kg ice available. Add the H2O2 (carefully!) 60 ml at a time, waiting for the temperature to drop back to around 25 deg C before adding the next dose. And do it outside. Sounds like a plan. Not a great plan considering the goal of a simple-to-implement recipe, but at least one that probably won’t get us into trouble. Next step is to try it.
Update 8/10/12: The cut down 2 liter bottle I used for the acid fountain is pretty  misshapen, but it’s about the only clear bottle I
  have, so I reused it for this more reasoned experiment. I didn’t expect to need aeration, so a simple holder for the copper hammock was all it needed this time. I added some new copper to the remains from last time to get back to 150g.
 With all the stuff laid out outside (I wasn’t even going to put the acid in indoors this time), the copper already in the bottle and the camera set for higher res than last time, I got under way.
I got good videos of each of the four additions of peroxide, but they were too boring to include. Boring is good.

 The addition of the first 60 ml of peroxide started to turn the solution green immediately. After maybe 10 seconds, it started to bubble vigorously, but not dangerously. The temperature had gone from 25 to about 50 C at this frame capture. It got up to around 85 C by the time it settled down maybe 2.5 minutes after the peroxide went in. I put it in an ice bath then to cool it down for the next round. All those bubble cost oxygen from the H2O2. Looks like even the 60ml was too much.

 Each successive addition of 50-60 ml of peroxide produced less vigorous bubbling. I checked the temperature a lot waiting for it to cool back to around 25C to do the next round. Here’s what’s left of the copper after the second peroxide dose.
 After the second round there was apparently enough CuCl2 to significantly attack the remaining copper during the maybe 5 minutes while it cooled from a peak around 70 C to baseline 25 C. This frame capture shows that there was a lot of (brown) cuprous there. Very interestingly, the next addition of peroxide cleared up the brown – oxidized the cuprous to cupric – nearly instantly. Not surprising that a strong oxidizer would do that, but to a guy whose reaction would be “Ugh – look how brown it is. Better turn on the air pump and come back and check on it in a couple of hours!”, it was an amazing transformation.
Aside from the instant brown->green changes, the third and fourth peroxide doses were uneventful, with almost no bubbling on the last one. I think the peroxide decomposition is very temperature dependent, being much faster at higher temps. Since the decomposition is exothermic, it can become unstable. I suspect strongly that was part of the show last time. That probably argues that (especially early on) it would be good to start with cold acid to minimize the wasteful loss of peroxide due to decomposition.
The copper was almost all gone after the bubbles settled after the final peroxide addition. At that point I put an air stone in to provide agitation, rigged a very crude splash guard for the misshapen bottle mouth from a little plastic box, and let it bubble for a couple of hours to dissolve the last of the copper. It took another 10 hours or so (this time after transferring it to my regular tall etch/aeration tank) to clear the brown to green.
Overall it worked, but it felt a lot more like doing a chemistry experiment than following steps to make something useful. I think the approach could be further improved – perhaps by starting at lower temperatures and adding the peroxide in smaller quantities to keep the temperature down so the peroxide has time to react with the copper instead of decomposing uselessly. But that’s so much of a hassle I don’t know if it’s worth trying.
After everything was cleaned up and aerating, I came across the bottle of left over crud from the first 35% peroxide fiasco. Thinking about it, there shouldn’t have been anything in there but acid and copper, so the ugly brown was almost certainly just cuprous chloride. I work with this stuff (now) and know what to do with a jar of acid with cuprous chloride in it: You bubble air through it until it turns green. So I did, and it did. I haven’t checked its acidity and specific gravity yet, but I expect it’s pretty much just a little more usable etchant.
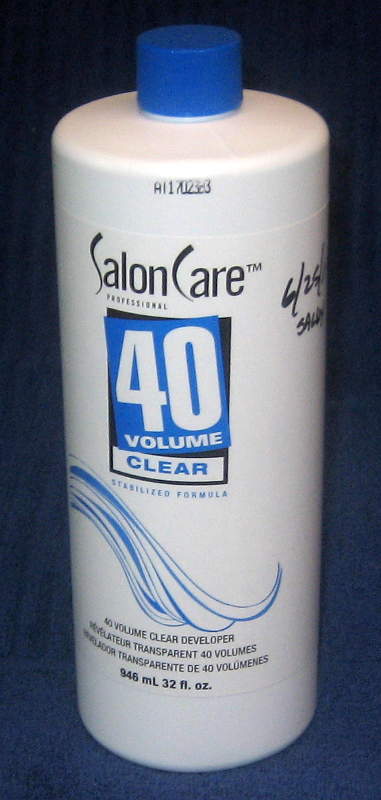 Update 6/25/17: I found a good source for 12% H2O2: Sally Beauty sells a 32 oz bottle of 40 volume “clear” developer for about $5. I got a bottle just to verify that they weren’t going to give me grief for not being licensed or something. No problem.
I don’t have the math for a recipe (yet), but this should be a fine starting point, and I’ll use it for my next batch. Of course we still need to be quite concerned about heat.
As a more general comment, I’m still using what I made up a few years ago as my standard every-day (OK, every few weeks) etchant. No adjustments – just seems to work fine. It actually works as designed!
Conclusions
This section is the beginning of a full summary, and will probably be moved to the top of some post.
The goal and initial experiments
The goal was a simple recipe that would allow anyone to make cupric chloride etchant using easily available materials and with minimum effort and high probability of success.
The initial quantitative chemistry led to the realization that we couldn’t make a recipe using “drugstore” 3% H2O2 that would react with all the copper using the quick, clean H2O2 as oxidizer. The reaction would have to proceed in two phases: one making as much CuCl2 as the limited H2O2 would allow, then using that CuCl2 to dissolve the rest of the copper. That second phase was slow – several days – for two reasons:
– limited H2O2 only let us get ~10% as much CuCl2 initially as we would have liked;
– the second phase was throttled by first making cuprous chloride, then oxidizing that to cupric by bubbling air through it. But the reaction would eventually finish, and produced good etchant. This is a viable recipe.
Using a slightly higher concentration of H2O2 (like 6%) should help by making more CuCl2 in the first phase. (Note that I haven’t tested the process using 6% H2O2.) That reduces the amount of copper we need to process in the second phase, speeding completion. It would seem like having a higher concentration of CuCl2 would also further increase the rate of the second phase because we’d start with more CuCl2. But I doubt whether the higher concentration helps much: I suspect we rapidly reach saturation of cuprous and are throttled by the rate our aeration can oxidize that Cu+ to Cu++.
That argues that to get “done” more quickly we should maximize the aeration oxidation. More air should help, as should smaller bubbles (more surface area), a taller skinnier container so the bubbles contact more liquid, and probably running at higher temperature. Those make sense, but are untested.
The long reaction time using 3% peroxide led to the idea of using sufficiently concentrated H2O2 that we could react with all the copper in the first phase, substantially reducing the time it takes to finish. The quantitative math says that we could put enough 35% H2O2 in to react with all the copper. But using the simplistic approach that worked fine with drugstore H2O2 of dumping all the reactants in a container and letting them react DOES NOT work with 35% H2O2. The reactions are highly exothermic and quickly destroy the peroxide, if not the whole reaction vessel.
A more complex methodology using an ice bath to control the temperature and adding the 35% peroxide in small quantities works, but requires a fair amount of effort and isn’t really in line with the goal of a simple recipe.
Lessons learned along the way to the recipe
Bubbles If you’re going to be using this etchant, you absolutely will need some kind of aeration setup. An aquarium pump and air stone work fine. As soon as you etch anything, your solution will turn brown with cuprous chloride and you’ll have to aerate it to get it back to green. Turning the air on, walking away, and expecting to come back hours later to pretty green etchant is such an ordinary part of the rhythm of using this stuff that including that step in the recipe for making the etchant is completely not a big deal.
And since you have to have a bubbler, it’s really convenient that those same bubbles are a great way to provide mechanical agitation to make the process of etching boards quicker and more uniform. A free win!
35% peroxide This is interesting stuff. It’s great that it makes it possible to dissolve a lot of copper fairly quickly to make new etchant. But along with it come two problems, both related to heat:
– Since it reacts so quickly with copper in a very exothermic reaction, using it releases a lot of heat very quickly into your under-construction etchant. You MUST take this into account (and get rid of some heat!) when making new etchant with it.
– It decomposes into water and oxygen in a reaction that occurs more and more quickly as temperature goes up, and is also very exothermic. That means once the temperature is high enough for it to start decomposing (evidenced by bubbles), the decomposition heats the solution even more, causing even more rapid decomposition. When this happens, the oxidizing power you paid for in buying the 35% stuff and on which you are counting to dissolve the copper is literally going up in smoke before your eyes. (OK, going up in a colorless gas.) You really don’t want this to happen. How do you prevent it? Keep the solution cool!
After the cupric chloride concentration has built up a bit, you’ll have a fair amount of cuprous chloride built up while you’re waiting for it to cool down after adding some H2O2. The next dose of H2O2 will go in part to oxidizing the cuprous, allowing you to use a larger dose.
Worry about heat! Doing the quantitative math of how many moles of this you need to make a mole of that is a great starting point, and gives you good answers about how much of each reactant you need to start with.
But with exothermic reactions like these, you really also have to do the rest of the math to figure out how much heat is given off. And if you didn’t bother to find out whether the reactions are exothermic, that’s your fault! I was VERY lucky there was no more damage (or injury) than there was when I stupidly ignored this rule.
Recommendations
Unless you really need the etchant today, I’d just go with the 3% peroxide and live with the fact that it will take several days to complete. If you can find 6%, that’s probably fine (but that’s not verified) and will finish up sooner. Here’s the recipe to make 1 liter:
– 16.5′ 12 gauge stranded copper wire (stripped)
– 750 ml 30% muriatic acid
– 250 ml 3% hydrogen peroxide
Put it all in a reaction container with the copper suspended above an air stone and a splash guard at the top. Turn on the air and leave it on. It should live outside for the first couple of days – the initial fumes are bad. It will start out light green, but quickly become muddy brown and stay that way. It’s done when it’s a deep, clear, pretty green. It will take several days.
If you’re into instant gratification and insist on using 35% peroxide, here are some suggestions.
– Use the recipe above, but use at least 200 ml of 35% H2O2. If you use less than 250 ml of peroxide, make up the difference with water.
– Keep the container you’re making the etchant in in an ice bath to control the temperature.
– Add the peroxide in small doses, letting it cool between doses.
– Do it outside! The fumes are very bad, especially at the beginning.
– Here are the tradeoffs: You want to use as much peroxide in each dose as possible so you can be done sooner. But if you use so much that it gets hot enough to decompose (bubble significantly), you waste peroxide and will have to finish up the last of the copper with the much slower CuCl2/air method. You don’t want to wait long between doses so you can be done sooner. But waiting longer so the temperature drops more will let you put a little more peroxide in before it gets “too hot” and begins to decompose. (Or at least gives you a little more temperature headroom.)
– If I were going to do it again (with 1 l as the target) I’d start with 25 ml H2O2 each time. You can increase the amount per dose as the process progresses, especially if there’s a lot of cuprous present.
– It seems like if you used small enough doses to not raise the temperature to where the peroxide decomposes significantly, and waited long enough for it to cool back to room temp between doses, you might be able to get away without an ice bath. A fan should help. But it would require a LOT of hand-holding over quite a long period of time.
– You’ll need mechanical agitation to dissolve the copper efficiently. Air bubbles are fine for this, but make it really hard to see when the peroxide starts to bubble. Turning the air off when you add each dose of peroxide seems like a good idea.
– 250 ml of 35% should be a small excess, so if you keep from wasting it via decomposition, you should be able to get rid of all the copper without having to resort to letting the CuCl2 and air finish it up. The more you lose to bubbling, the more you’ll have to make up with the slow CuCl2/air at the end.
– In any event, once all the copper’s gone and it’s deep, clear green, it’s ready to go.
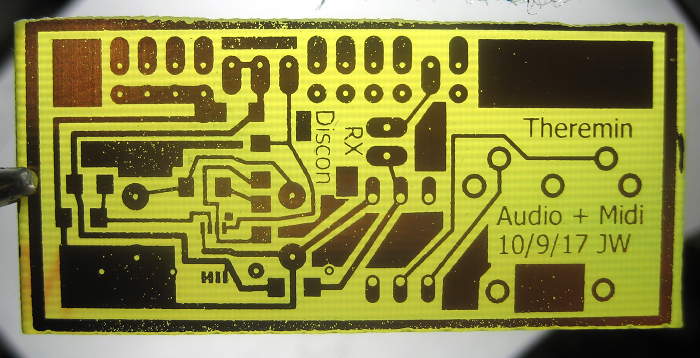
Update 10/9/17: This isn’t relevant to the strong H2O2 thread, but this is the latest post, and I didn’t know where else to put it.
I’ve noticed that the tank looked milky for probably a few weeks, but since I hadn’t etched any boards in that time, didn’t look closely. I tried to etch a small board today, and it was bad.
The bubbles from the aerator didn’t pop like they usually do, but grew and rose in the tank. After 30 or 60 seconds would have overflowed the tank. (Sorry no pics.) The liquid (and inside surfaces of the tank) were cloudy light green. My guess is that it was Cu(OH)2, probably because the acid concentration had dropped below some critical threshold.
 I pulled the board and holder out and rinsed them off in the sink. 🙁 I tried to decant the liquid without getting too much of the precipitate. When I pulled the air stone out, it was heavily covered in the light green mush. I started to rinse it out, and got a big wash of cloudy green in the sink.
Considering the possibility of acid depletion, I poured a very small portion (2 ml?) of the now very cloudy goo out into a small container, and added 5 drops of the 10M HCl I still had left from making the etchant. It mostly cleared up to the good old beautiful clear green I’ve come 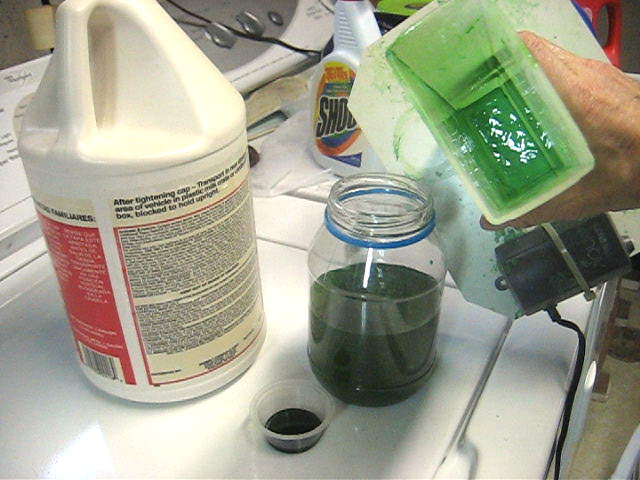 to know and love. Encouraged, I poured 50ml of the acid into the mess in the bottom of the tank. It got a lot better, but as I stirred with a plastic stick (coffee pack holder from work), there was still a lot of precipitate in the bottom. I poured the mostly clear liquid out, and put another 50ml of acid it. The precipitate diminished until about gone. I poured another 50ml of acid into the big jar with the early not-too-ugly liquid, and some residual cloudiness disappeared.
 I swabbed the inside surfaces of the tank with the last 50ml addition, and it cleaned up nicely. I saved that last 50ml and (sigh) washed out the tank and its badly dirtied base. I scraped most of the bright green crystallized dried deposits off and into the etchant. I poured all the etchant back into the tank, and it was once again beautiful clear green. I guess I really should do a density test on it, and be more watchful of dropping acid levels. For the record, I added a total of either 150 or 200ml of 10M acid (sorry!).
 I put the board and holder back in, and when I fired up the air stone, the bubbles broke close to the surface like they always had. I let it etch for about normal time. It came out fairly OK, but there were a lot of pinholes I almost never see. The text, which is often a good indicator (I think) of over etching (it gets skinnier) was only a little thinned. Thoughts that the etchant is much more potent than previously weren’t supported by that. There was also an issue with the ink jet printed artwork (!?$# Epson lost my custom settings!). I have noticed that it was taking longer than I remembered to etch boards over the past few years.
Anyway, everything is nice and clean again (though I do clean it every few years), and I think the etchant is up to par again.
Ran into your blog via a link at instructables.com.
First, I want to thank you for working through and posting this info.
Hopefully I can contribute a small amount in appreciation.
I have been sourcing 40% hydrogen peroxide for years now in a place most people might not think to look; at least us nerd types.
Beauty supply stores.
Yep, they use it to process perms!
Ask for 40 volume hydrogen peroxide. In the Northwest US, it runs about $10/gal.
There’s a catch. Some places only sell to licensed beauticians. Some stores sell to the general public.
So, find the public outlets or buddy up to a local beautician and Bob’s your uncle.
Also, I’m not sure it’s food grade, but I doubt you’re thinking of drinking it. 😉
Again, thanks for doing what you do.
Looking forward to the update for this post!
Pingback: Making cupric chloride etchant from scratch | Jim's Projects
I necro this post, i know…
However, id like to comment on it, so yeah… 🙂
First: I am VERY happy nothing serious happend to you in your experiment with the high-percentage-H2O2 and the boiling acid. That video looks scary as hell!
8-0
I used the starter etchant (HCl + H2O2) since long time, but i just set up a batch of your slower formula. It should yield 2x 2dl (I make it in 2 batches. Too scared by the full ammount of fuming HCl in one place to be honest).
It turned brownish in minutes and is bubbling with the bubbler since 30mins.
The bottle is quite warm to the touch. Around 30°C i would say (Feeling. Not measured) and it is around 2-3°C outside…
Will check in the morning again.
And yes: It is placed outside, in a glassbottle (The airstone was just the diameter of the bottlethroat) and the splashguard is installed (A long, inverted cone willed with absorptive papertowel) . The bottle is in a big glass-jar (in case the bottle blreaks due to thermal stress) and all this sits in a plastic-crate (last line of defense). I also covered the crate with a small carpet (IKEA) intended to use in the bathroom… Serves as minimal drop-on-protection…
Thanks for the real in deep analysis in all your 9 posts about this experiment-series. I read them all and i think what i do now is more a longtime-experiment than the covering of a real need since i already had the etchant (starter) at hand. And since i always etched only 1-2 very small boards every month or months, i think that would have served me equally well. But the learning and information about the really interesting chemistry here is what drove me to the point where i wanted to try it out. 🙂
Thanks!
I’m really glad nothing worse happened as well. 🙂
I’m happy to share my experiments, but the real credit for in depth experiment and reporting goes to Adam Seychell.
Sounds like your setup is well on the way to making some good etchant. I’m a little surprised by how large the temperature rise is, but that probably means it will just finish more quickly. Your multi-level failsafe setup sounds quite sensible. If there are any rustable metal objects nearby/downwind, I’m sure they’ll fare much better with your carpet covering to catch any remaining aerosol.
I’ll be interested to hear how you make out with 200ml of etchant. My usual tank (the spaghetti box container) holds about a liter. If I do 2 small boards – maybe 2″ x 3″ – the second one takes noticeably longer to etch than the first from the etchant being temporarily partially exhausted. (And I lay out my boards with resist on unused areas just so the etchant won’t have to work so hard!)
I’m looking at making another tank (for our local hackerspace) but with the dimensions I was picturing (maybe 2x10x20cm) it’s well under a liter, and I’m concerned about the performance with so little etchant.
Thanks for your comments!
Jim