
We’ve had a lot of instances of water leaking into the basement from the fridge. This details the latest instance, with what I can recall of others. All the problems could be stopped dead by disconnecting the water line that feeds the icemaker and the thru-door water, but we use and like both features.
Main water line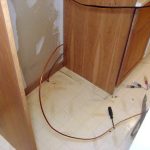
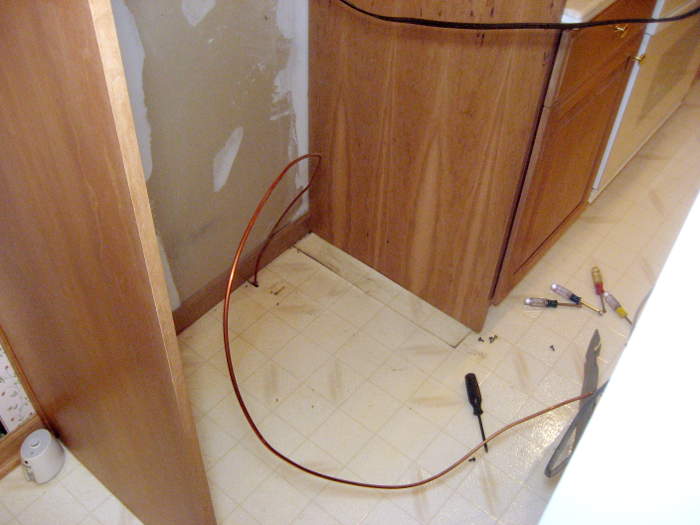
The first leak was when the plastic water line to the fridge failed maybe a year after it was installed ~1999. I might have replaced it with another new plastic line followed by another failure – not sure. But then I replaced it with copper, like the installer should have done in the first place. There’s even a sign on the back of the fridge that says DON’T USE PLASTIC WATER SUPPLY TUBING. IT WILL AGE AND LEAK. Too bad the installer ignored it. I left a generous loop in case we had to pull the fridge out again. Wise move.
Ice maker leaks
In February of this year (2017) there was a leak in the (factory) 1/4″ plastic line from the (outer more) solenoid where the copper line comes in to the icemaker. I think it was the second time the loop at the beginning of the run – right under the solenoid – had cracked. The poly tubing was fine for most of its run, but brittle right there by the solenoid.
I think I found enough slack in the line the first time to just cut it back and put it back into the nylon compression nut on the solenoid (date unknown). The second time (2/17), I replaced the lower couple of feet with new poly, and joined it to the original line with a 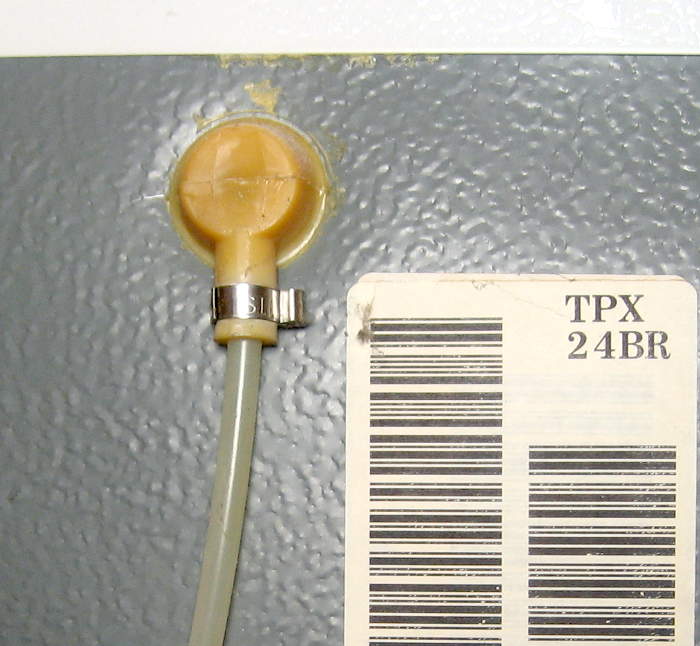 compression union in the middle of the back of the fridge. I would have replaced the whole tube, but it’s got a funny crimp connector at the top that I didn’t want to mess with. I even put a tag dating the repair on the union!
I was very surprised to find that forgotten tag when I pulled the fridge out for this latest leak just 8 months later. The failure was in exactly the same place: in the tight U-bend right after/below the solenoid. But how could brand new tubing fail that quickly?
I suspect the fridge has been running way hot for quite a while. I recall during the February repair that the fan was turning very slowly or would only turn if I gave it a good spin by hand. I fixed that, too (see below).
 For the icemaker tube leak, I decided to replace the bottom foot or so that gets hot with copper tubing. Unfortunately, both the 1/4″ IPT male threads on the plastic solenoid valve and its mating compression nut are plastic, and I’m not comfortable trying to get enough compression to seal copper.
 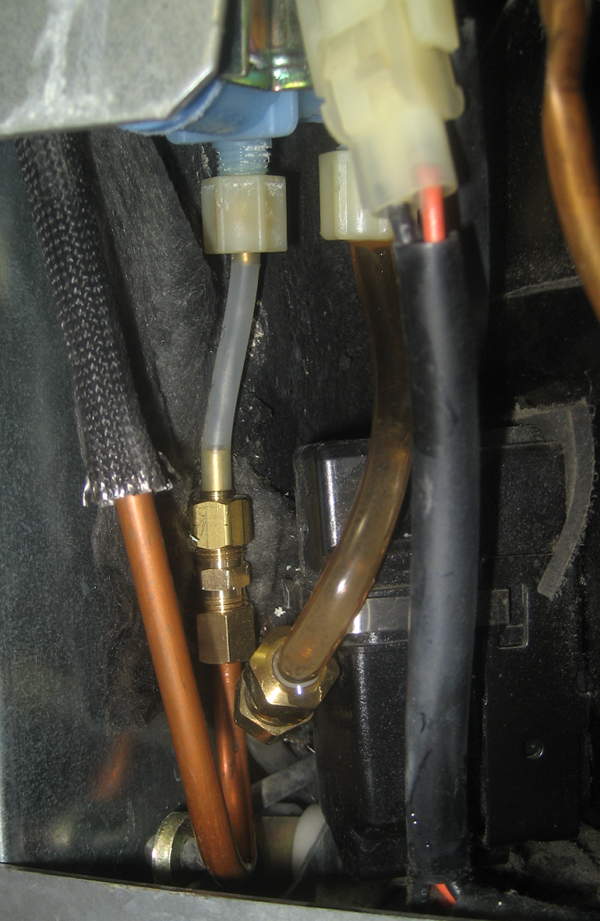 So I used a short run of new poly tubing from the valve to a compression union on the copper. That 3″ piece is essentially straight, with the U bend
 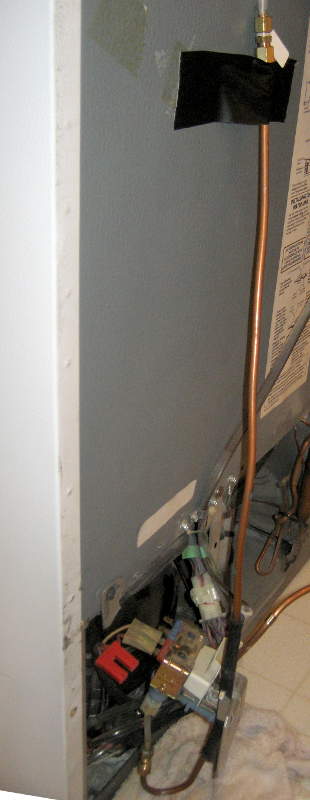 where the failures have all occurred made in copper. I’m hoping the reduced bending stress on that little piece of poly will let it survive for many more years. We’ll see. Here’s the whole copper part of the new icemaker run.
Cleaning the fan motor
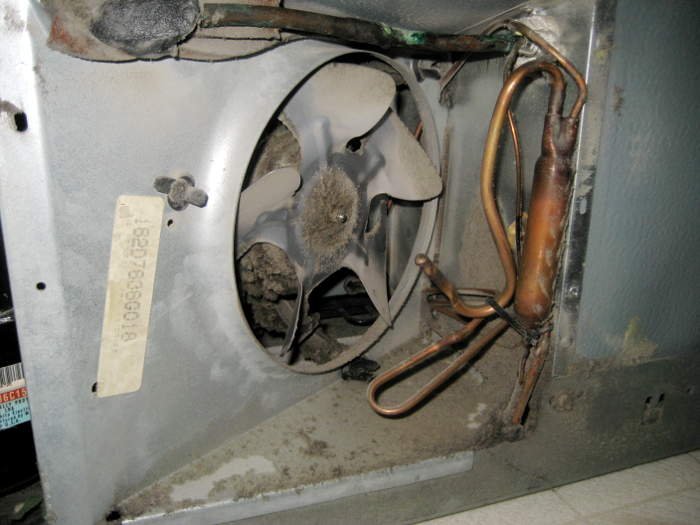 I really think the failures – especially the second one – were significantly accelerated by excessive heat. I doubt the fan has been working at all for the past months. I’m amazed the refrigeration even worked without the fan. The fan would turn if I spun it manually to get it started, but it was gummy and slow. Looking for the part (WR60X187) on eBay gives 2 families of hits: ones for ~$50 with a black wire pigtail, and ones for ~$140 with a 3 pin connector built in – like the one in the fridge has. I’m not willing to cut and splice wires even to save close to $100 when the right part is available.
But I wanted the fan to work now, and the fridge was pulled out, so I took it out to see if I could improve it. The motor looked almost monolithic in the videos, but when I had it in my hands, I could see it had aluminum caps pressed on both ends. It took angled blows  with a cold chisel to budge them, but once started they came off fairly easily.
  Sorry for no pics of the chisel technique.
The back (away from the fan) had a lot of felt pads. The shaft was held in with a spring nut. I brute forced it off, hoping to be able to remove the armature, but even with the nut off it didn’t come apart. Given that hindsight, I should never have messed with the nut, though its removal did allow the shaft to move farther, which helped clean the old lube out.
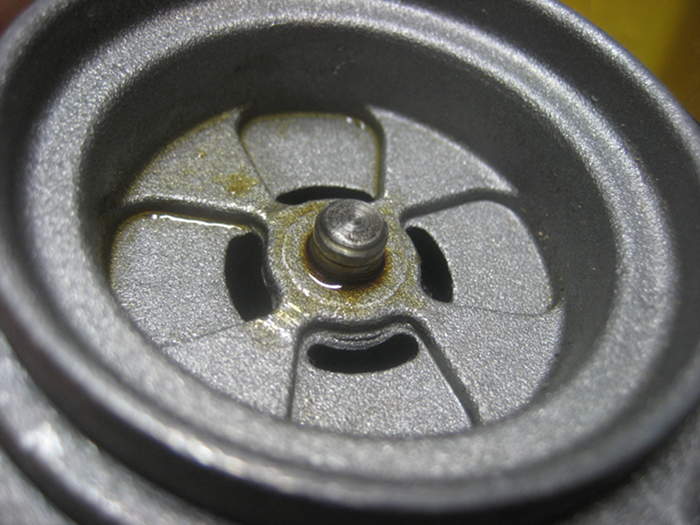 I started with normal machine oil, and did a combo of spinning and sliding the shaft in and out, hoping to “pump” old gunk out. After a little work, I did 2 or 3 applications of Tri-Flow. While its main benefit is suspended teflon, the base is still a light oil. That seemed to help a lot in loosening up the old gunk. I repeatedly saw dark liquid coming out around the shaft, as the shaft moved more and more freely. After maybe 10 minutes of working it (ending with normal machine oil), it spun nicely as I expected it to, and I put it all back together.
It spun up under power just like it should, but made a little cyclic noise. I figured neither Laur nor I would stand for that for long, and was about to order a new motor. I was busy (getting music ready for a dance) and put it off. We’ve both sat in the room with it now, and while audible, it’s probably a noise we’ll get used to. I’ll probably put off ordering that motor for a year or two – we’ll see. But I’ll bet the fridge is a lot happier with that fan running again. The icemaker leak and fan cleanout (and trips to the hardware store) took most of a day, but the fridge is back and functional (except for the door water).
Second leak
There was a slow leak – a drop or 2 a minute sometimes – on the vinyl tubing leading from the door water solenoid (inner more) to the poly tubing disappearing into the innards. That tube was under inappropriate stress, and the leak was right at the connector. It looks like that original poly tubing might have failed some time in the past and the cut off bit replaced with vinyl, though I don’t recall doing that. (But there have been a lot of leaks, and I don’t even remember what I had for breakfast!) It turned out the fittings were both bad. The tubing was more like 3/8 (0.35″ OD), but they were 5/16″ fittings. And there were no inserts in the tubing! Unfortunately, I thought it was 3/8″ tubing, and got some of that and a compression fitting (with insert). Wrong. So I made a capped off stub so it wouldn’t pour water on the floor if I accidentally tried to get water thru the door, and put the fridge back in place for the night. (I tried to just get the wires off the solenoid, but failed.)
Over the next couple of days I got a 5/16″ compression fitting, spare 5/16″ inserts and both vinyl and poly 5/16″ tubing. That should be enough to replace the (inappropriate) 3/8″ vinyl with 5/16″ 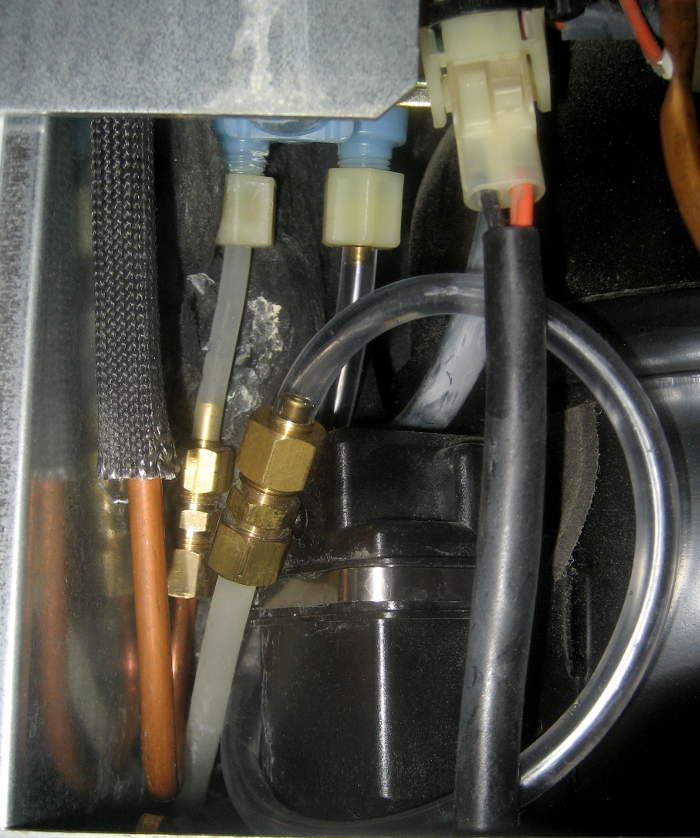 new tube. Finally pulled the fridge out again and fixed it. I chose to use a big, gentle loop of vinyl tubing (5/16″, as it should be). Seems fine, tho with low pressure and only on when water is drawn thru the door, it was probably never a significant part of the problem.
Water sensor
A bigger part of the problem was that I really wanted to put in a water sensor this time, and pulling the fridge out is a real nuisance. And I didn’t have the sensor yet. If I didn’t do it now, it wouldn’t get done – exactly like last time.
 I had an old sensor PCB (from 2011) that had a transistor on board that didn’t work well.
 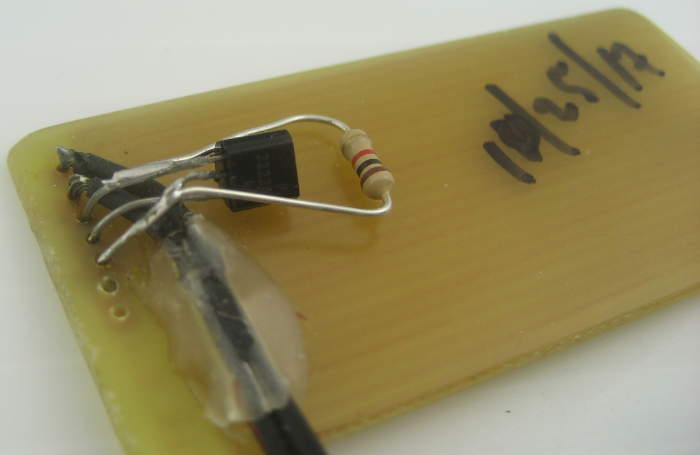 I replaced the transistor with a good old 2N2222, with a 1K (!?) pulldown on the base that seemed to work pretty well. It was functionally a normally open switch, with just 2 wires coming out, to be put in series with a battery and piezo (or similar). I planned to have it local, with battery and buzzer in the kitchen, but ended up fishing the wire thru the water line hole in the floor so the guts would be in the basement.
I knew where the low place was from patting my hand around in the puddle when I first pulled the fridge out this time, and thought I’d put the sensor there. Unfortunately, that was exactly where the back roller of the fridge sat!
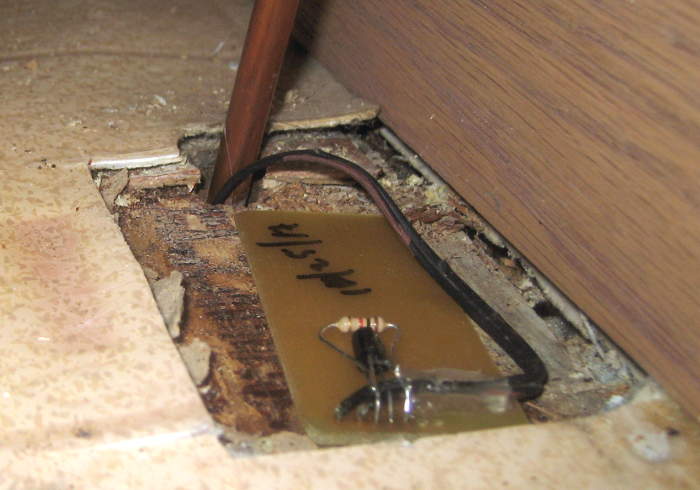 To get a low enough place to be sure it would get wet without getting run over, I cut the flooring out next to the hole. (Ugly, but c’mon, it’s just behind the fridge!) The new light colored flooring was apparently just put down over the old much darker stuff. But after I cut thru the two layers down to the underlayment, I had a perfect nest for the sensor.
  I held it down with a 1.7 oz chunk of iron from a disk drive magnet. While I couldn’t test it in place (as drying would probably take days), I’m pretty confident it will work. (Sigh.)
I’m not sure what the leakage current will be (and don’t have one of Dave Jones’ cool μCurrent low current adapters), and am a little afraid of killing a 9V even when it’s not wet. Hey – how about just using the 12V bus from the HA net? No data – just the power lines. Battery backed – no worry about a fraction of a mA. But then it hit: I’ve gone far out of my way to make sure that bus is never referenced to ground. Yeah, the sort of isolated wet wood’s not ground like wet basement floor cement, but still. Nice try. (The plan for water sensors on the floor is to use an optoisolator and maybe a couple of AA cells on the sensor side. But now I’m worried about those going dead from minor leakage.) OK, maybe a 12V battery? And maybe with a low battery alarm? Or maybe just another dollar 12V wall wart from Goodwill (or some other DC supply with a real transformer). More hassle, but at least it’s in the comfort of the basement. So nothing connected yet, but at least the sensor – the hard part – is in place.
Water filter replacement
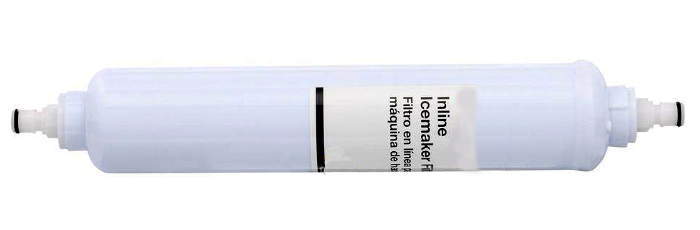 Not a leak, but this seems like the best place to record it… I put a cheap inline water filter into the fridge water line many years ago – probably motivated by smelly ice cubes. (Didn’t help that.) This isn’t the one, but the layout is the same: horizontal, press-in no-tool 1/4″ fittings on both ends. Expected lifetime was maybe 6 months; probably stayed there 6 years.
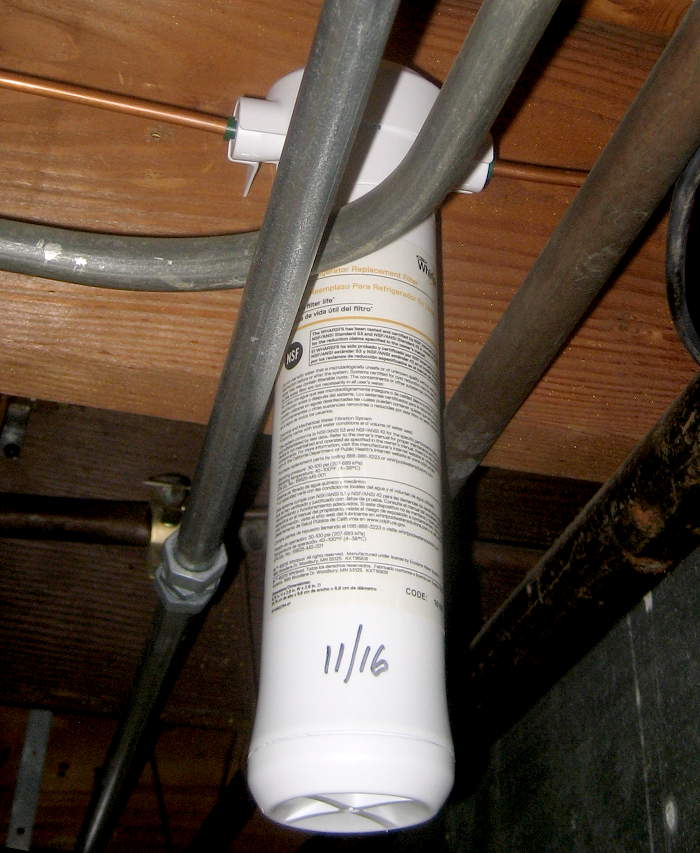 When I wanted to replace it (low water flow?) around 11/29/16, I realized I’d have to turn the water off (or have a small flood). Boo. (Yes, there’s a valve, and I used it. But it’s a clamp on saddle valve and I hate messing with those once in place.) So I sprang for a more expensive Whirlpool twist-in cartridge job that allegedly can be changed without turning the water off. Fine. Here it is finally in place. Cartridge is a WHARSF5.
But to get the tubing out of the old press-in fittings, you need to press on the inside part of the fitting – which I couldn’t easily do for the old filter. So I made up a little tool to push on just the part than needed pushing on. It worked acceptably, and I got the filters exchanged. 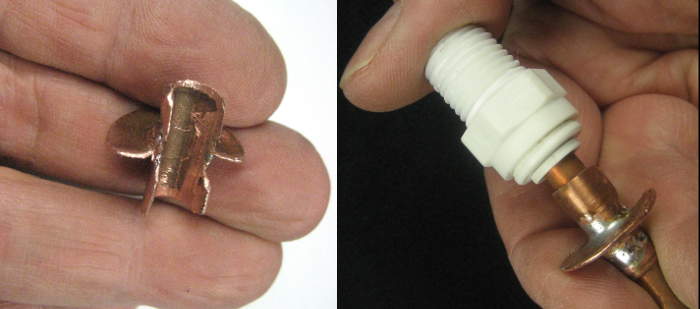 Of course the new filter has the same push-in fittings, but with luck I won’t ever need to remove it, especially since I have no idea where the tool is. 🙁
Looking back at the pics I took at the time, there’s a video clip of bubbles coming from a piece of 1/4″ poly tubing in a bucket (but no notes file). I vaguely recall that I tried to be a good kid and flush the air out of the new filter before putting the outlet side tube in place, but had problems: With a scrap of old poly tubing going from the filter into the bucket, I ran way more than the volume of water the filter could possibly hold thru it, but kept getting bubbles in steady state. I think the problem turned out (after a lot of head scratching, cussing, and recording video) to be a small crack in the old poly tubing scrap that entrained air as the water flowed thru. “But it doesn’t matter if it’s a crappy, cracked old piece of tubing. All I’m trying to do is direct most of the water into the bucket!” Wrong.
To facilitate flushing the air out next time (without having it go all the way to the fridge), I should have put a tee with a capped stub in the line from the filter to the fridge. I suppose I might do that when I change the filter next – if I can find the tool to remove the press-in fitting.
For reference, fridge is GE Profile 24 model TPX24BRBB WW Ser num: ST200700
And yet another leak
6/12/18: A week or two ago I saw a small puddle on the basement floor in the neighborhood of under the fridge. I mopped it up; it came back. Seemed to be dripping from a slightly different place. I think I had just emptied the ice maker bin, so multiple icemaker cycles had probably been running. A little later, a towel from the pile under where the leak usually is was damp. Damn.
While hooking up some kind of alarm to the water sensor – which has been in place for months – has been on the list, the bare wires are still hanging there. Yeah, I’ve been busy, but the sensor was in place and its wires were right there. I put a Li-ion battery, 470 ohms, and an LED in series with the sensor wires. The LED lit one way. That probably meant the sensor was wet. No surprise, but probably means the sensor works. (Wrong.)
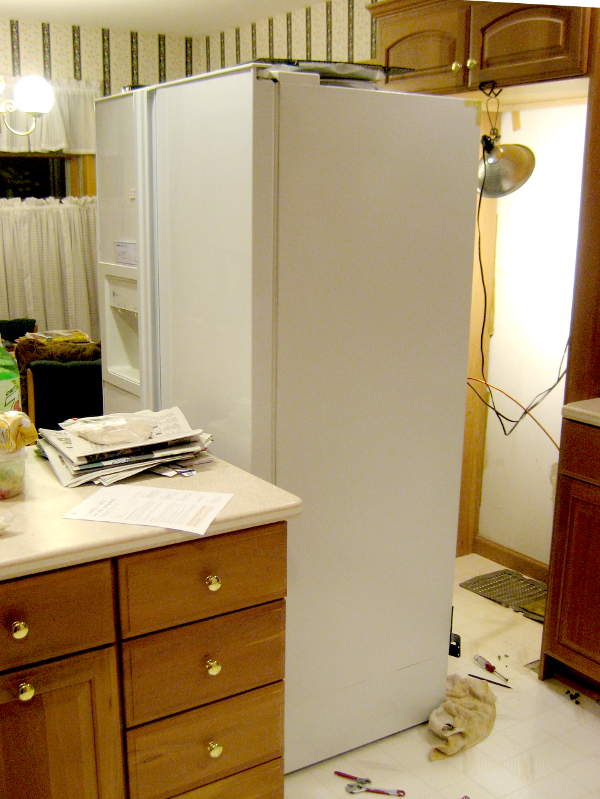
So I finally pulled the fridge out (more and more of a hassle as its rollers make permanent dents in the soft vinyl flooring). I could see white calcium water leak traces on the tubing that supplies the icemaker, but no water. (Maybe a leak at the plastic compression fitting at the bottom of the solenoid?) I tried to cycle the icemaker (with Lauren moving the bail and observing in the ice bin), even waiting around a little in case there were some timer cycles, but no luck. Tried again later, and Laur described the bail being moved slowly up and back down by some motor, but still no water cycle. Pushed the fridge back part way so we could at least open the door and get thru the kitchen.
 A few hours later, I saw a big (3 oz?) puddle on the floor. Pulled the fridge back out, but couldn’t see any water on the tubing. (Having my near vision gone after cataract lens replacement didn’t help.) I pulled the plumbing a little further apart, and after considerable struggle, disconnected the connections to both solenoids.
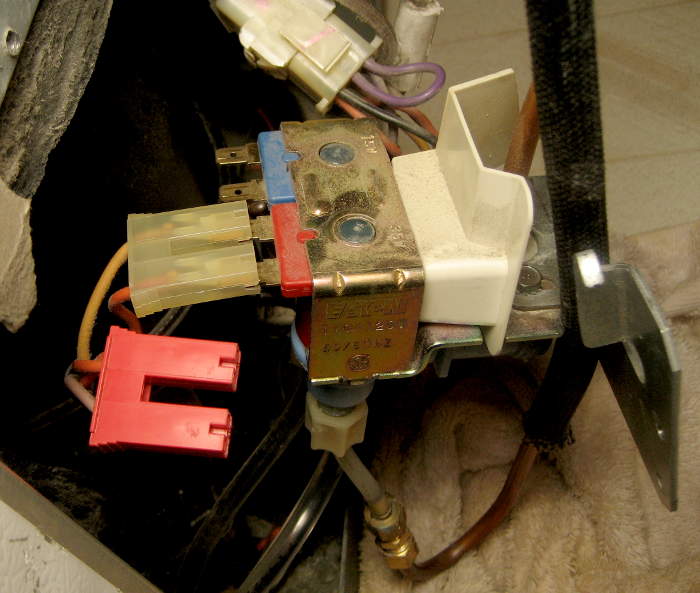 Excellent: now I could put the water-thru-the-door wire on the icemaker solenoid and cycle it at will.
Lots of water leaked after the first one second cycle. After a surprising amount of mopping, drying, feeling and cycling the valve, I finally located the leak. It was in the brass compression 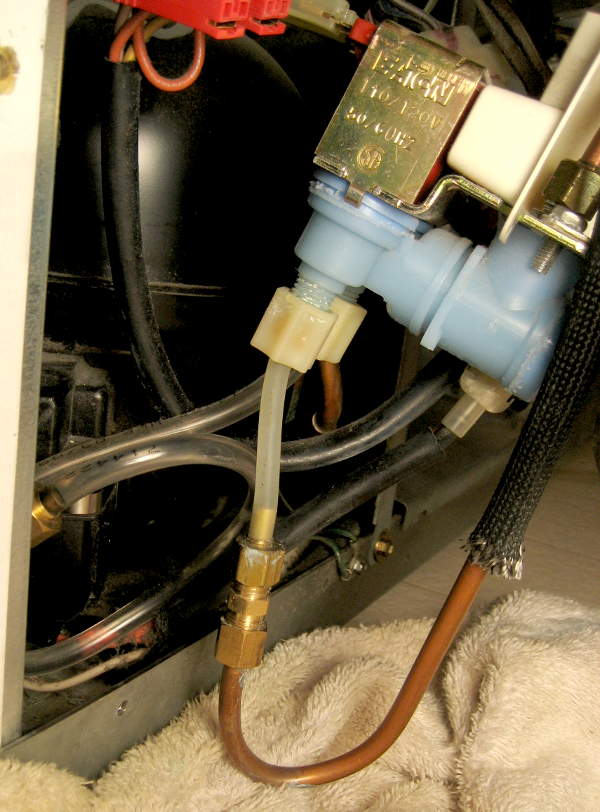 coupling connecting the remaining short plastic tube from the valve to the recently installed copper tube beginning the path to the icemaker. I tightened it all, and it still leaked – quite a bit. I tightened some more (and further hand tightened the white plastic compression nut under the valve), and it seems to have stopped. It didn’t feel like the threaded fittings were about to strip, but it was torqued way more than I think compression fittings are supposed to need to be tightened. But it doesn’t seem to leak. 🙂
Squeezing into the space behind the fridge, I pulled the still unconnected water sensor out of its little below-floor grade home. Its well didn’t feel wet, and neither did its surface. I connected the same battery/resistor/LED test setup, this time looking at the board and getting the polarity correct. The LED didn’t light until I pressed a wet finger to the sensor pad, and then barely convincingly. When I inverted the leads, the LED did light. Oops – wrong conclusion earlier.
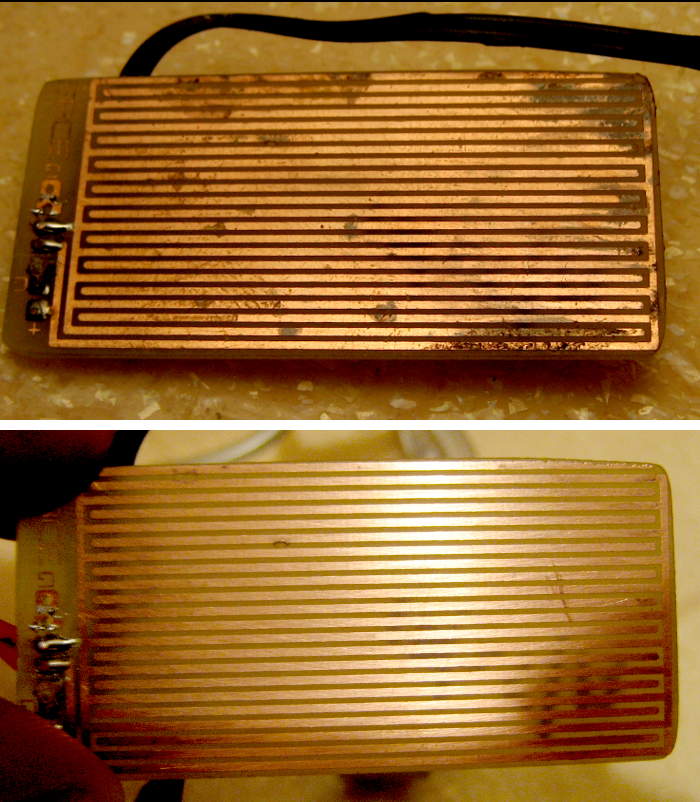 I scrubbed the cruddy copper surface and wiped it off, so I hope it’s in good shape to sense water if/when it appears again. I don’t know what I’ll do for electronics to connect to the wires from the
 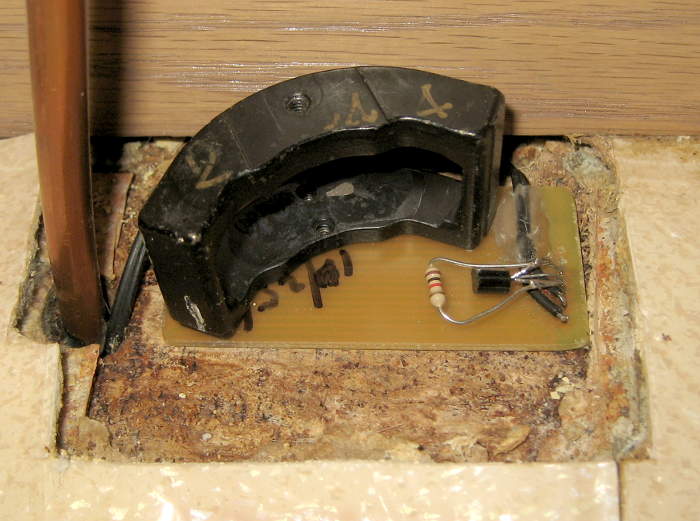 sensor, but at least now I have something to go on. I put the sensor back in place, this time with the whole weight of its hold-down bearing on it. I hope I do better hooking up at least an audible alarm to it this time.
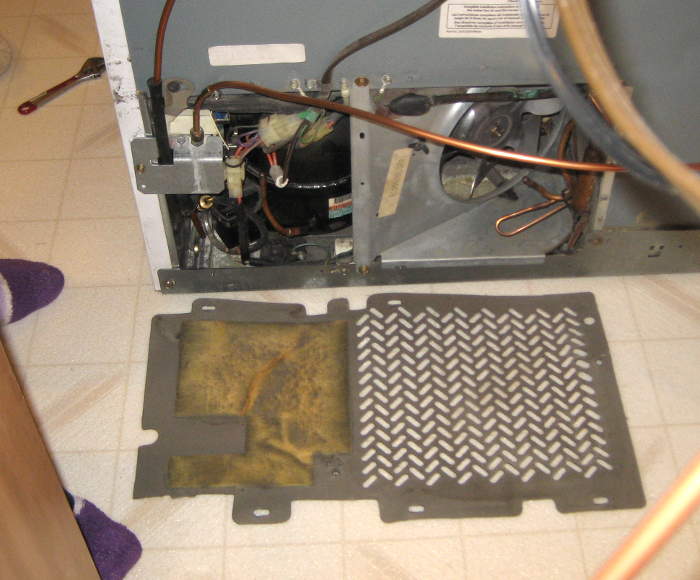 I’m also considering leaving the back panel off. The fan exhaust would obviously be happier with less obstruction, so that’s good. I’m not sure whether the padding behind the compressor is for sound insulation or heat insulation. Let’s hope it’s sound.