
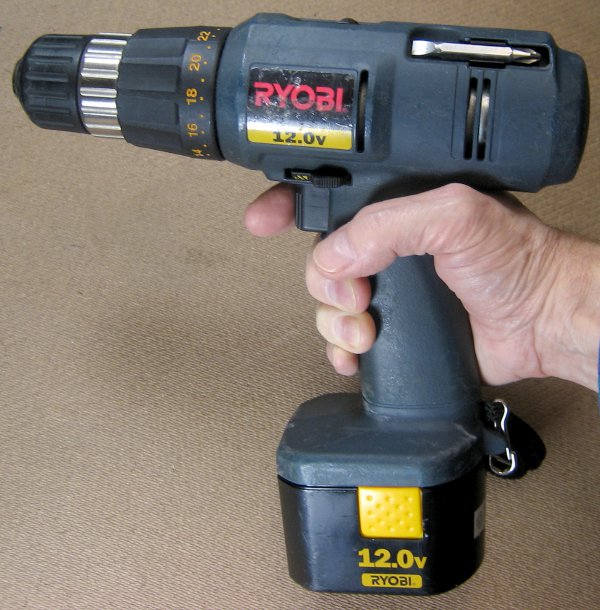
 My 14 year old 12V cordless drill is finally back on the air, with a battery pack rebuilt for the manyth time. Two more cells replaced this time, but once again, some surprises. I remember when I thought the hard part of battery rebuilding would be the tab welding!
 It looks like I replaced 2 cells in this pack around July of this year. After that it looked to be in pretty good shape. Unfortunately, the charger stopped working and I don’t think I ever got to use it with this pretty fair battery pack. Worse, the pack was allowed to sit discharged for a couple of months.
Fixing the charger – and a small head adjustment
With the prospect of a working battery again, I took a look at the charger. It had stopped working (no lights) maybe a year ago. I’d opened it once to put an RCA jack in series with the main current path so I could measure charging current. (There’s one shorted RCA male and another with 2 alligator clips (holding a 0.1Ω resistor) that live next to the charger as a result of that modification.)
When I opened it this time, I first looked to see if my earlier hack had failed. No – all looked good. Then I found – the blown fuse! It was a 4A glass slow blow, but smaller than a normal 3AG. Shorting around it showed the charger was still workable, so now I just needed the fuse.
Fry’s web site said they were in stock at the local store (pack of 5 for $4), so I went in. There was indeed one package. But someone (else who needed one) had poked a hole in the package and ripped off one fuse. I was immediately offended, and didn’t want to buy the incomplete/damaged package. But I needed the fuses. I really only needed 2 – one for the charger and a spare. A couple more would be nice. So the 4 left in the package would fully meet my needs. The cost per fuse wasn’t a significant issue. I had a short discussion with my indignant head, and we finally agreed to buy the package. Interesting negotiation. The charger works now.
 Back to the battery
When I tested the pack again in October, two more cells were in bad shape, leaving the pack at under half capacity (assuming >1500 mA-hr cells). So I replaced those 2 with some other reclaimed cells.
 I usually have a bunch of candidate cells for reuse strung together so I can charge and test them. Their history is lost by this time, but some previous tests have shown they have promise. Any cell that’s clearly bad goes in a box to be
 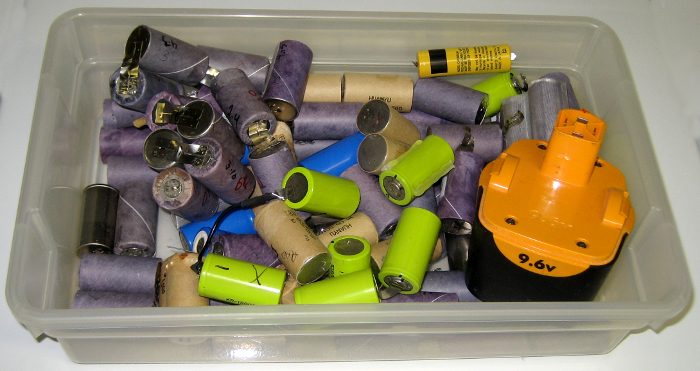 recycled so it doesn’t waste any more of my time testing it. I chose the two best candidates to go in the Ryobi pack. They were still going strong at 1500 mA-hr in a test a couple of weeks ago. They sat, presumably still discharged from that qualification test, until I put them in now. I knew they were the good ones, and didn’t bother to retest before I tab-welded them in to the Ryobi pack.
Lessons learned
But when I tried to charge the pack to test it, both “new” cells sat at 0V and wouldn’t charge at all! It looks like dendrites (or whiskers?) grew and shorted both cells out. If only out of curiosity, I decided to “zap” them to see if I could get them going again. After all, they’d tested quite good not long ago.
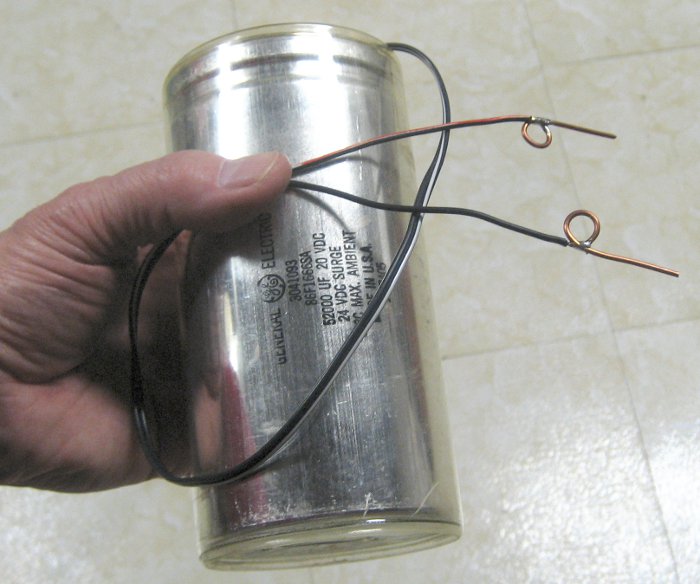 My usual zapper is a 52,000 μF 20V electrolytic. I charge it to ~20V and use the #14 solid tips I’ve soldered to the leads to connect to the zappee cell ends using a firm, decisive motion. Sparks vary from minimal to substantial enough that I usually close my eyes tight just before I make contact.
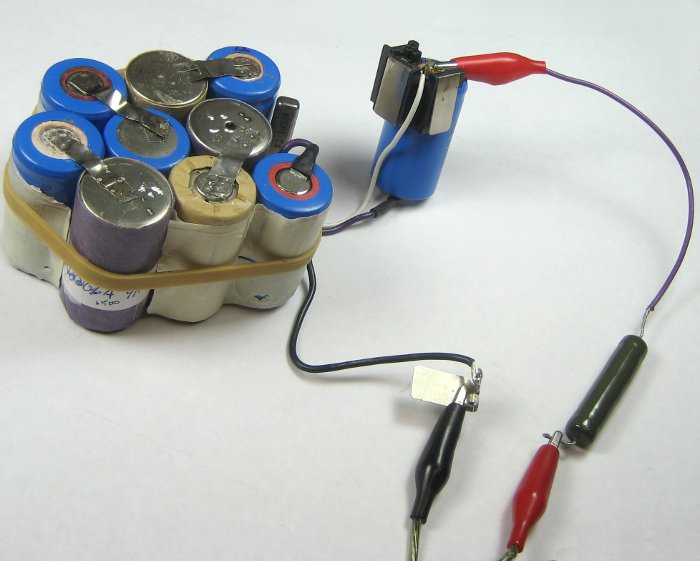 Two zaps each, and both cells started charging normally. (The 20Ω 5W resistor with a clip lead soldered to it is a welcome bench accessory. Clipped in series with a bench supply, it’s just about right for manually charging most of the batteries I have to deal with.)
 A test with the each-cell discharge tester showed acceptable performance. All I have to do it put it back together! But not so fast: I could barely force the cells into the case. The mechanical design of the pack used the bosses of the case screws plus some additional webbing molded into the case to keep tolerances quite tight so the batteries wouldn’t move around. I’d used masking tape to hold the cells together, and there was no room for that. Even after I’d removed the tape, some webbing I didn’t see for a long time wouldn’t let the thermistor seat correctly (eventually requiring soldering a wire in to fix a broken connection). Once the webbing was relieved, the cells fit OK. All the springs and latches and case screws were in place – done!
 But not so fast. I charged it up on the bench, and did one final 2-terminal discharge test. Yeah, the capacity was OK. And it looks like a pretty nice discharge curve for a 9-cell (10.8V) NiCd. Unfortunately, this is a 10-cell (12V) pack. Somehow, in the day or two between the test above and putting it all in the case one cell died!
So I took it apart again. No surprise – the dead cell was one of the “new” ones I’d had to zap back into life. So I take away this lesson on cell zapping: Yes, it works. But (at least in some cases) the results can be very short-lived.
And I’ll take away another important lesson on rebuilding batteries with recycled cells: Yes, a quick charge/discharge cycle gives you useful info on which cells to throw away immediately. But the only way to tell which cells to keep/reuse is to charge them, let them sit for a couple of weeks, and then do a discharge test to see which have survived.
Following my own advice (finally)
Fine. I recharged the pack, marked it, and left it on the shelf for 2 weeks. When I finally did another discharge test, the results were interesting and useful.  By the end of the test – at only 990 mA-hr! – 3 cells had failed, and another was in trouble. (Both of the “new” cells had failed.) And I now knew 2 more to replace. (That initial glitch is a mystery. Cell voltage on every cell went up, although the current reading – just another voltage reading, across a 0.1Ω resistor – did not change. It looks like a problem with the discharge recorder, but I can’t imagine what.)
Knowing I was going to need more cells, I also charged up some candidates (I think it was the 15 cells from the original try at Ed’s battery), and left them on the shelf for the same 2 weeks as the Ryobi cells. Again, anything that failed that discharge test is of no interest for a “real life” application – whatever the failure mode. Let’s test it…
Whoa – only 2 cells survived – and that was only to 220 mA-hr. Of course they could have much more, but that says at least I should dump all 13 others. (Unless, I suppose, I thought I’d have use for a collection of cells with high self discharge, but still good capacity. But I don’t.)
Hmm – maybe I just replace all 4 bad cells with brand new ones. I have a bunch (at ~$2 each), and since I’ve already rebuilt the Dustbuster, and just bought a new 3rd party battery for the Roomba (and that’s NiMH, anyway), and I’m running the B&D blower and the DeWalt drill from that nice LiPO pack, I don’t really have much need for all those sub-C nicads. Sounds like a plan.
<several days later> Done. And now that the factory charger works again, I charged it up that way. I don’t know what the trickle  charge current on that charger is (yet), but I remember feeling warm batteries after they’d been plugged into it for a while. So I took the battery out within hours of when the green “fully charged” LED came on. It was another day until I got around to testing it, but it finally got a clean bill of health.
Update: Trickle current with the green LED indicating “fully charged” is ~60mA. That’s just about right, and the battery isn’t warm. I think the charger used to be plugged into a strip that powered on/off with the basement lights, so it started a new charge cycle each time the lights went on. Looks like if I leave it in an always-on outlet I should be able to leave the battery in indefinitely.
So I finally have an assembled, fully working battery (and charger!) for my good old drill. Yeah, between the time I’d put the 4 new cells in and now, I needed the drill to make a video of a toroid winding technique at the space and had to resort to clip leads and a 12V sealed lead acid battery to power the drill, but at least now I’ll be ready the next time I need it! (Well, assuming I remember to put it back on the charger. Guess I’ll do that now. Done.)
Great information. Batteries should taken cared of so that its longetivity will be longer. Thanks for sharing your insights and experience about rebuilding batteries.
My experience with zapping nicads parallels yours. The fix is temporary and if one cell has gone short, the rest are not far behind. I used a defunct AT style PC power supply to do the zap. Not the 5 or 12 volts, but a couple wires directly across the voltage doubler filter on the input. A few hundred microfarads at 350 volts will definitely do the job. Just remember to unplug the AC cord before you hit the battery. Scared the crap out of my wife.
I have a Craftsman (Ryobi) pack I rebuilt with cells from an on sale Home Depot Ryobi pack that was almost but not quite the same. For unknown reasons the craftsman charger rejects it even though the voltage is the same. I charge it with an 18 volt wall wart and this terminal hack.
Enjoyed the article. I have the same ryobi, rebuilt with new donor 9.6v packs (3) about 7 years ago. Still going strong, bought a Bosch on the week-end, might return it though, only problem with the ryobi is the plastic breaking down. Great drill otherwise.