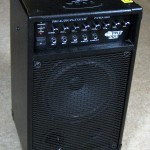
 When Bobby told me the amp Amber uses for her dance classes was being flaky (often would cut out and needed a couple of whacks to get it playing again) I said I’d take a look at it.
The PylePro PWMA-8601 is a pretty nice unit – 500W, AC or battery powered, lots of mixer inputs, an Ipod dock, wheels, normal and luggage-style handles, even built-in receiver for a wireless mic. Whack it and it works – sounds like a classic loose connection. How hard could that be?
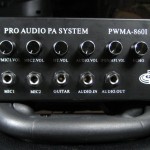
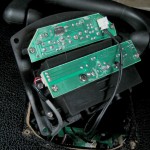 A couple of machine screws on the sides release the amplifier, but before you can get it out you have to disconnect the Ipod dock on the top. The two cables to it have nice little connectors, and soon the amp was free (but still tethered by several wires to the rest of the unit).
It looks nicely made, although the PCBs 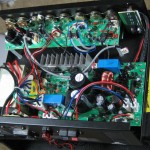
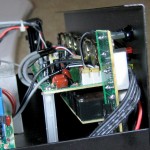 are just single sided. The big board is the power amp (and power supply and battery charger). All the front panel controls are on what I’ll call the mixer board. Almost hidden below the mixer board is another board to which all the front panel jacks are connected. Most of them are inputs, so I’ll call this the input board.
Outlined in red is the main signal cable from the mixer to the main amp. In blue are the connections from the input board the the mixer.
Before I opened it up, I could reproduce the flaky behavior: Lean it over one way and bump it and it cut out; lean it the other and whack it and it worked again. Excellent. While poking around inside, I noticed a very loose connector body on the main board. Even before I knew it was in the main signal path it looked awfully suspicious. But wiggle it as I might, I couldn’t get as much as a scratch out of the music playing through it. For it to be that robust, I figured it was only mechanically loose, and still electrically connected. I guessed the foil tracks had lifted off the PCB, removing much mechanical stability, but the pins were still soundly soldered to the tracks. Clearly a failure waiting to happen, but apparently not the problem at hand.
As I poked around some more, I couldn’t get it to fail at all. I got more and more aggressive poking and wiggling, but it still played perfectly. Rats. But all of a sudden, when I touched one wire, the audio cut out. It was very sensitive, and if I very gently pushed it one way it would fail and work again when I pushed the other way. I went through a couple of cycles, and it seemed to respond to my touches. Then it wouldn’t fail again. How could it have been so sensitive and then work perfectly?
The sensitive cable was the signals from the input board to the mixer, and I guessed it was unlikely that all the signals were affected. I was only running signal through the audio in jack when it failed for a minute or so. I emailed Amber asking whether the other jacks (like mic in) still worked when it was flaky. If they did work, it pointed strongly to a flaky connection on the audio in wire in that inter-board cable. (I couldn’t test that since I couldn’t make it fail any more.) Unfortunately, she never used anything but the audio in jack, and couldn’t provide any more clues. I wanted to chase that apparently temporarily sensitive wire some more.
I took the mixer and inputs boards out and looked for bad solder joints, etc. I touched and wiggled and injected signals at various places in the path, and having found the exact wire that carries audio in from the input board to the mixer (leftmost red wire in picture above) pulled at it as aggressively as I dared, but never heard any evidence at all of flakiness. Bummer.
As long as I had most of it apart, I decided to pull the main amp board so I could try to do 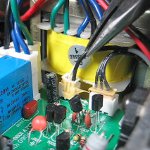 something about that loose connector body. I was (pleasantly) surprised to see that the tracks were still firmly attached to the board, but the pins of the connector were no longer soldered to the pads. I made a little clip to show how loose the connector was, and it pulled out in my hand. OK – at least this is something specific I can fix. (This isn’t the connector unplugging – it’s the connector body no longer attached to the PCB.)
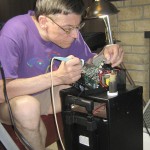 I scraped the pins on the connector, wicked away the old solder, used my best flux and soldered it back in place. Worked fine. (Of course it also worked fine before I pulled it out.)
Was this the problem all along? Those loose solder joints are completely consistent with the “whack it and it works” observation. The other observation – that it would work for a while then quit – made Bobby very reasonably suspect overheating. But that didn’t seem to be the case (and it wasn’t). Of course it doesn’t take much heating to shift things the thousandth of an inch it takes to break a loose connection. So this is also consistent with the “works a while and then quits” symptom. Maybe that was it after all.
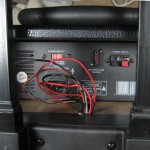 As I was putting it back together, I had a little trouble with the wires that go from the amp into the main housing. (There’s the obvious red/black battery wires, and red/brown speaker wires. But what the heck are the thin black zip cord and thin shielded cable?) There’s a nice channel for the wires to lie in under the amp. But you have to be careful to push the bulk of the wires back down their rabbit hole before you slide the amp all the way in.
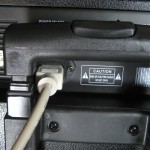 The amp is maybe 3/16″ narrower than the hole it lives in. It turns out it matters how you align it. The AC power cord is VERY close to one side of the handle, and if you don’t put the amp in flush with the left side (viewed from the front), you may not be able to get the plug in and out.
Since subtle heating was a known trigger for the problem, after it was back together I ran it (not real loud) for six hours or so and it didn’t fail. I also used it for a couple of hours putting out a lot more sound for a basement dance, and it worked flawlessly then as well. I’m guessing it’s fixed.

hi! I just bought pyle pmxakb2000 a week ago that working
BUT speakers on off unusual how I fit it myself thank you ,