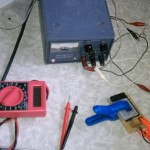
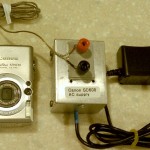
 Since it seems likely I’ll end up doing more time lapse photography with CHDK and my little Canon SD600 it seemed appropriate to make a dedicated supply for it rather than hauling the unholy hack of a battery directly in parallel with my bench supply and a lot of clip leads described earlier. (And then I can get my bench supply back on the bench!)
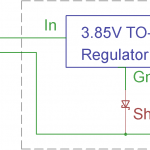
I was planning to use an LM317 adjustable regulator, but while rooting around in my regulator drawer, I found a TO-220 regulator with 3.85V hand-written in Sharpie. It was otherwise unmarked, presumably from a “poly-pak” assortment of regulators, apparently tested by me many years ago. A quick test showed it was really 3.85V, and putting an 8Ω resistor across it dropped it very little. Sounds like a good replacement for a 3.7V battery!
I found a 12V 1A wall wart and tried it with the regulator and the camera. Close, but no  cigar. It would turn the camera on, but immediately turn off. Looks like I needed a little more voltage. With a Shottky diode between the negative side of the supply and the nominal ground pin of the regulator, I saw 4.1V and the camera worked correctly. The regulator got hot, but that was expected. With the display off, the camera only drew ~50mA while idling. With the display on, it was more like 150mA, and there was a 400-500mA peak when it took a picture.

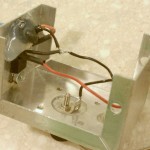
 So I put it all in a little aluminum box, using the box as a heat sink for the regulator. Since the leads to the fake battery could have little more than bare wire at the end to fit through the little hole in the battery cover, the choices of output connector for the supply were a pigtail with alligator clips or binding posts. Since there’s still chance of mishap with clips, I chose binding posts. Not much inside. You can see the knot/hot-melt strain relief. It will get its inaugural run tomorrow trying to catch application of the last layer of blacktop to the street in front of the house.
Update 7/20/11: It worked fine and I got a nice capture of the blacktop laying. With the display off, the box got warm, but only a little. Success!

How are you attaching the wires inside the camera? I was messing around with doing something like this and accidentally crossed the wires inside the battery compartment of the camera and fried it… I’d really like to make a setup like this but I don’t want to fry another camera! Thanks for posting this, it’s going to help a lot with my project.
Jon
Hi Jon,
I didn’t “attach” wires to the camera – I made a fake battery-sized-and-shaped wooden block with brass contacts as close to where they are on a real battery as I could arrange. As an integral part of the fake battery, I soldered wires to the brass strips and brought them out on the side of the battery you can see when it’s in place but the camera door is open. The door had a hole (with a little rubber plug, which I removed) so I mad sure the wires coming out of the fake battery lined up with that hole. To make connection, I just insert the fake battery like a real one, thread the wires out the little hole in the door and close the door. The small hole means I can’t put a connector on the end of the wires, but I can live with that.
There’s a picture of the real and fake batteries in this post: http://jimlaurwilliams.org/wordpress/?p=1194.
Hope that helps!
Awesome. That was basically the conclusion I was coming to as well. Thanks for the link to the pictures of the batteries. Thanks for replying! Can’t wait to get my rig all set up to do some overnight time lapse.
Jon