
Redneck jokes aside, baling wire is a great way to hold broken stuff together when function is more important than form. Sometimes the driver is cheap, but sometimes replacement parts aren’t available and you just need to get running again. Here some past hacks and a home for those to come.
 Garage door opener light covers

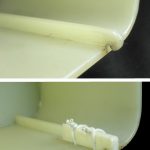
 Maybe the first baling wire fix in recent memory was when the plastic diffusers around the garage door opener lights fell and broke. There were at least 2 rounds of repairs somewhere around 2013 (and I finally found the pics!). In addition to rejoining major breaks, various small tabs that allowed the covers to be hooked into place were reinvented.
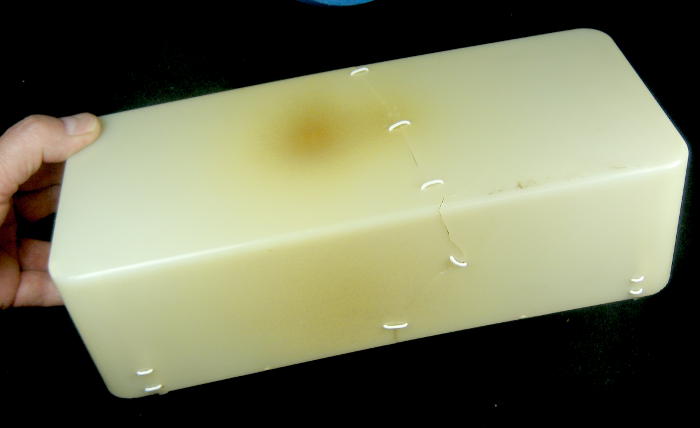
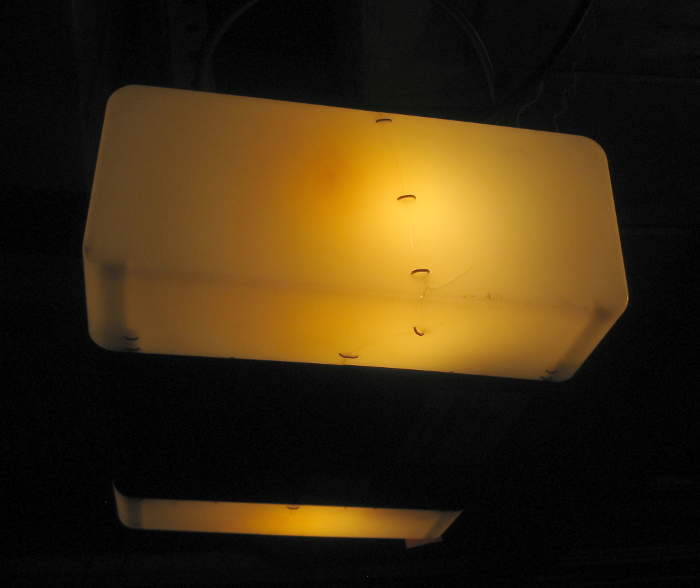 It looks like this wasn’t quite a “baling wire” fix, as I used white insulated solid copper wire in a nod to keeping the white plastic covers a little less ugly. Didn’t matter much when the light was on, tho. 🙂
Snow blower exhaust chute
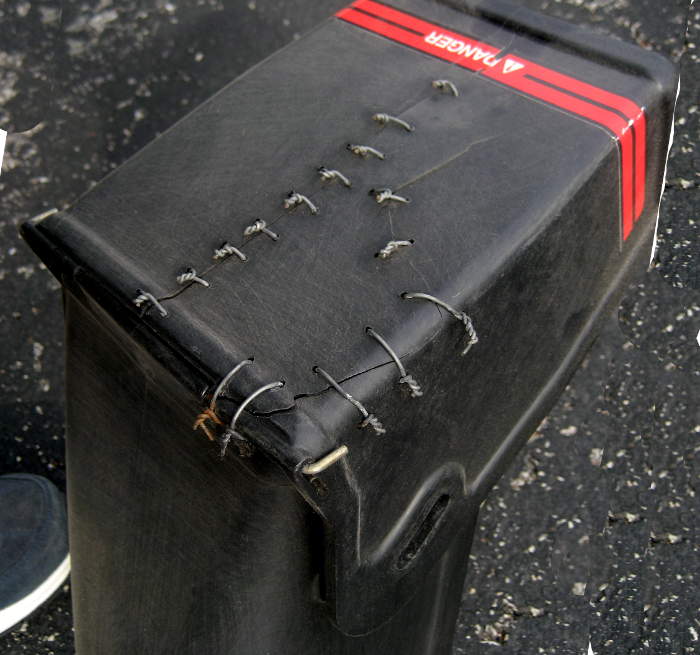 While I think the first repair to this heavy black polyethylene part was a year or two earlier, I took more “stitches” and finally got around to taking pictures of this snowblower exhaust chute repair in 3/17. This was a completely proper baling wire/Frankenstein fix. Somehow a replacement chute wasn’t available.
Yeah, while I bent the ends down as best I could, I still had to be  careful to not brush my sleeves over those nasty places. But it was completely functional and I could clear snow again!
Hmm.. just checked (12/18) and the hacked chute is on the shelf and a new one is on the blower. Must have found a replacement somewhere.
License plate holder patch
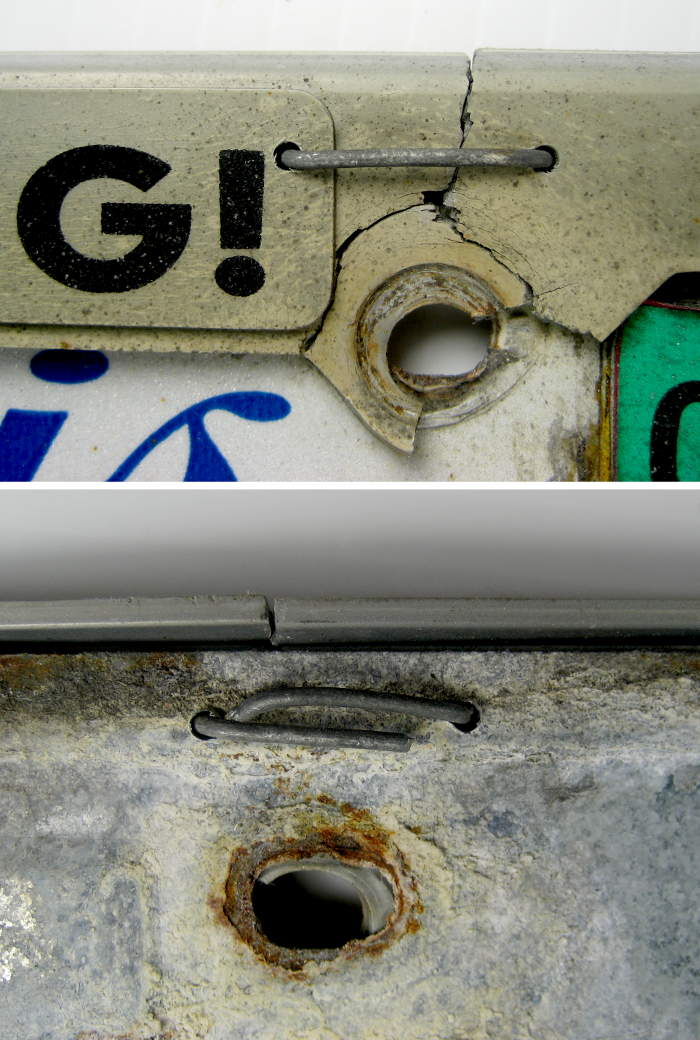 On 3/9/17 I made a baling wire fix to the broken Square Dance license plate holder on the blue Prius. Two holes and a piece of wire, and it was dramatically improved. It’s a temporary fix, until I can get a new plate holder. But at least it doesn’t rattle every
 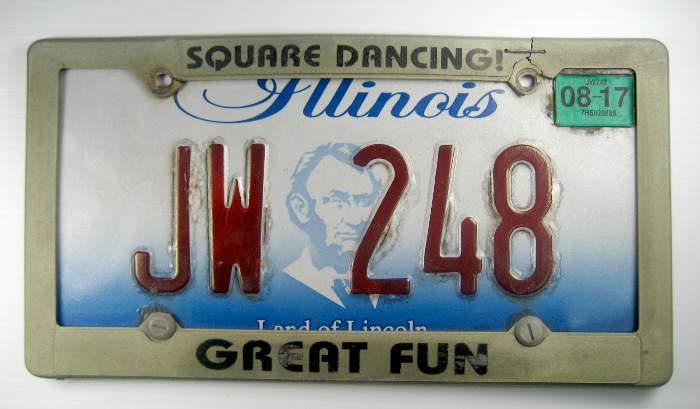 time I close the trunk.
10/5/17: I’d bought a new license plate holder a couple of years ago to host new signage, presumably about square dancing. Hasn’t been built up yet, so I had to 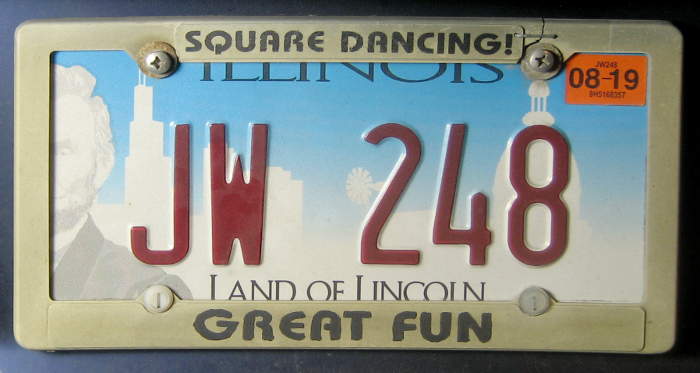 patch the old one again for the new plate I just received. Kept the piece of wire, drilled new holes in the new plate. Might have lost a small piece, but used washers to hold plate and holder to the car. Still ugly, still functional.
Flashlight fix
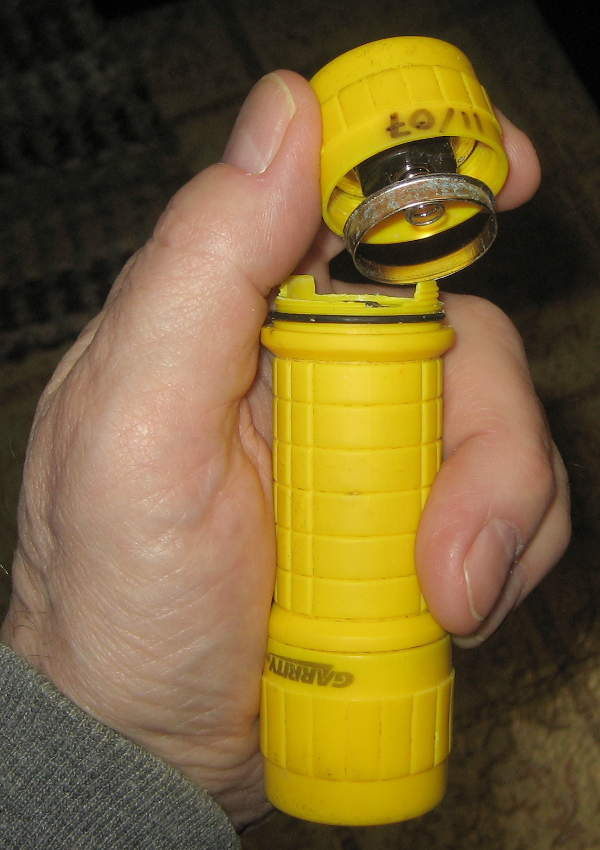 Some time in 12/18 I went to use the flashlight that lives in the car. To ensure the end push switch wasn’t accidentally hit while banging around in the console, I’d lightly press fit a bottle cap over the end. But when I took it off this time, the whole end cap of the light broke off! I guess the plastic just got brittle (and after only 11 years!).
After a little grumbling about having bought a nice brand name flashlight for the car so it would last a while, I ordered a couple of aluminum-body lights (that seem to be much nicer than the HF junk ones) for the 2 cars. I stuck bottle caps on their ends too, but I’m guessing the aluminum won’t break. (And Lauren’s car got an upgrade from the ancient incandescent bulb clunker it had.)
So what do I do with the old Garrity? It has a nice rubbery body and is very visible, but is critically broken. I could epoxy it, but that’s only good for one set of batteries. Hmm… 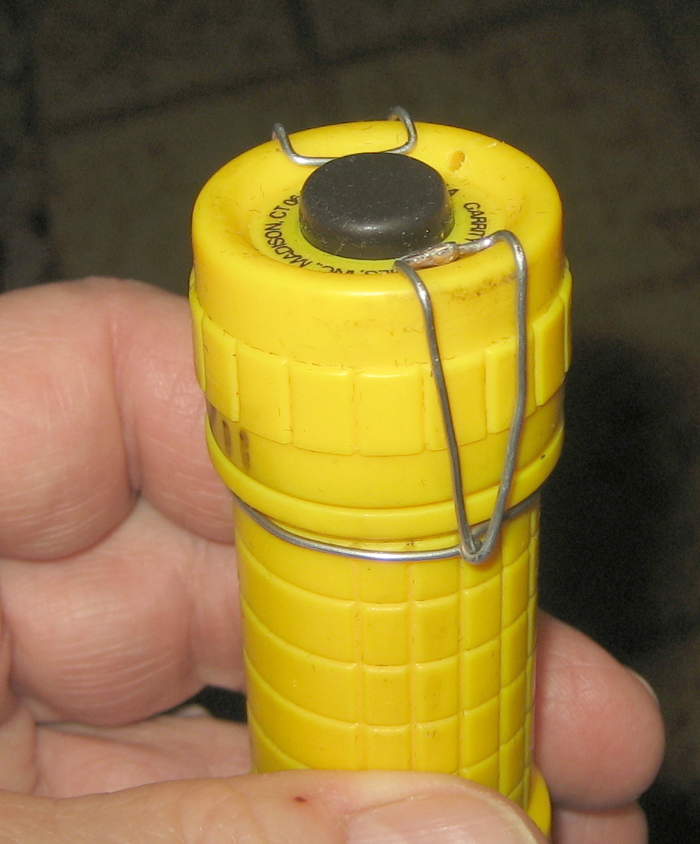 there’s a shoulder that might let me clamp the top on. Where’s my baling wire?
The 20ga galvanized wire soldered nicely. I’ve gotten more anal or careful or something over the years, and actually measured and marked the wire to get a neat, symmetrical holder. It’s still farther off than I’d hoped, but fully functional. And now the computer bench has a nice new flashlight that’s easy to find and whose switch is WAY more reliable than its various predecessors.
Cyclone dust separator
 When I finally (10/3/19) got around to installing the cyclone dust separator for the contractor saw in the garage, a really attractive configuration was to connect the separator input directly to the dust port on the saw. But how could I support its weight?
A shelf for the dust receptacle (a clear box from Container Store) to rest on would have to be very precisely the correct height (and from the saw, not the table) due to the fairly rigid connection with the dust port. I needed a sky hook! Gluing to the polypropylene separator body wasn’t very attractive.
Baling wire (OK, 0.10″/12 ga is heavy baling wire) to the rescue. A loop around the body solved the gluing problem, and two pieces hooked around a bar on the saw provide completely sufficient mechanical support. Yes, there’s still an unresolved issue with tilting the blade (as the dust port moves as the blade tilts), but I’ll cope for that infrequent use case to have the separator in place for the great majority of my cuts.
A second possible baling wire application would be a support for the receptacle bottom run from top short edge around the bottom back to the other top short edge, fitted to just clip over the top. Any other band with velcro, zip tie etc around would do about as well. And the container snaps on to the top well enough that it would probably survive (as it is now) with nothing. Maybe later.
Waterpik flosser hose repair – and a new tool!
The plastic hose from the base unit to the handpiece of my Waterpik 660C flosser broke in early July 2020, providing a surprise challenge to my reaction time to limit the water spray mess. This seems to be a well known problem, and from looking at Waterpik hose repair videos, it’s pretty clear that they changed the design to make that (frequently needed!) repair much simpler. And their website prominently displays many hose-and-handpiece replacements for sale.
Easy fix – not
I used a few inches of what felt like good press fit vinyl hose to connect the broken ends, as many repair videos showed. But the pressure was much too high, and the connections blew apart immediately. (Don’t know how they ever got away with that.)
Fixing the fix
I had no hose clamps that small, but figured wire twisted around the outside would do the job. With 3 pieces of blue/white insulated solid phone punch down wire (#26?) twisted tight around each end, I tried it again. Took a few seconds before one end blew off. Sorry for no pic.
A better fix – and a new tool
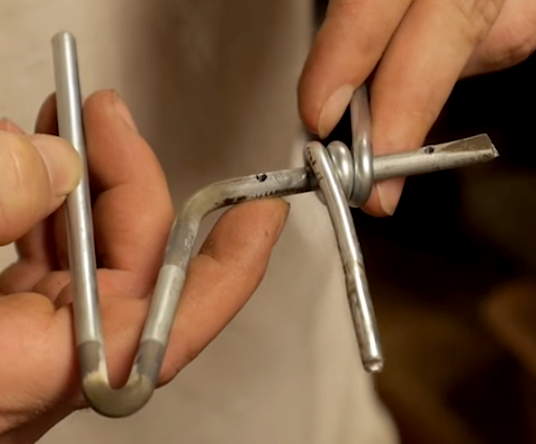
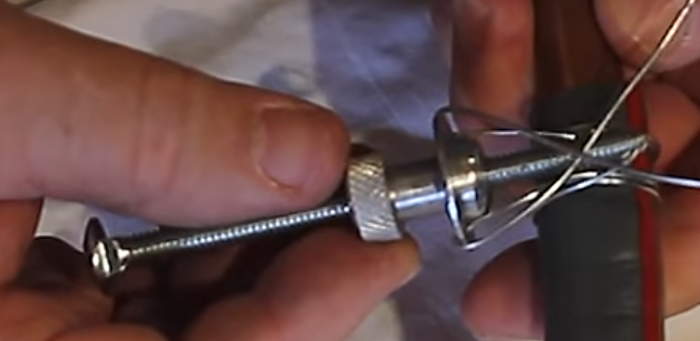
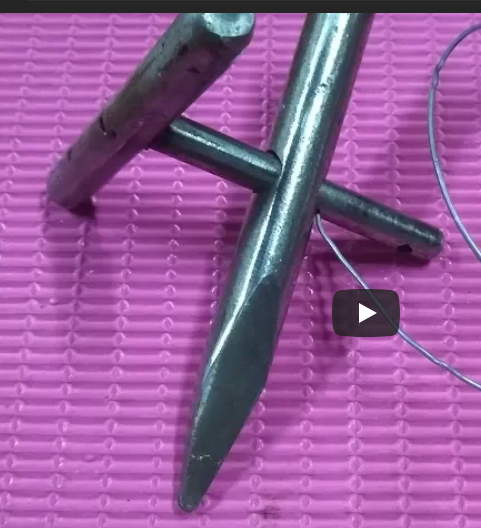
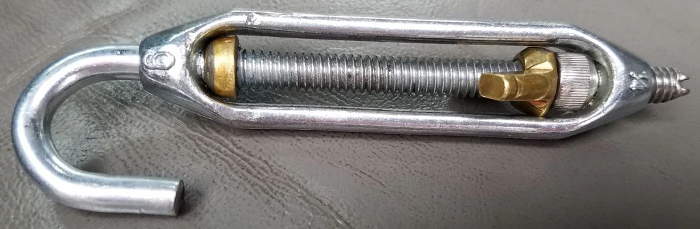
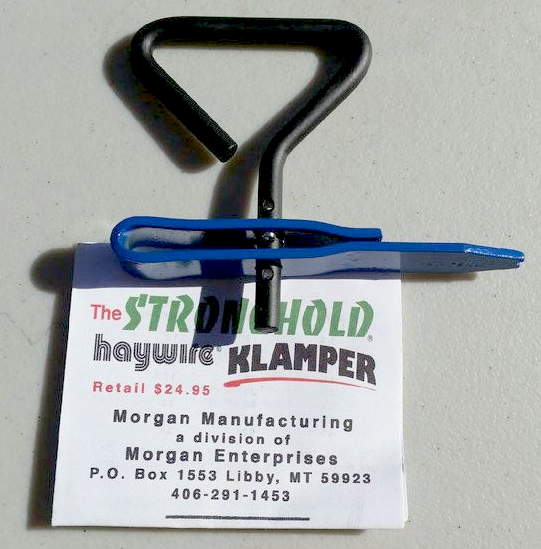
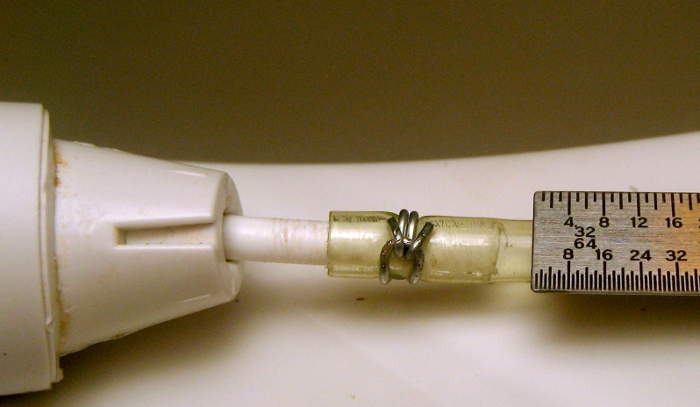
 Some research showed there’s an old, common way to make a simple, cheap, very effective hose clamp from wire. I’m pretty surprised this is the first time I’ve come across it. These classic clamps look like this:
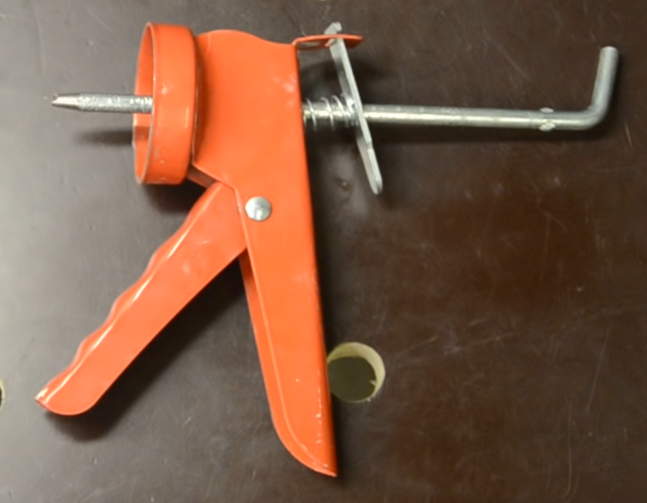
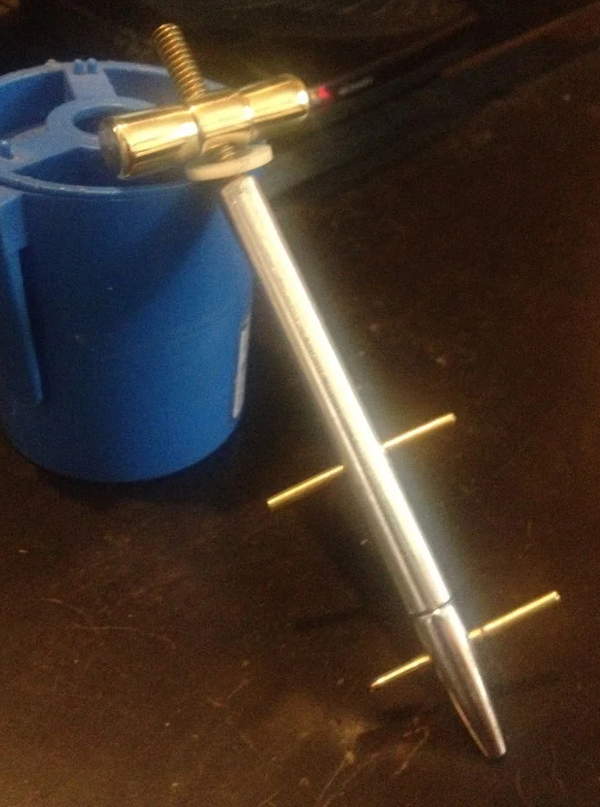
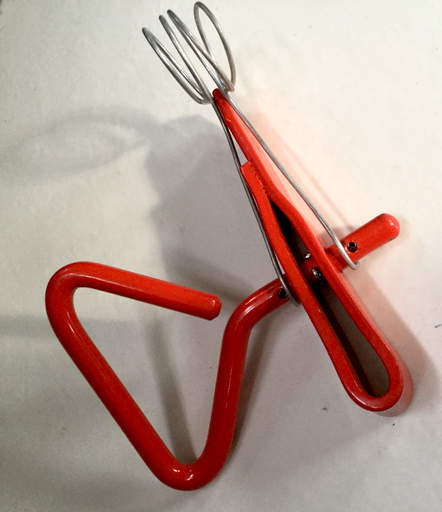
That the technique has been around for a long time is testified to by lots of tool versions I found after I knew what to look for.


-
- Wire clamp tools
-
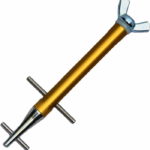
- Wire Clamp Tools

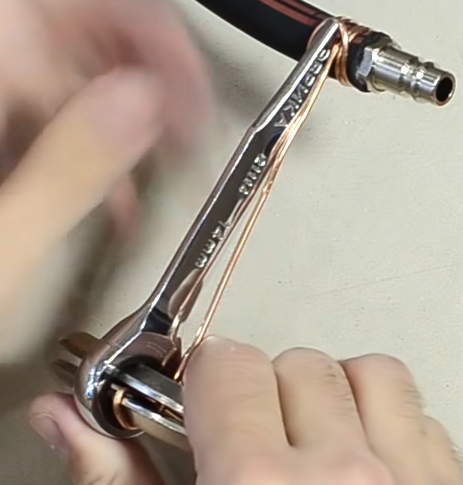
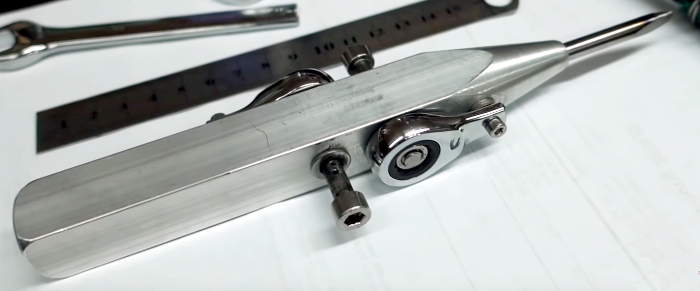
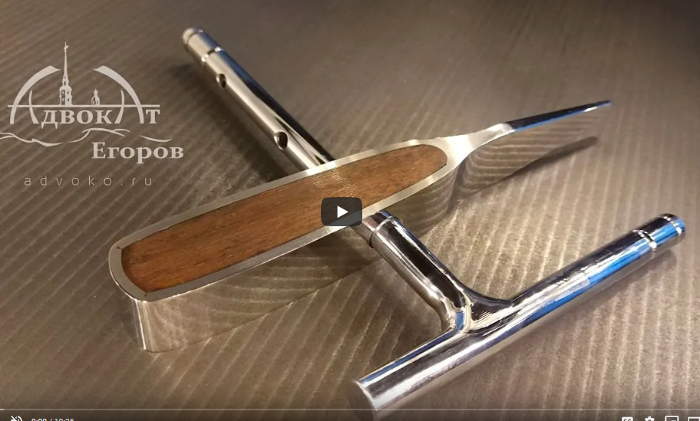
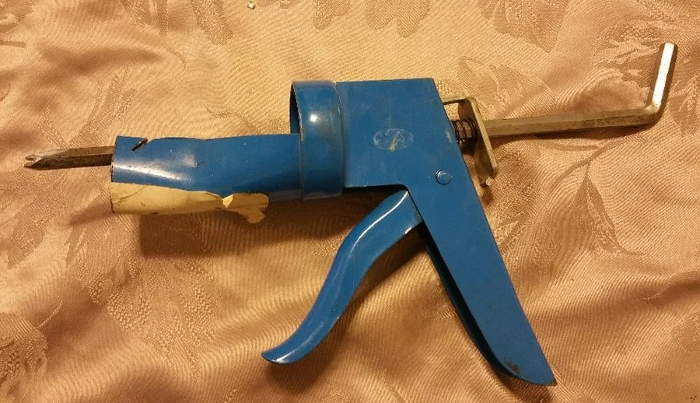
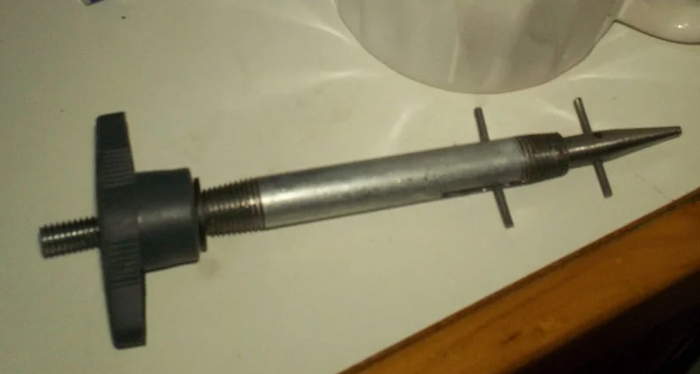
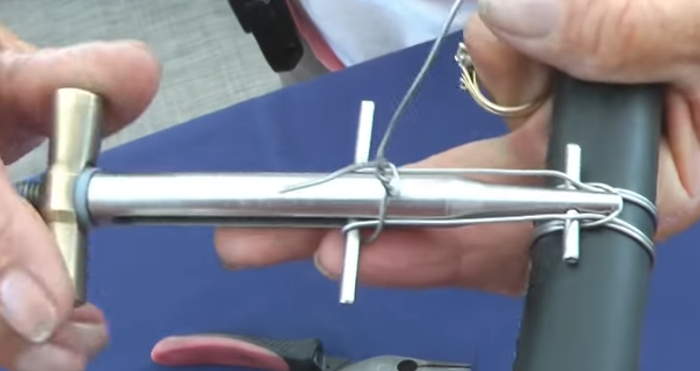
The mechanical details differ (a lot!) but the idea is to hook on to the very center part of the wire and use some mechanical advantage to pull hard on the loose ends until you think it’s tight enough and crimp it over. The one that caught my eye (at midnight as I was trying to get the dumb thing fixed) was the pop rivet tool. I have one of those! (Actually, the very same model as in the picture.)
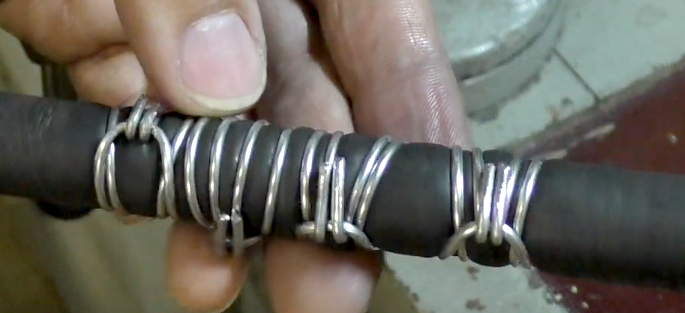
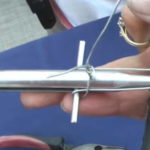
 Some soft 19ga galvanized wire and a little while later, I had two of these nice clamps on my hose. And they passed the pressure test! Yeah, ugly, but functional. (That’s part of the baling wire spec.) To tidy up a little, I even put heat shrink over them.
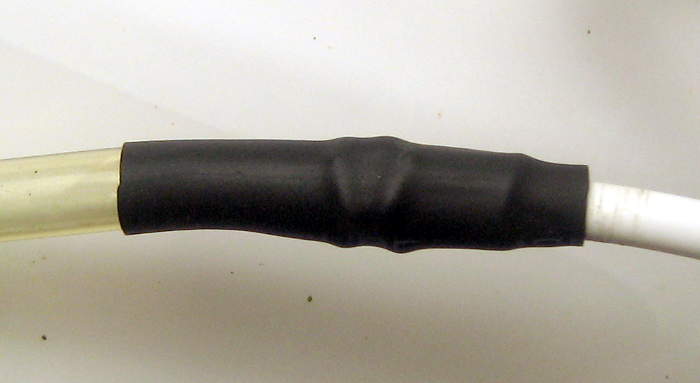 Lauren promptly asked “Didn’t you at least have some white heat shrink?”. But at least it works.
I’m a little embarrassed to say that I ordered the overkill replacement kit as a final solution. But this will keep the thing working until the replacement shows up.
Tool?
This is a pretty powerful technique to add to my baling wire arsenal. I certainly have garden hose customs and repairs that it will help with, but there’s lots more: Repairing cracked (typically wooden) tool handles; replacing ferrules to reinforce file handles and the like; binding about any size or shape things together; and probably more.
So do I buy a tool for it? Or just make do with the free-‘cuz-I-already-have-it pop rivet tool? It does seem to work pretty well. I’ll try to remember to update here if I actually make a decision.
Vac hose adapter
11/13/20 My nice palm sander has a dust port, but it doesn’t fit the vacuum hose in that room. I’d hacked an adapter by making an 1/8″ slit in some PVC pipe and duct taping it to close it together. The PVC won over the tape, springing back to its original shape, so didn’t hold well.
 Spying a big roll of 0.041″ SS wire from HF bought months ago for just this purpose – what if I clamped the PVC and heated it? Did I ever get a tool for that? <digs thru project notes> Oh yeah – the pop rivet tool! Let’s try it.
 Second try, after I left long enough loose wire ends (and twisted them) for the rivet tool to grip, it made a fine clamp on the sander end. I did the same on the hose end. That had more material removed, as it needed to be moderately smaller diameter.
 After heating for not very long with the heat gun (with no visible changes – are we done yet?) I left it to cool. When I pulled the clamps, the PVC stayed exactly as it had been clamped. (You can see the impressions of the clamps, which was no problem in this application.) Success, even for two slightly different final diameters! Hot PVC is pretty fungible.
 Here’s the adapter in place. The spring of the PVC makes for a nice fit on the sander, but also leaves a crack for a vacuum leak. Some tape fixed that.