LED Christmas lights are cool. Unfortunately, some older strings didn’t have the neat pink/purple LEDs. We have some with with just red, green, blue, yellow, and orange. The yellow and orange are quite close, and are the least exciting colors.
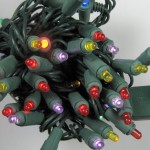 So I got 100 pink LEDs (from China) and started improving things. One string just had normal lens-ended 5mm LEDs. This makes for very non-uniform brightness, depending on viewing angle. I suppose some might consider that an “interesting” feature. To avoid the bright flash if you happen to view it on-axis, I chose (5mm) flat top LEDs – no lens. Replacing some of the original yellow LEDs from that string was about like replacing regular incandescant bulbs in older strings except that to observe polarity, the sockets are asymmetric and one leg of the LED bulb is longer than the other. (That picture had the LEDs powered from a Variac turned down considerably, along with some fill light.) One string down.
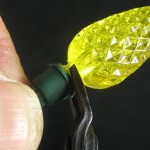 The other target string, which is strung around the living room window, was more challenging. Designed to look
  like traditional bulbs, these LEDs had bulb-shaped plastic diffusers. That caused a couple of problems. First, the bulb/diffusers were colored plastic. My pink LEDs inside a yellow bulb weren’t going to look very good.
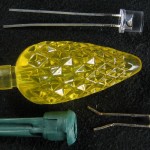
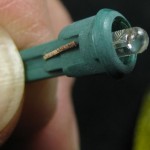
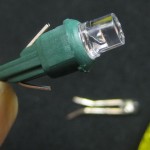 But after I levered the bulb off the bulb holder, I found the original LEDs were 3mm and fit down into the socket and up inside the “bulb”. My 5mms would never fit, and couldn’t be significantly cut down in diameter. Putting a new LED in was easy enough, although it sat on top of the bulb holder. What do I do about a bulb? Cheat.
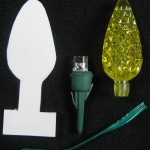 I cut out some card stock in the shape of the bulb, extending far enough down to be lashed to the socket. The LED would illuminate it from the side. I’d locate the card stock bulb on
 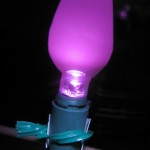 the inside, so it would present the best appearance for outside viewers. To reduce the effect that the bottom was much more brightly lit than the top, I curved the top so light coming out of the flat LED top would hit it.
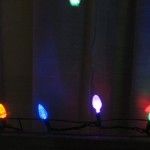 The fakes obviously don’t have the jewel-like facets of the originals, but to a casual observer walking by, they don’t look glaringly different (except for the pretty color). Sometimes low tech is good enough! The picture suffers from the perennial problem of photographing LEDs. That one was underexposed by 2 stops – as far as I could make my camera go, so I couldn’t even get a good enough bracket set to try HDR on it. Hmm – I wonder if I could get lower exposure with spot metering?
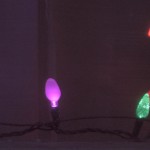 Anyway I’m pleased with the results.
Update 12/19/11: I tried spot metering and also got the camera to do some bracketing so I could use picturenaut HDR. Not great, but better than the one above. There’s a little more on the HDR side here.
On looking at the lights for a while, the pinks are very nice, but the yellow/orange are less so, so I added more pinks. The original order was red orange blue yellow green. I originally replaced every other yellow. This time I replaced the other yellows.
I did actually try the pink LED with a yellow diffuser this time, and sure enough, it doesn’t look very good. But at least now I’ve done the test.
Looking at the string, there seemed little difference between most of the oranges and yellows. As I replaced more yellows, I started looking at the bare LEDs I removed. They were orange! Since the yellows were prettier than the oranges, I extended my replacement exercise by swapping in yellow tops (that I’d removed for pinks) for the orange tops. Not great, but it helped a little. If I’d had 3mm yellows, I might have replaced the orange LEDs.
The other good news is that one of the pretty blues was dead. Fortunately, it failed by shorting out, so the rest of the string stayed on. I happened to have some 3mm blues, and with a little fiddling replaced the bad one. Looks fine.
