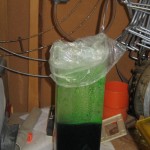
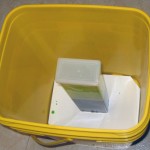
 I’ve been using my new Container Store spaghetti-holder etching tank with cupric chloride etchant for several months now, and I’m pretty pleased with it. I can walk away and let the bubbles do the etching, needing only a visit halfway thru to flip the board vertically for more uniform etching. I glued a piece of plastic on
 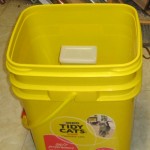 the bottom so it won’t tip over. The tank even has its own custom carrying case for going to show and tell.
A shortcoming has been the small air stone making the bubbles. At an inch or so long, it doesn’t distribute the bubbles across the 3 inch width of the tank as well as I’d like. I’ve had a longer stone for a while, and finally set up to use it.
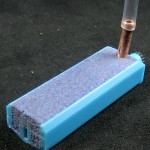 I cut the stone down to fit the width of the tank. A hacksaw cut the stone and plastic very neatly. The first limitation was that the air feed was straight into one end. To keep the stone as wide as possible without kinking the air hose, I needed to feed air in from the top. I found a bit of copper tubing that just fit the air hose and drilled a hole for it (the stone drills nicely). Five minute epoxy has held up well in the etch bath (holding the board holder together), so I was going to epoxy the tube in and slather more epoxy on the cut end to seal that up. But in a rare stroke of Murphy
 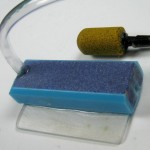 avoidance, just before I epoxied the tube in it occurred to me that copper probably wasn’t a very good material to use in a bath designed to dissolve copper. So I drilled the hole out a little bigger to fit the vinyl air hose and epoxied that directly in. Not ideal, but (better than using copper! and) worst case I have to re-epoxy it once a year. Here’s the almost-final configuration, with the old (stained) air stone posing in the background. I glued a little bit of plastic on the bottom to keep the stone over to one side of the tank.
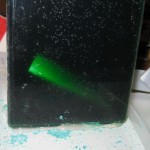 When I put the new stone in the tank and turned on the air, it refused to sit politely on the bottom of the tank. Something about being full or air, I suppose. The tank was about due for some cleanup, so since I was going to have to fit some sort of hold-down into it, I dumped the etchant back into its original glass jar and cleaned up the tank.
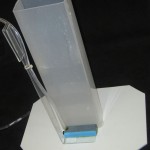
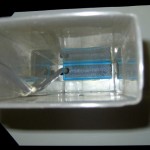 I ended up epoxying a 3/4″ wide strip of acrylic to the new base of the stone and bending it to clip around the top of the tank. That would hold the stone down well, and provided a good way to manage the air hose as well. An extra benefit is that with the air hose coming out one corner, the plastic baggie I stuff into the top to contain the spray when it’s bubbling (etching or regenerating) seals much better than it did around a clamp I’d been using to hold the air hose in place.
For the tank and bubble system, I think this is about the final configuration. I’m still thinking about better ways to hold boards in the tank.

Did you ever try stainless steel hardware in the etch tank? Nylon screws disappear in a couple of days. Wondering what kind of hardware would survive the HCl.
Haven’t tried stainless, but a little googling makes it sound like it’s not impervious to HCl. I did make a board holder with some small nylon nuts and bolts, but it’s only been in the bath for a few hours.
The design of board holders is a major challenge as I make more and more boards. I orient the boards mostly vertically (since they don’t fit horizontally!) but at maybe a 15° angle copper side down so the bubbles wash up against the copper. The etching action is not completely uniform (I think the top usually etches a little faster – why?), so I routinely turn the board over (rotate 180° on an axis perpendicular to the copper face) about half way thru. This is a messy process. To avoid losing any more etchant than necessary, I do it with my bare hands over the top of the tank without rinsing anything off. (I do wash my hands immediately after doing it.)
My latest holders (which I’m going to write up Real Soon Now) are horizontal strips of (coffee packet shipping) plastic that stay clipped to the board so turning the board over consists of removing the board and strip as a unit from a hanger, flipping it over, and putting it back in the hanger. Hard to describe without pictures, but quicker and less messy than any previous ones. It’s been a challenge to design, since the only materials that seem to stand up to the acid are that plastic, plexiglass, and the vinyl air hose. You had my hopes up there for a minute until I looked up stainless and HCl 🙁