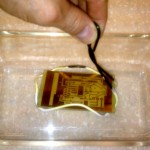
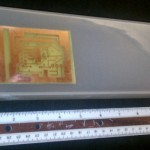
I finally etched my first board in cupric chloride (with no extra oxidizer). It was a little slow, but came out fine. I heated the etchant some, but not as much as I typically heated ammonium persulfate, for fear of fumes. It took 13 minutes with continuous manual agitation.
I formed a cradle with a handle out of #14 insulated wire to hold the board. A little bending and it holds quite securely. I dipped the board in the glass loaf pan dedicated to etching and immediately pulled it out and turned it nearly vertical so the spent etchant would drain away as much as possible. I did a dip every 3-4 seconds and changed the orientation for draining every several dips. Boring, but I’m sure it was much faster and more uniform than if I’d left it sitting in the etchant with no agitation. The etchant left a heavy white deposit on the insulation of the wire after one use. More on that later.
The etchant is a little thicker than the water-consistency AP I’m used to and also nearly opaque, so not so pleasant to use. It started to turn from its pretty clear green state to muddier green-brown quite quickly. (It’s “clear” only in thicknesses of maybe a mm.) By the time the ~2.5″ square board (~typical 50% remaining copper) was done, the etchant was noticeably browner – between 0.5 and 1 g/l Cu+ concentration from Seychell‘s white card pictures. His etch rate v Cu+ concentration graph shows times not a lot greater up to maybe 5 g/l, so some fears that my 0.7 l of etchant might give out too soon probably aren’t well founded unless I have a lot of boards to do at once. And after 12 hours of aeration, it was clear, pretty green again.
I found a rectangular plastic spaghetti storage container (at the Container Store) about 1.5″x3″x11″ that’s just about right for the smallish boards I usually make and the volume of etchant I have. I’m hoping it will become the combination storage and aeration container for the etchant as well as being the etch tank. The etchant would never leave that tank. With a little luck, I can use the same aeration setup (a rectangular aquarium air stone) both for regeneration aeration and for agitation during etching. It would be great if I didn’t have to stand around (breathing fumes) doing the dumb manual agitation dance any more! But the steps before I can do that are making a right angle fitting for an air hose to the stone and a rectangular clone of the funnel top I’m using in the current glass jar to control splashing during aeration. And probably making a base for it so it won’t tip over easily…
The one thing that might make me need to take the etchant out of the tank is some kind of crud deposits. I suppose it’s copper hydroxide, but don’t quote me. There was the white deposit on the wire I used to dip/agitate the board during etching, and a similar white deposit on the back of the board after etching. Most surprising, however was a ring of deposit that had to be scrubbed out at the surface level of the etchant in the glass etch tank! If these deposits are any indication, there may be a lot more cleaning than I would expect from this system. I’ll continue to report on it.


